
A Great DIY Gift Idea
When the fall rolls around I am ALWAYS looking for great DIY gift ideas to create for so many events.
You know me, gift ideas that use photos are ones that I am ALWAYS loving!
Of course, there’s Christmas gifts to create because you know I am all about heart gifts and gift ideas that I create for those in my life.
But I am sharing a NEW DIY gift idea today that is perfect for so many occasions.
I knew that photos could be transferred to fabric and added to sewing projects and quilts.
That’s when my mind went on overload. To add a photo for any occasion to a blanket? Genius!
My mind went to photos of graduations, Christmas cards, adoptions, weddings, engagements, those who just need something snugly…are you getting me?
The uses for this gift are endless. Truly!
For those who know me, I LOVE to sew. Even if you don’t sew, I got you!
The grands and great littles in my life always love a great blanket. I can create a quilt for them, but, this solution is a fast and easy one that speaks directly from my heart.
Adding a favorite photo for the occasion is the perfect personalization for that blanket. Even if it’s a bit of comfort for those having a difficult time, often the photo speaks volumes.
Do you love to make gifts, too?
Good! Then come sit beside me. You will be so far ahead in the special gift giving department that you will be amazed!
So here goes:

Great DIY Blanket
Equipment
- iron
- Sewing machine
- scissors
- inkjet printer
Materials
- 1 Blanket of your choice
- Photo for the blanket
- Fusible interfacing
- transfer photo material
- snuggle fabric softener
- thread to match photo
Instructions
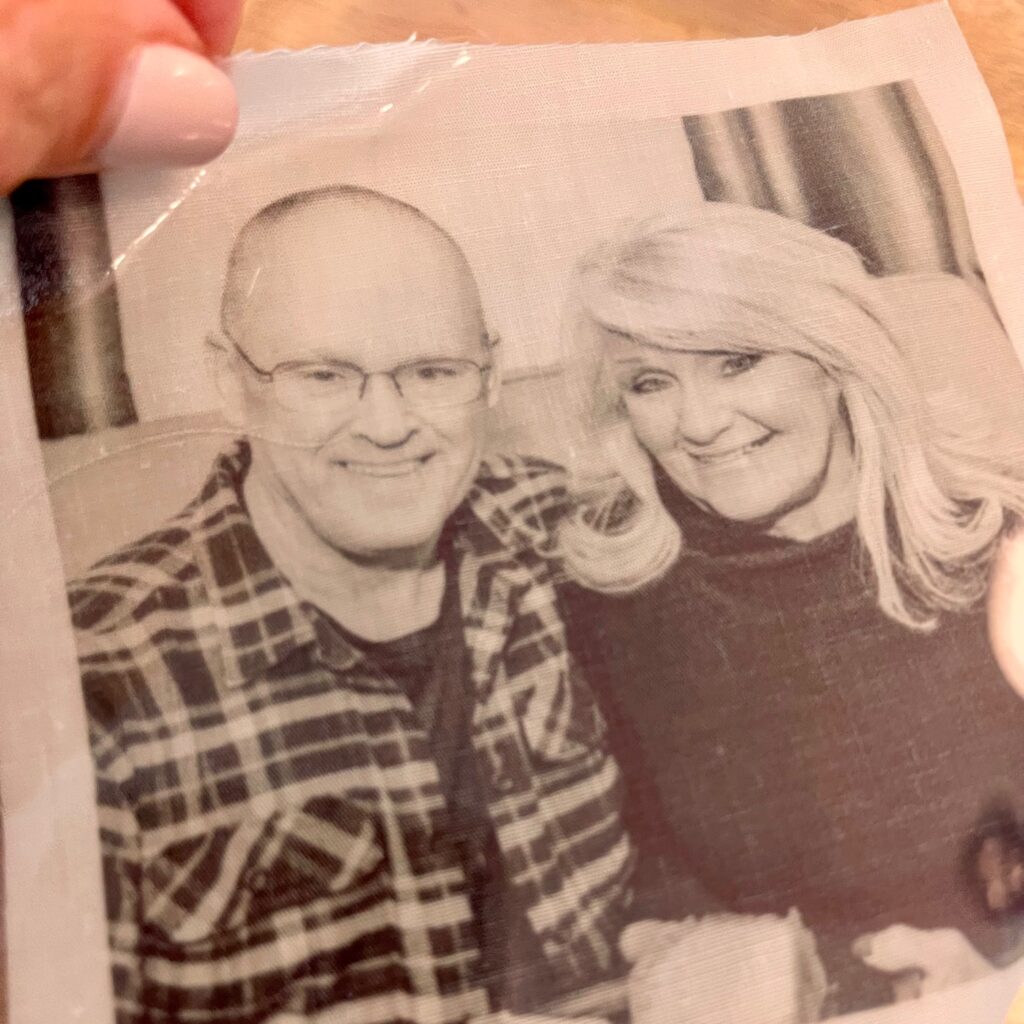
- Select a photo that you would love to have attached to a blanket.
- Size the photo to add to blanket.
- Add photo fabric as directed to the inkjet printer and print the image onto the fabric.
- Wait for at least 5 minutes or until ink dries on the fabric.
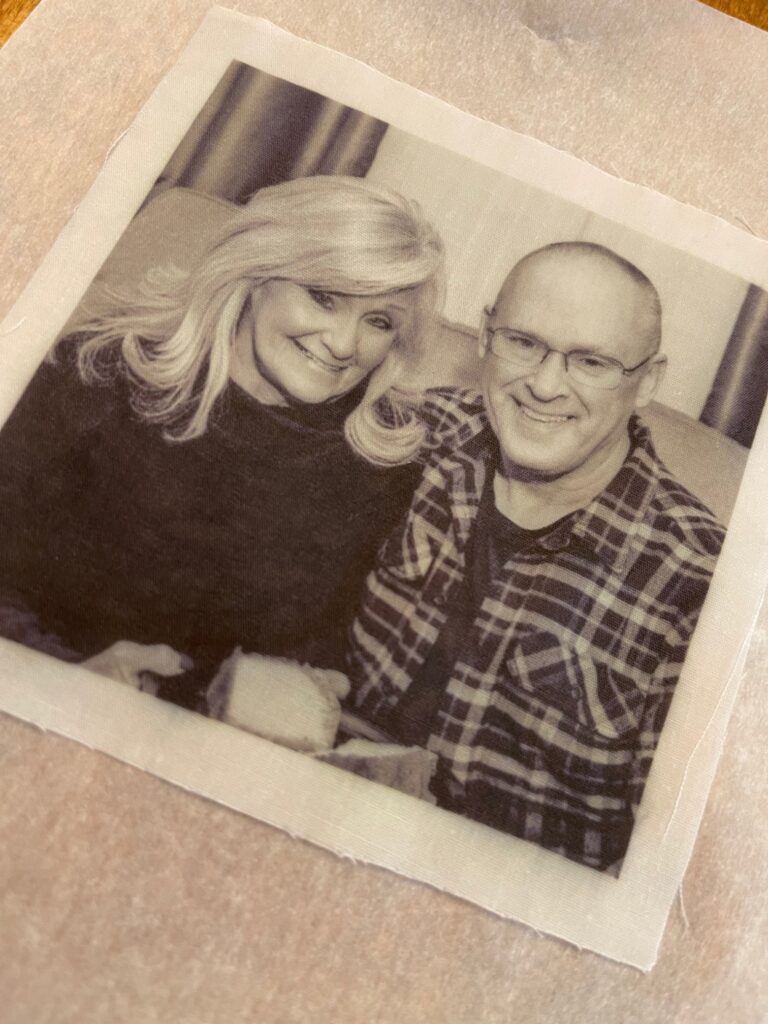
- Trim the photo leaving a border to the edge, if preferred.
- Peel off the paper backing from the photo.
- Add a little bit of snuggle fabric softener to cool water to a 9 x 13 glass dish and mix. **The pan should be large enough for the photo to lay flat.
- Holding the fabric, immerse the photo, face down, in the cool water solution and gently swish for about 15 seconds, away from any ink that is floating in the water.
- Lift the fabric out of the water, making sure that it doesn't fold down on itself.
- Place the fabric face down on a towel. Fold part of the towel over the back of the fabric and blot it to remove excess moisture. Open the towel right away.TIP: Don't worry if you see a ghost of an image, it is merely excess ink.
- Lay the fabric face up on a flat clean surface to dry.
- After it is dry, place the photo fabric between craft paper and iron with a dry iron–NO STEAM- to set the image into place.
- Cut a piece of fusible adhesive a little bit smaller than the image and remove one side and iron to the back of the photo between the craft paper, again with a dry iron. It should adhere to the back side of the photo.
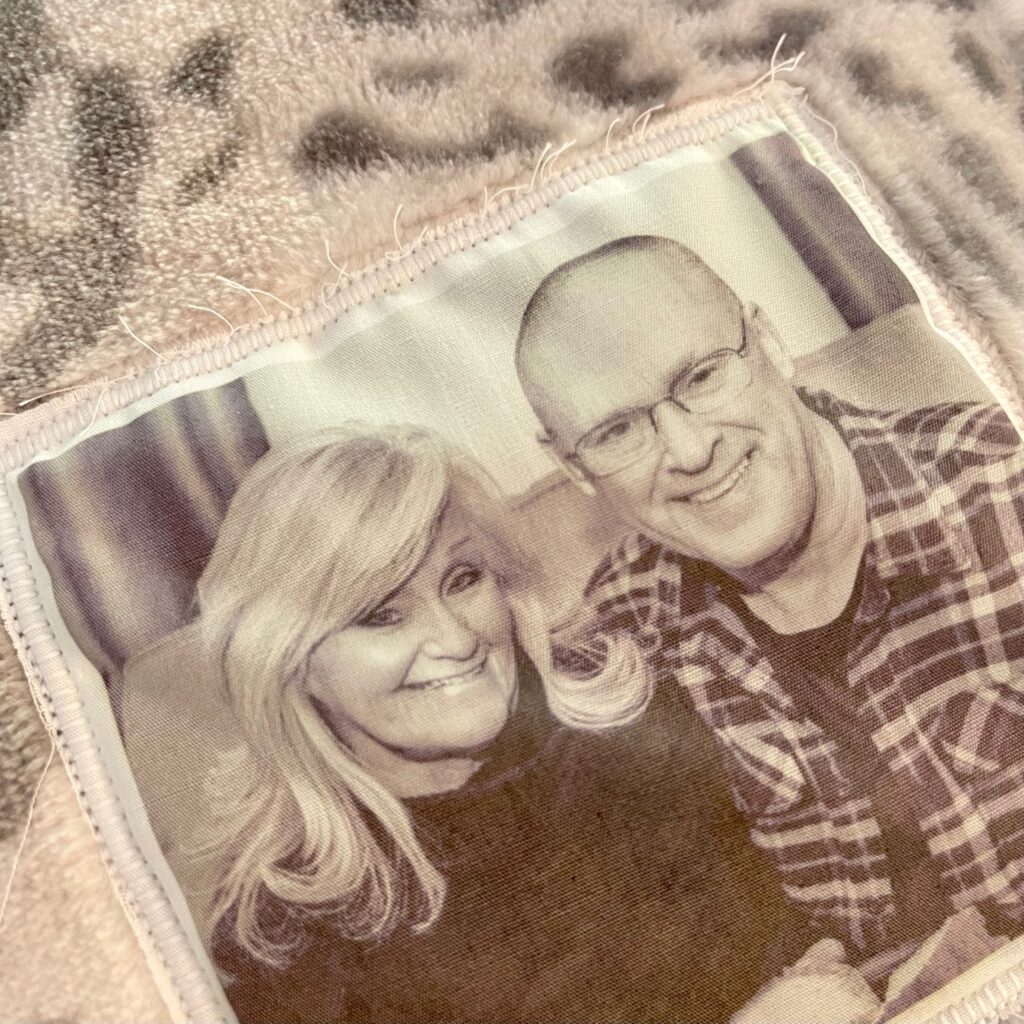
- Remove the back side of the fusible adhesive and place the photo in one corner of the blanket. Lay craft paper over the top and iron to fuse the image onto the blanket, making sure it is straight with both edges.
- Using a zig zag or blanket stitch, stitch all around the blanket edges. ***Blanket stitch by hand if you prefer.
Notes
DIY GIFT PROJECT RECAP:
- Simply begin by selecting the perfect photo that matches the occasion for the gift giving.
- Determine color to be printed.
- Set the size that you want the image to be printed.
- Add the Threads inkjet fabric sheet to the printer and print the image.
- Cut the photo to size and remove the paper backing.
- Immerse and swish face down in a solution of a little Snuggle fabric softener with cool water for 15 seconds.
- Remove and lay face down on a towel and blot the back to remove extra moisture.
- Let dry on clean surface.
- Place photo between craft paper and set image with a dry iron for a few seconds.
- Add fusible interfacing to the photo and then peel off backing and add to the corner of the blanket.
- Applique the photo edge with a zigzag or blanket stitch. Feel free to blanket stitch by hand if you don’t have a sewing machine! Trim the threads and you are ready for gift giving!

So…what gift will you create using this method?
My wheels are turning.
This is such a fast and easy way to make a blanket, that I cannot even contain the joy it brings me! The hardest part is selecting the image or perhaps waiting for that photo to dry before adding it to a blanket.
I can’t wait to see what you will create with this in the gift department!
Won’t you share your gift ideas with me?
There’s no time like the present to begin!
Just to help you find all of the things you need to create this DIY gift…I am adding a few affiliate links for your convenience that cost no extra for you. Always love having things at my fingertips so that I know what the creator used…hope you love that, too. You may help this blog grow by using these links! Happy creating and gifting!

Are these blankets inspiring you to add a photo for a gift? They are me!
Enjoy creating! Thanks for joining me today!


27 Comments
Martha Wallace
How special! Almost made me cry! A true treasure! Great instructions too.
Leslie J Watkins
Thanks, Martha. I think she truly loved it.
Renae
Great idea! Such a thoughtful gift.
Leslie J Watkins
Thank you, Renae. This was a special one for sure.
Cindy
I love this idea. It makes it personal and extra special.
Leslie J Watkins
Thank you, Cindy. I am all about gifts that speak from the heart and bring fond memories.
Karins Kottage
Such a great idea for all kinds of gifts! You’ve got me thinking! Great post!
Karin
Leslie J Watkins
Thank you, Karin. I know, right? So many ideas could be created with this one!
Paula@SweetPea
What a great idea to make a meaningful gift for someone special.
Leslie J Watkins
Thank you–This was birthed from the heart for someone special for sure. I think I have many more to create in my future!
Juliet | A loverly life
What a great recipe, I can’t wait to try it.
Leslie J Watkins
Thank you. I love the personalization for any gift. Please share with me if you make one!
Juliet
Leslie, this is such a lovely and very special gift. Truly from the heart. xo
Leslie J Watkins
Thank you, Juliet. I love heart gifts so much and this was a perfect one that I needed to make for someone special.
Maria
Wow!! This is such an awesome idea. Thanks so much for the know how….I may have to make one:)
Leslie J Watkins
Thank you, Maria. I can’t wait to see what you make!
Dara
What a special gift this would be to receive! It’s so thoughtful!
Leslie J Watkins
Thank you, Dara. Making them makes my heart so happy!
Regina
What a neat idea Leslie. i too love thoughtful heart felt gifts. Great job!
Leslie J Watkins
Thank you, Regina. It truly makes my heart so happy to make them.
Marie
I love personalized gifts. This is thoughtful and sweet. Thanks for sharing.
Leslie J Watkins
Thank you! I love personalized gifts so very much. Just nothing like heartfelt gifts to give or receive.
Melba
What a thoughtful and beautiful gift idea! I have so many amazing photos of my grandparents, this would be incredible.
Cindy Rust
What a great gift idea Leslie! It would be such a nice way to keep memories close Pinned!
Pingback:
Pingback:
Pingback: