
Canning Chili Beans
If you have been here long, you know how dearly I LOVE to can. When a friend mentioned canning chili beans? Oh, yeah, my ears perked up.
Have you ever canned chili beans?
Starting in June and ending in the fall, 1/4 pints, 1/2 pints, pints and quarts of everything I can preserve happens here. Corn, jam, strawberries, blackberries, and more are added to the freezer. Jams, preserves, jellies, green beans, limas, dill pickles, sweet pickles, tomatoes, tomato juice, pizza sauce, spaghetti sauce, soups, meats…the list is never ending.
You see. Chili is one of my husband’s favorite foods. Pots of chili are created and added to the freezer…year round. And we are picky about the type of beans that we look for…mild chili pinto beans which often are difficult to find.
Another reason for canning chili beans? Cost savings. Walmart price for a 2 lb. bag of pinto beans provided 9 pints at 22 cents. WHAT? Yes, please. Now I realize my equipment and jars are reused, making only the ingredients and lids needed for each…but, it’s a wonderful investment.
Filling the pantry for winter…isn’t that the BEST reason to can? Have things on hand when needed for a recipe. Right?
But with these…you begin with dried beans. The MOST cost effective way to buy beans. So, when I heard that this recipe begins with dried beans.
I’m in!
Another benefit? Canning allows me to know the exact contents in those chili beans.
I thought perhaps if you are like me, you’d love to give these a try…save your budget…know the contents in those jars.
If you need new canning equipment to begin the year…here are a few of my favorites.

NOTE: Here’s the recipe for each pint.
This allows you to personalize the number of jars your canner holds.

Canning Chili Beans
Equipment
- 1 Pressure Canner
- pint jars
- 1 Jar lifter
- 1 set Measuring cups/spoons
Ingredients
Per Pint Jar
- 1/2 C dried pinto beans
- 1/2 t canning salt
- 1 t chili powder
Instructions
- Sterilize the number of pint jars that your pressure canner will hold.
- Begin boiling water to fill jars- I use an electric teapot for this job.
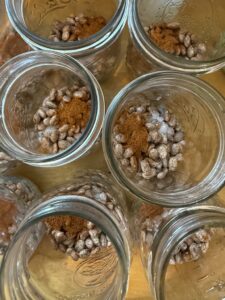
- Add 1/2 C dried pinto bars to each pint jar.
- Add salt and chili powder to each jar on top of the beans.

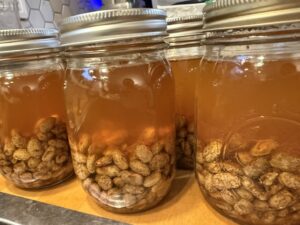
- Fill each jar with boiling water to 1" head space.
- Stir with nonmetallic spatula to mix ingredients and remove air pockets.
- Wipe tops of jars with damp cloth and add new clean lids and rings.
- At this point, let the beans rehydrate for an hour or so before adding them to the pressure canner.
- Fill your pressure canner with water as directed according to manufacturer's directions, and add jars on top of rack inside the canner.
- Process pints for 75 minutes at 10 lbs. pressure in pressure canner.
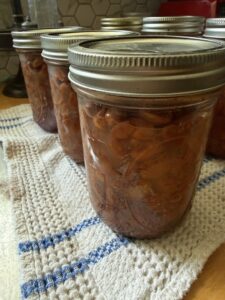
- Make sure to let canner cool naturally before removing jars to prevent syphoning of liquid.
- Check lids to make sure they have sealed…without pushing down on them. If they don't seal, use immediately or refrigerate and use within a few days.
- Set in a draft free area for 24 hours before moving.
- Make sure that all lids are indented (without helping with that) and label/date lids before adding to your pantry.
- NOTE: A 2 lb bag of beans will fill 9 pints with 1/2 C in each pint with a little extra. My pressure canner holds 9 pints. I simply added about 1 T extra in each to finish the bag…but, that reduced the liquid in each pint after processing. Many canners prefer more liquid in each canned jar. ALSO, I can't imagine soaking these longer than an hour since they were very soft when opened. Soaking longer might produce really mushy beans. If you want to have more liquid in the finished jars, keep the amount of dry beans added at 1/2 C.
Notes
I’m loving filling my pantry with these.
Perfect for our favorite sweet potato chili recipe.
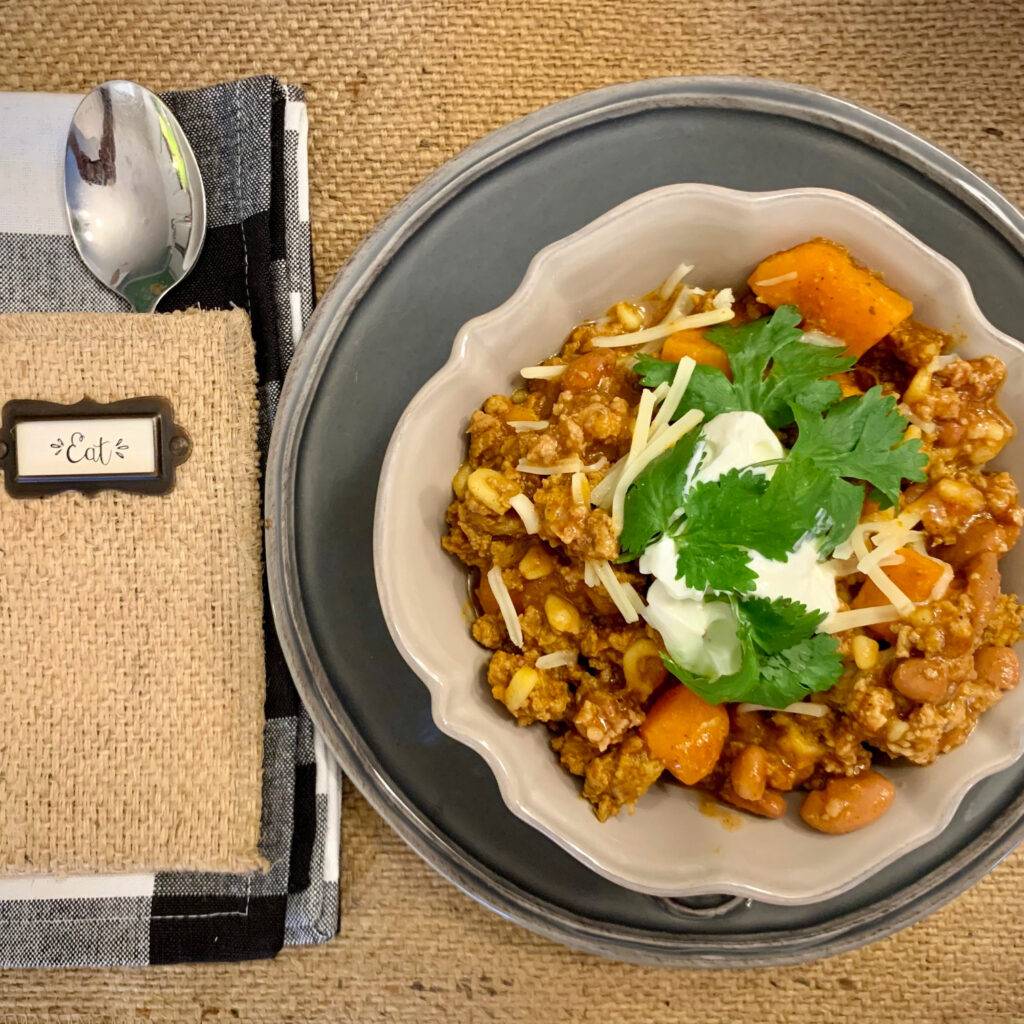
While I had the pressure canner out to can lima beans and green beans, I had to give these a try. I’m so glad I did!
Honestly? This type of canning can be done any time of year. That’s a win to not have to make these at the same time all the summer produce needs to be canned.
If you love to can vegetables, this one may be perfect. And if you love to make and serve chili–I’m your budget friendly friend!
Feel free to adjust your spices and adjust your heat level to make them perfect for guests when they have their feet under your table.
Happy Canning,

As an Amazon, Walmart and LTK affiliate, at times I may provide affiliate links to products that may offer an easier way to find products that I mention or use. Same price for you, but beneficial to this blog and at times, may offer compensation if you use them to shop. See my disclosure policy here.

Favorite July 4th Recipes

Compound Herb Butters
You May Also Like

Tips for Off Season Travel to Martha’s Vineyard
An Easy Crockpot Apple Recipe