
Canning Chili Beans
Canning dried beans to make perfect canned chili beans
Equipment
- 1 Pressure Canner
- pint jars
- 1 Jar lifter
- 1 set Measuring cups/spoons
Ingredients
Per Pint Jar
- 1/2 C dried pinto beans
- 1/2 t canning salt
- 1 t chili powder
Instructions
- Sterilize the number of pint jars that your pressure canner will hold.
- Begin boiling water to fill jars- I use an electric teapot for this job.
- Add 1/2 C dried pinto bars to each pint jar.
- Add salt and chili powder to each jar on top of the beans.
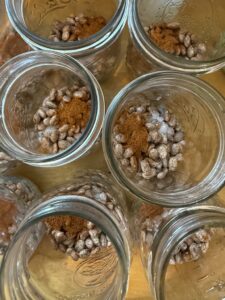
- Fill each jar with boiling water to 1" head space.
- Stir with nonmetallic spatula to mix ingredients and remove air pockets.
- Wipe tops of jars with damp cloth and add new clean lids and rings.
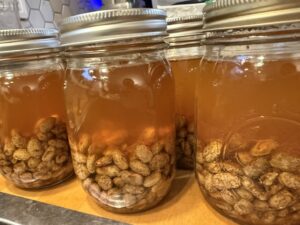
- At this point, let the beans rehydrate for an hour or so before adding them to the pressure canner.
- Fill your pressure canner with water as directed according to manufacturer's directions, and add jars on top of rack inside the canner.
- Process pints for 75 minutes at 10 lbs. pressure in pressure canner.
- Make sure to let canner cool naturally before removing jars to prevent syphoning of liquid.
- Check lids to make sure they have sealed...without pushing down on them. If they don't seal, use immediately or refrigerate and use within a few days.
- Set in a draft free area for 24 hours before moving.
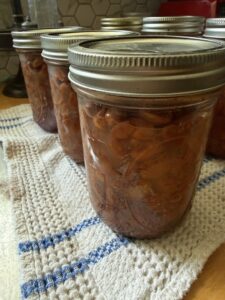
- Make sure that all lids are indented (without helping with that) and label/date lids before adding to your pantry.
- NOTE: A 2 lb bag of beans will fill 9 pints with 1/2 C in each pint with a little extra. My pressure canner holds 9 pints. I simply added about 1 T extra in each to finish the bag...but, that reduced the liquid in each pint after processing. Many canners prefer more liquid in each canned jar. ALSO, I can't imagine soaking these longer than an hour since they were very soft when opened. Soaking longer might produce really mushy beans. If you want to have more liquid in the finished jars, keep the amount of dry beans added at 1/2 C.
Notes
A delicious and cost savings way of canning chili beans. Feel free to use dried kidney or red beans if you prefer them in your chili and add more seasonings, such as, garlic salt, onion salt, cumin, etc.
I have a favorite Savory Peruvian Chili Lime Seasoning that includes other spices, so it's all I add.
The perfect addition to your pantry year round.
NOTE: Beans will absorb the water as they process. Adding more beans than 1/2 C may prevent them from being covered with liquid after processing.