New Kitchen Organizer Cabinet with a Surprise!
Do you remember when I shared with you that Plate Rack wall that we created on the end of my kitchen cabinets? Well, creativity from my husband struck this time. A new kitchen organizer cabinet that came with a bit of surprise. Are you ready for it?
A sweet Mother’s Day gift…
There have been glimpses and hints shared on Instagram and Facebook of this project; but, I am just getting around to sharing the final product.
For years, my husband has tried to convince me to add another bit of organization in my kitchen on the other end of that cabinet from the Plate Rack project.
I just couldn’t grasp all that he wanted to do. He wanted to create a spice cabinet organizer and all I could think of was that I didn’t want spices looking at me from the outside of a cabinet. Nope! I held him at bay for years.
But, he persisted with that spice cabinet organizer.
When he began to share his plans with me, it was genius! I was over the moon and in love with it.
So, here are the steps that we followed:
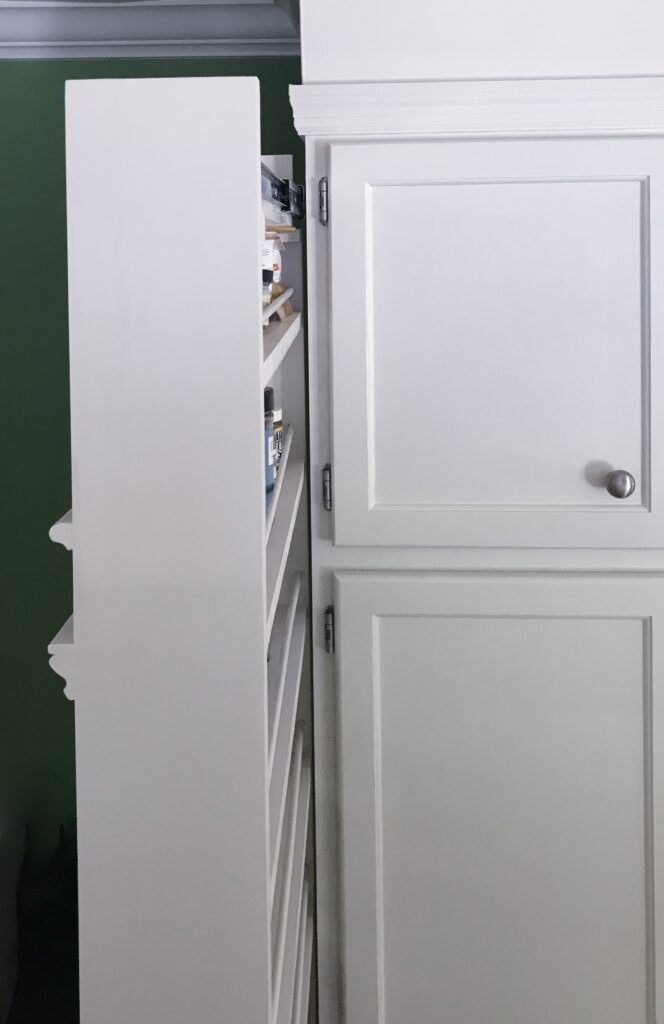
- He measured the end of that kitchen cabinet and began the design so that it would have soft closure drawer slides on the top and bottom and wheels to roll in and out. A pull out kitchen organizer! The wonderful part of this design was that he had planned for the spice jars to face inside giving me another flat wall on the outside. And the genius part? This pull out cabinet would only be the width needed to hold jars. WHAT?!! I was in.
- But then my wheels began turning…Why didn’t I use the outside of that spice cabinet organizer to mirror the other end that held the Plate Rack? But, this side hold cookbooks? Seasonal ones? My favorites? I was loving it.
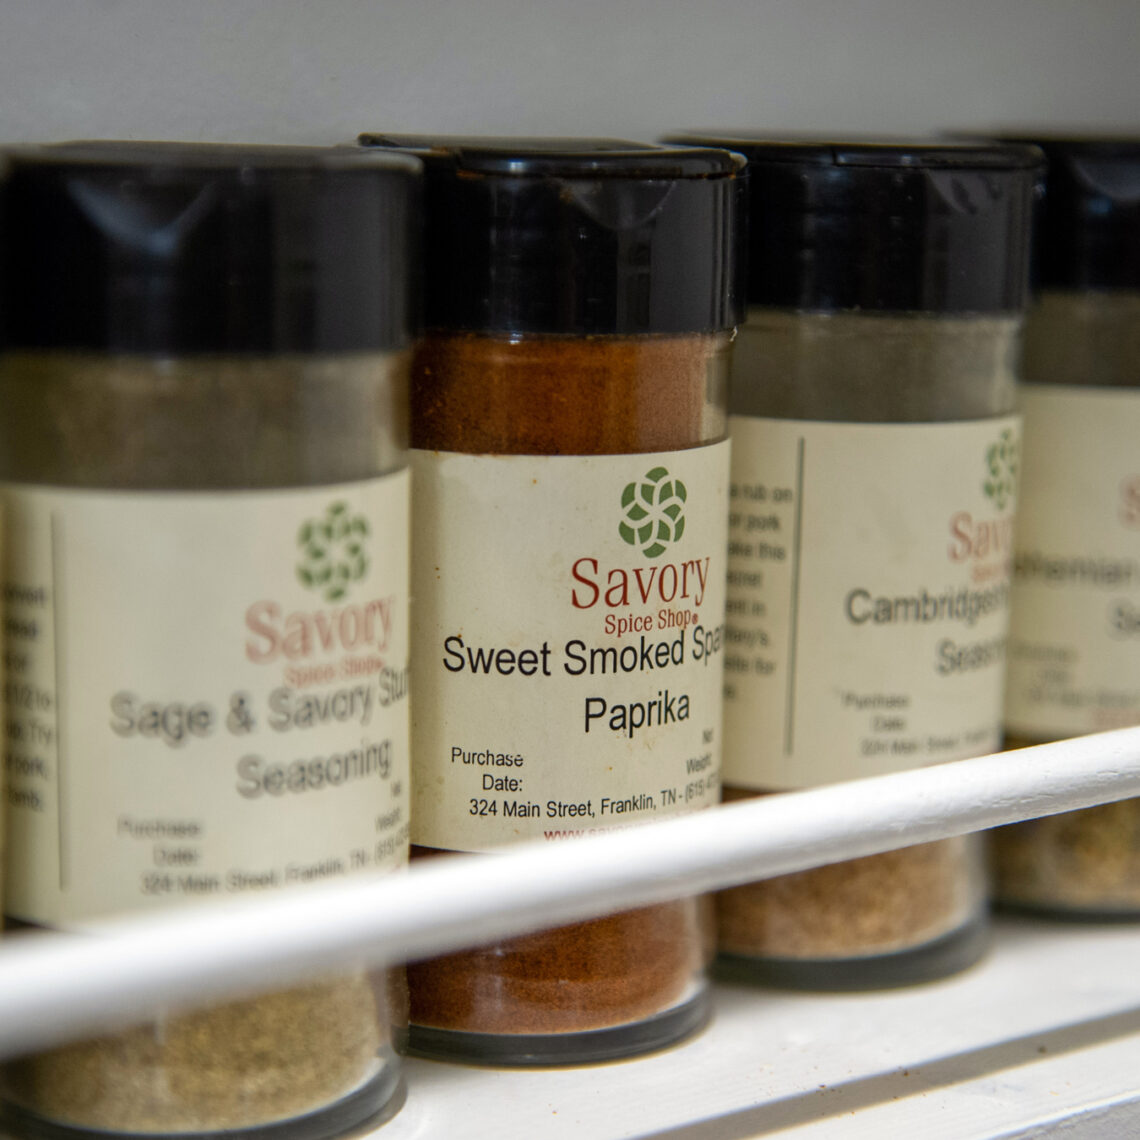
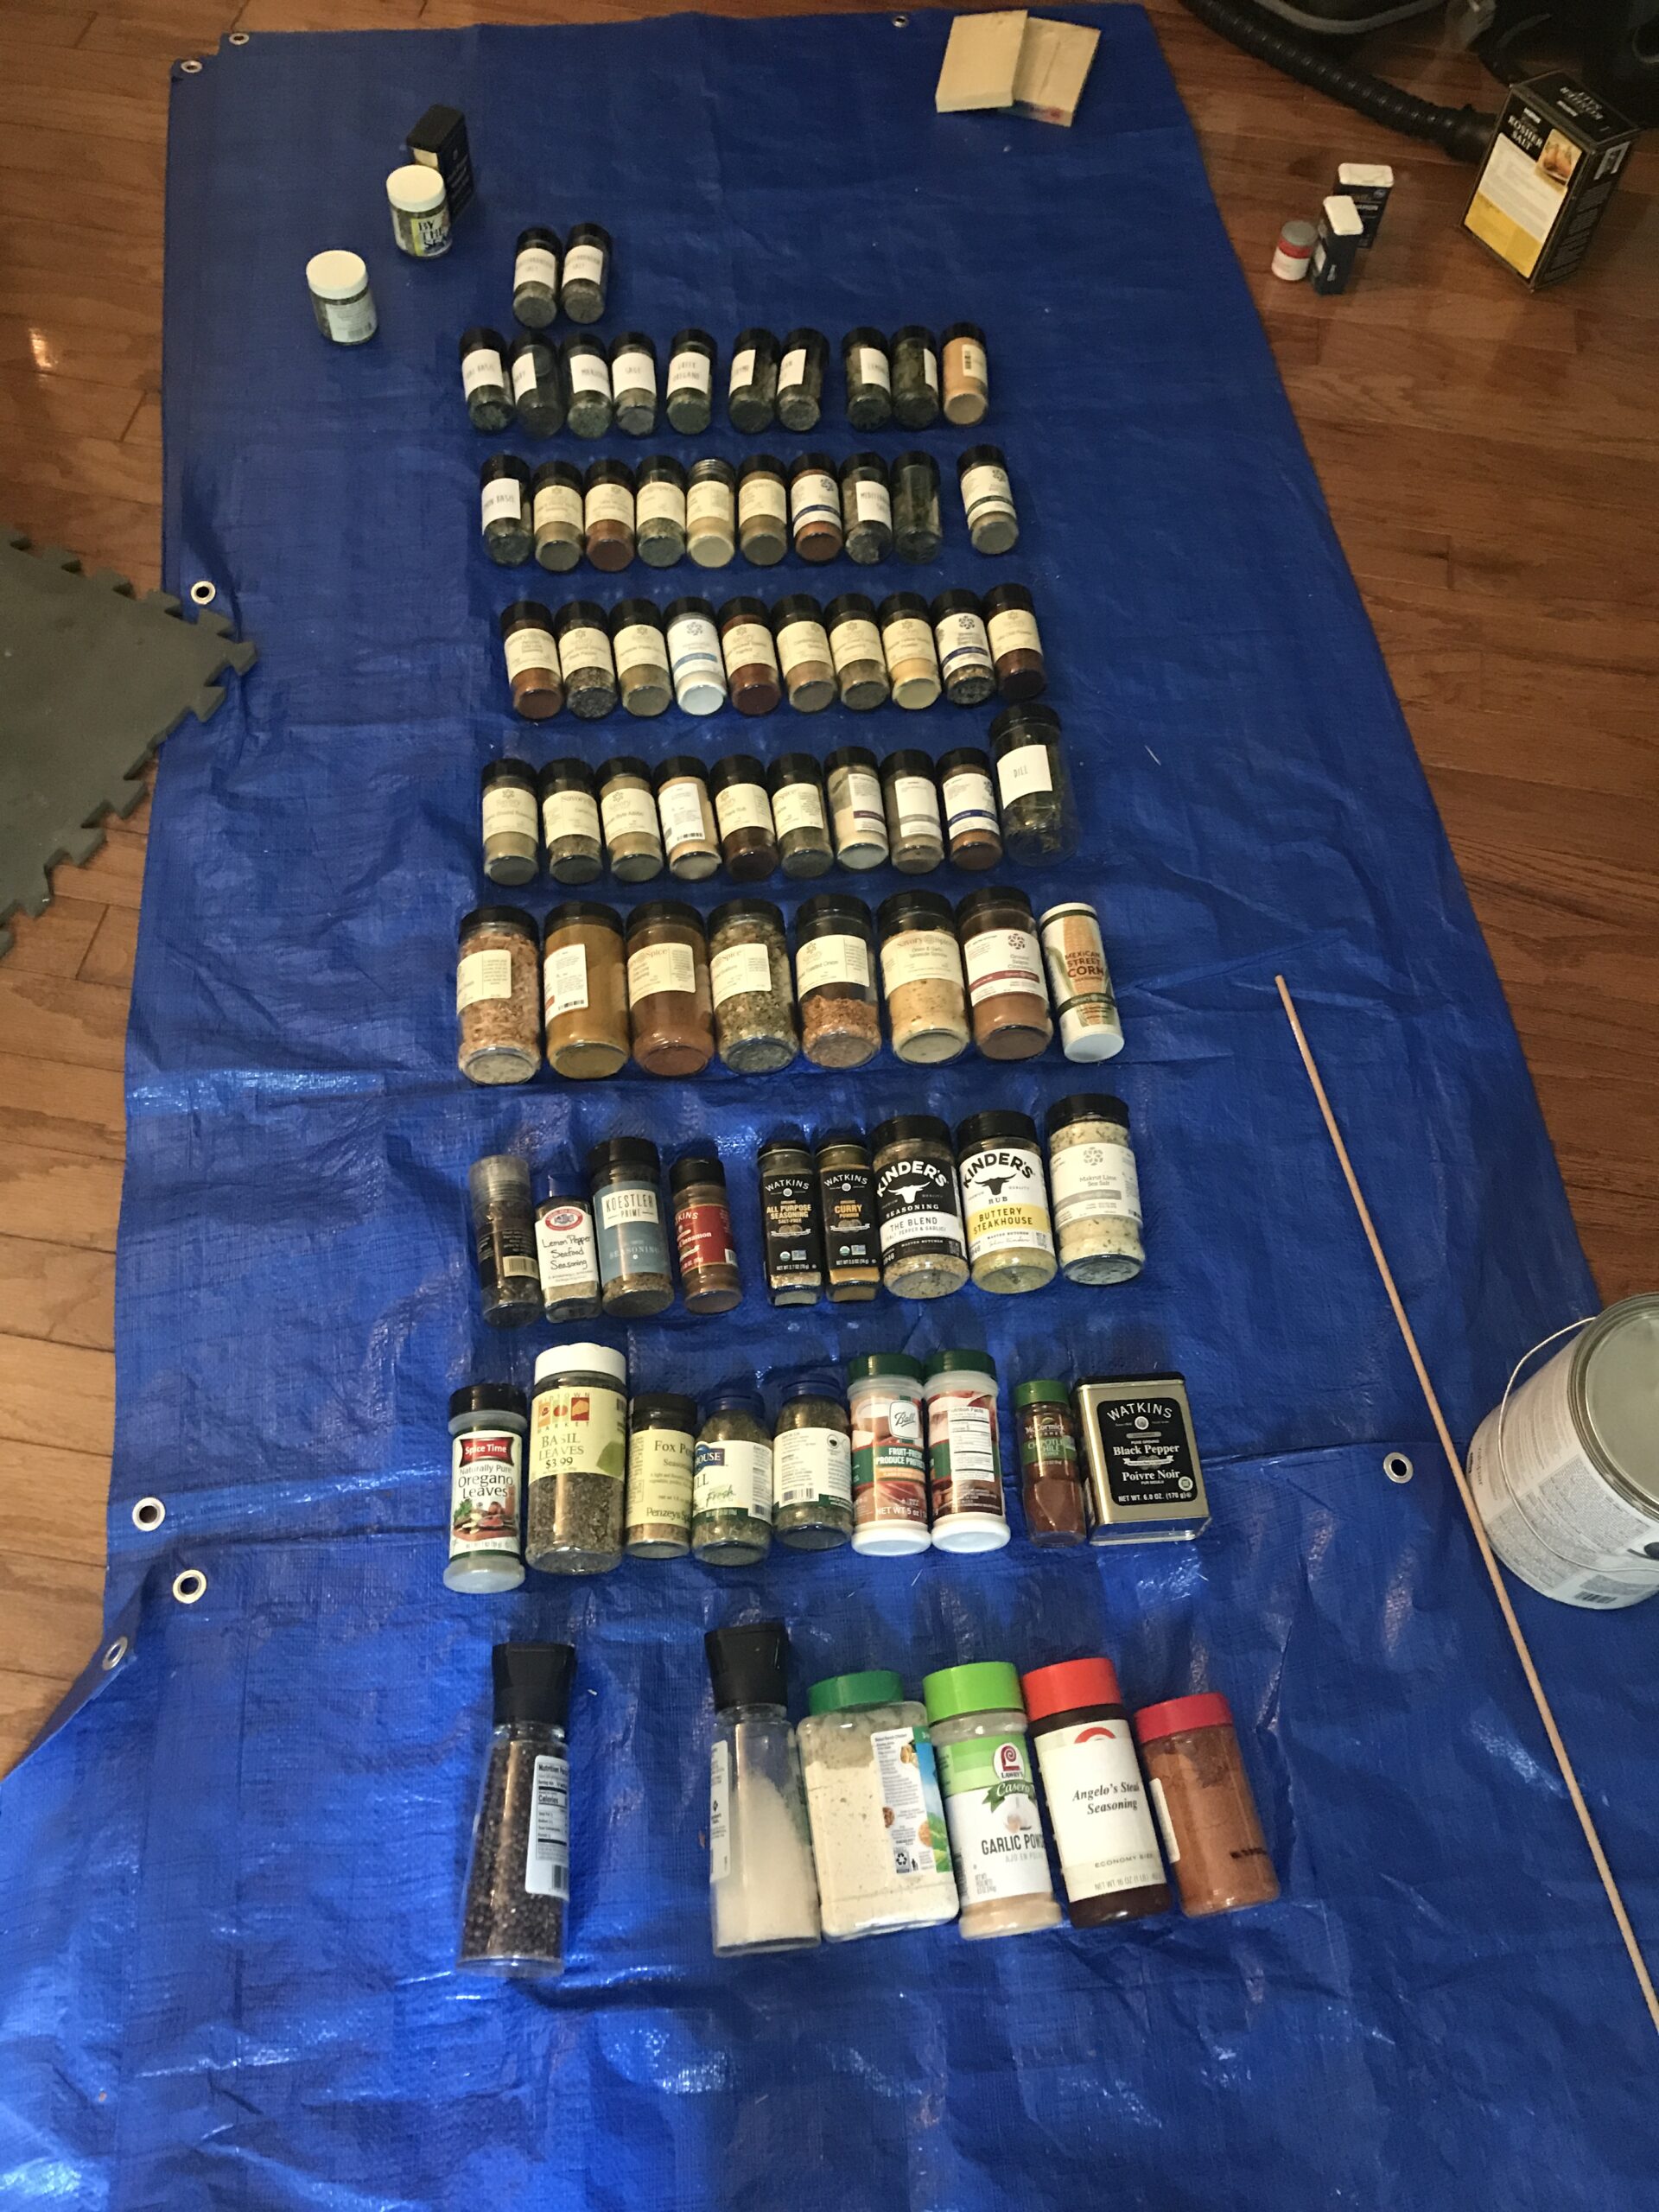
- Decisions were made for the size that would need to hold the cookbooks, measuring for depth; and then, the spice jars were laid out on the floor so that dimensions could be taken on how deep and how tall each shelf would need to be to hold my collection. You know I am a Savory Spice girl and have a full collection of my favorites from them, as well as, I ordered their jars to create my own herbs last summer.
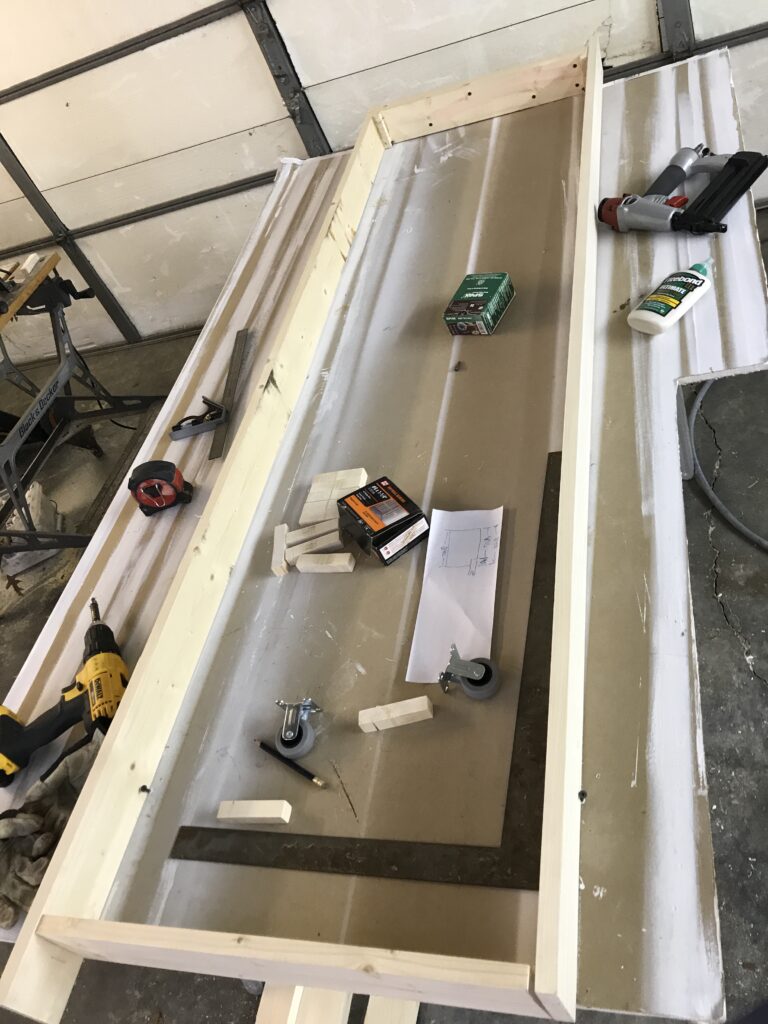
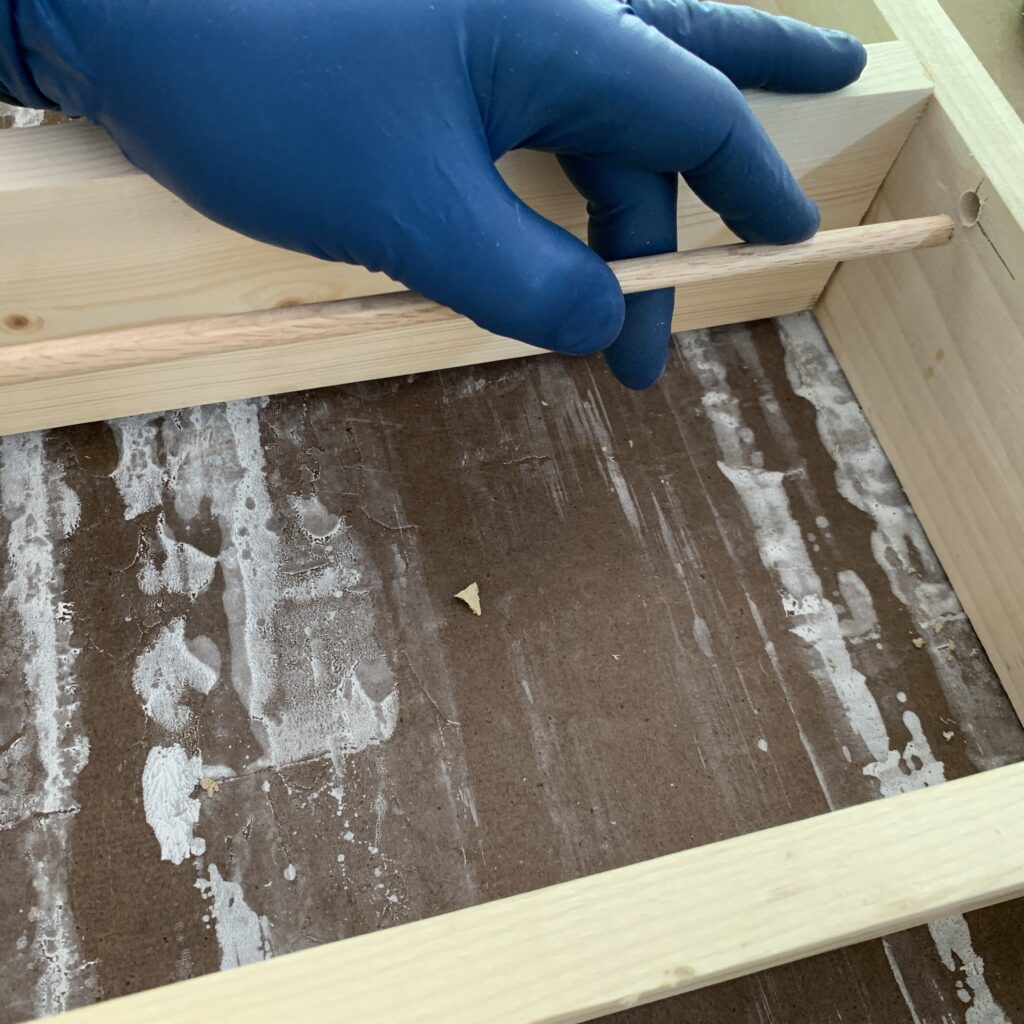
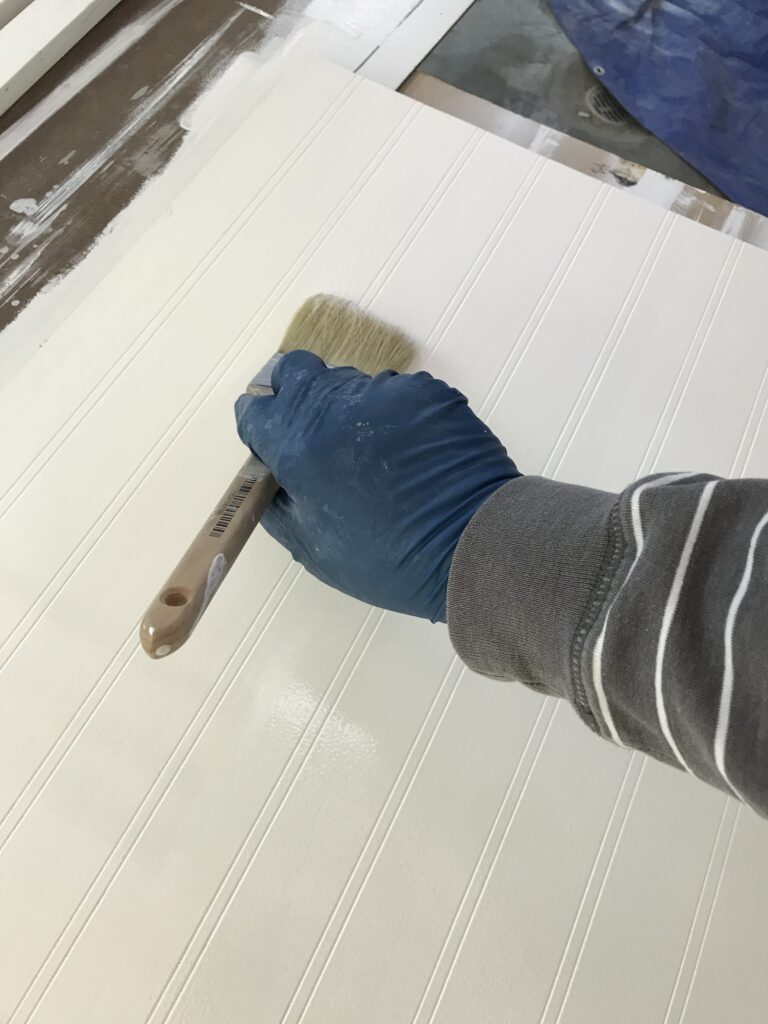
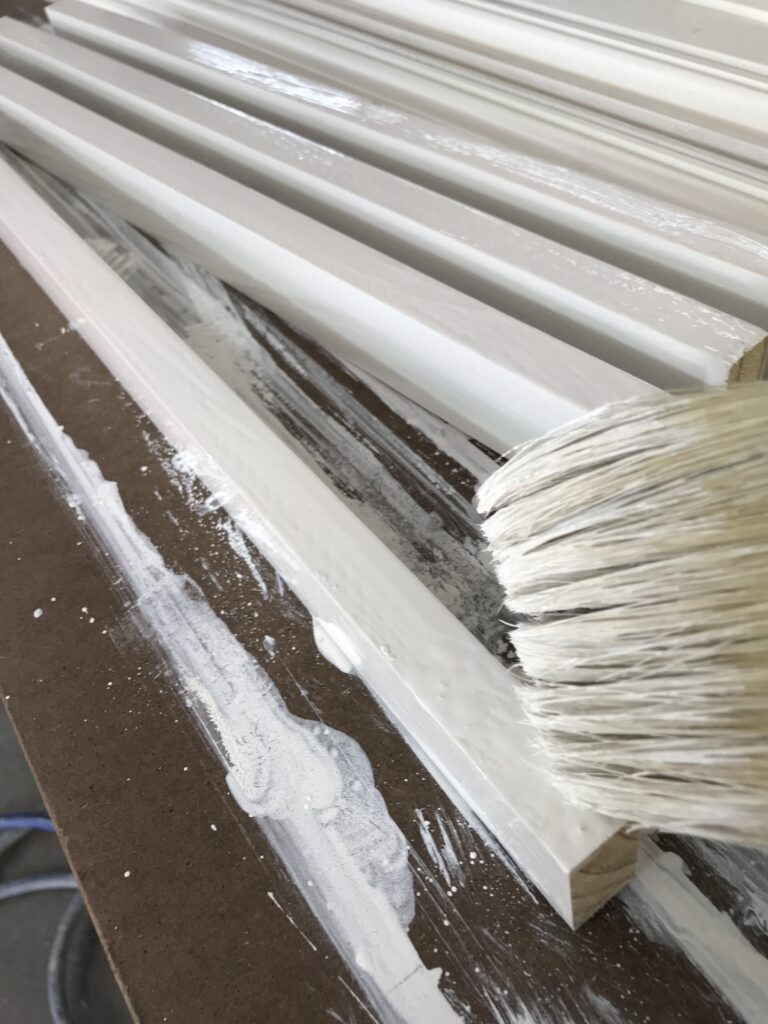
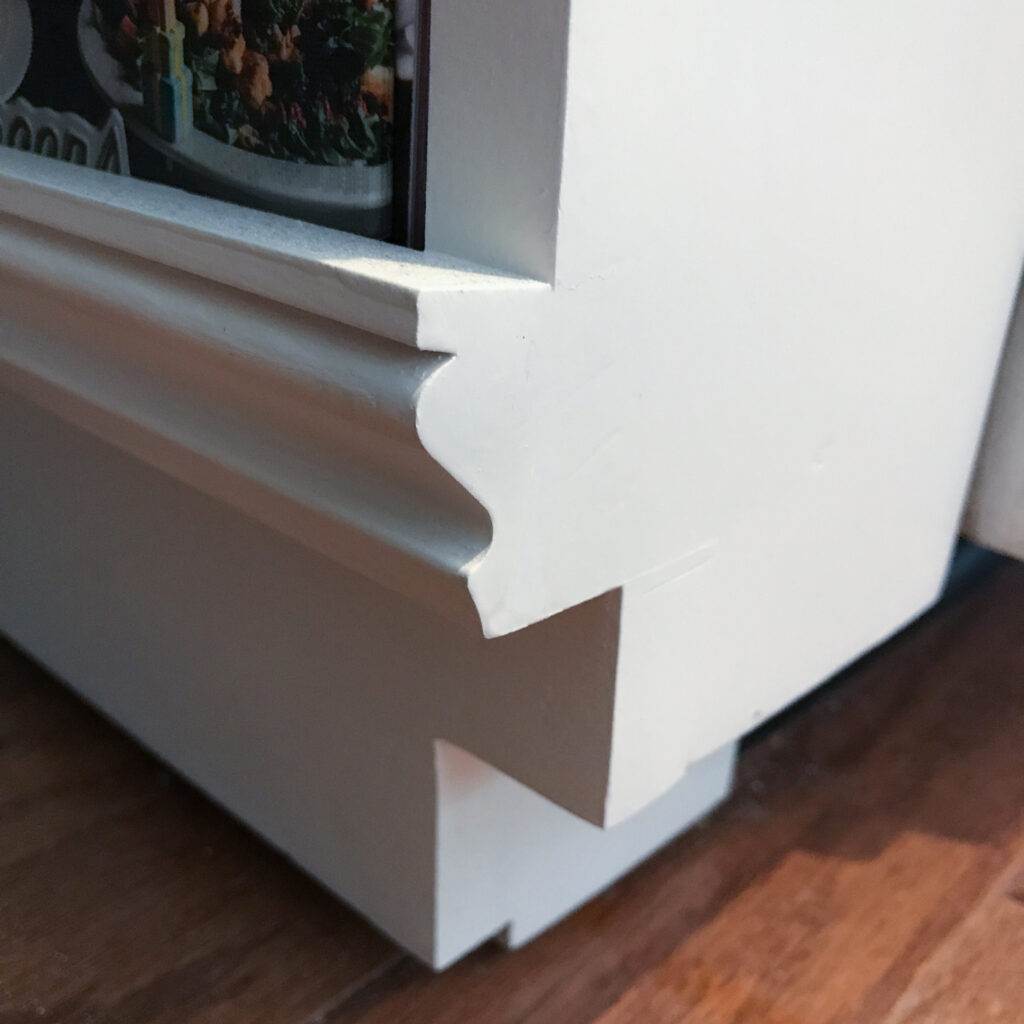
- Measurements were taken and all of the products needed from wood for the frame, bead board for the back of the cookbook shelf, trim to match the other end, dowels to hold in spices, wheels for the rolling and slides to attach to the cabinet began. Normal screws, tools, paint, glue and equipment were gathered.
- My husband is a pretty particular and precise guy when it comes to putting things together. Along the way if something didn’t work with his template? He would begin again until everything was perfect.
If you want the detailed plans of this kitchen organizer cabinet…he is working on them for you…
But, for right now? I have to show you the process and the finished project! Are you ready?!! Here goes!
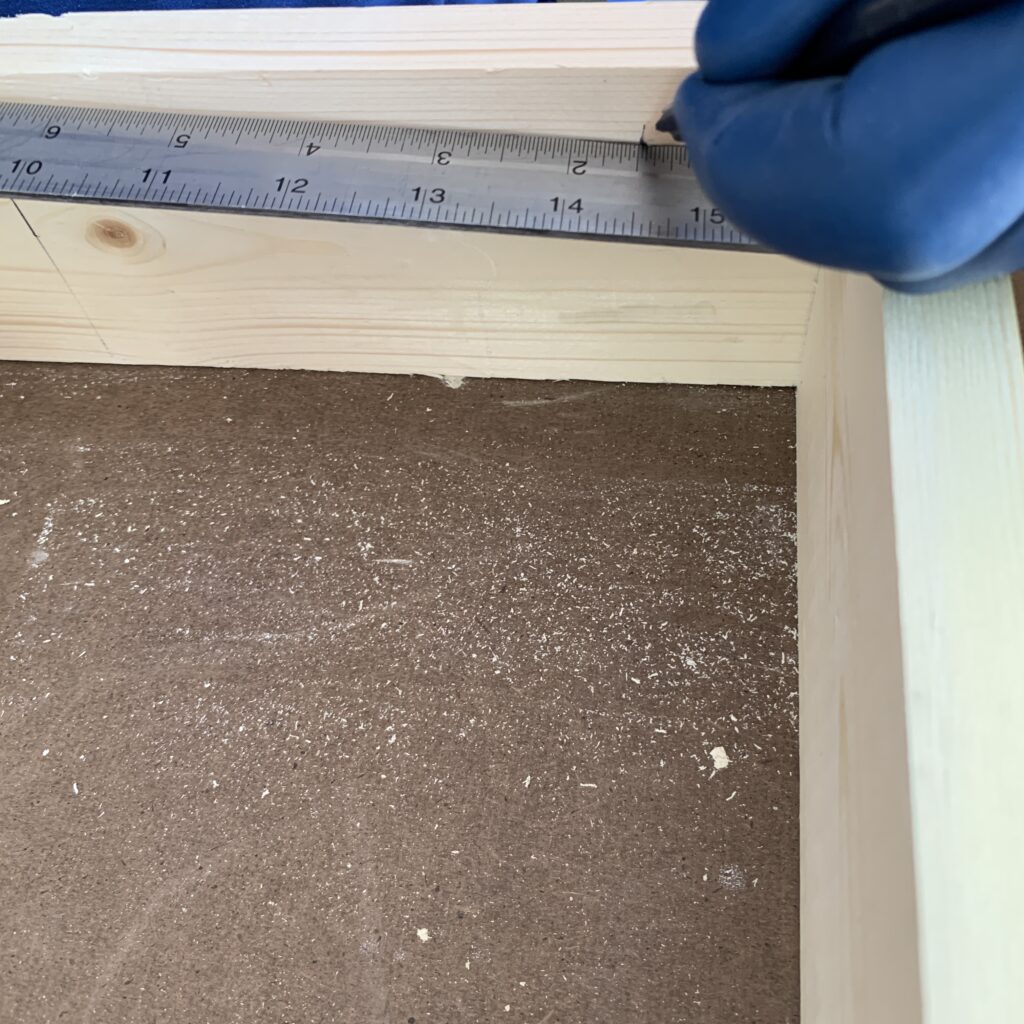
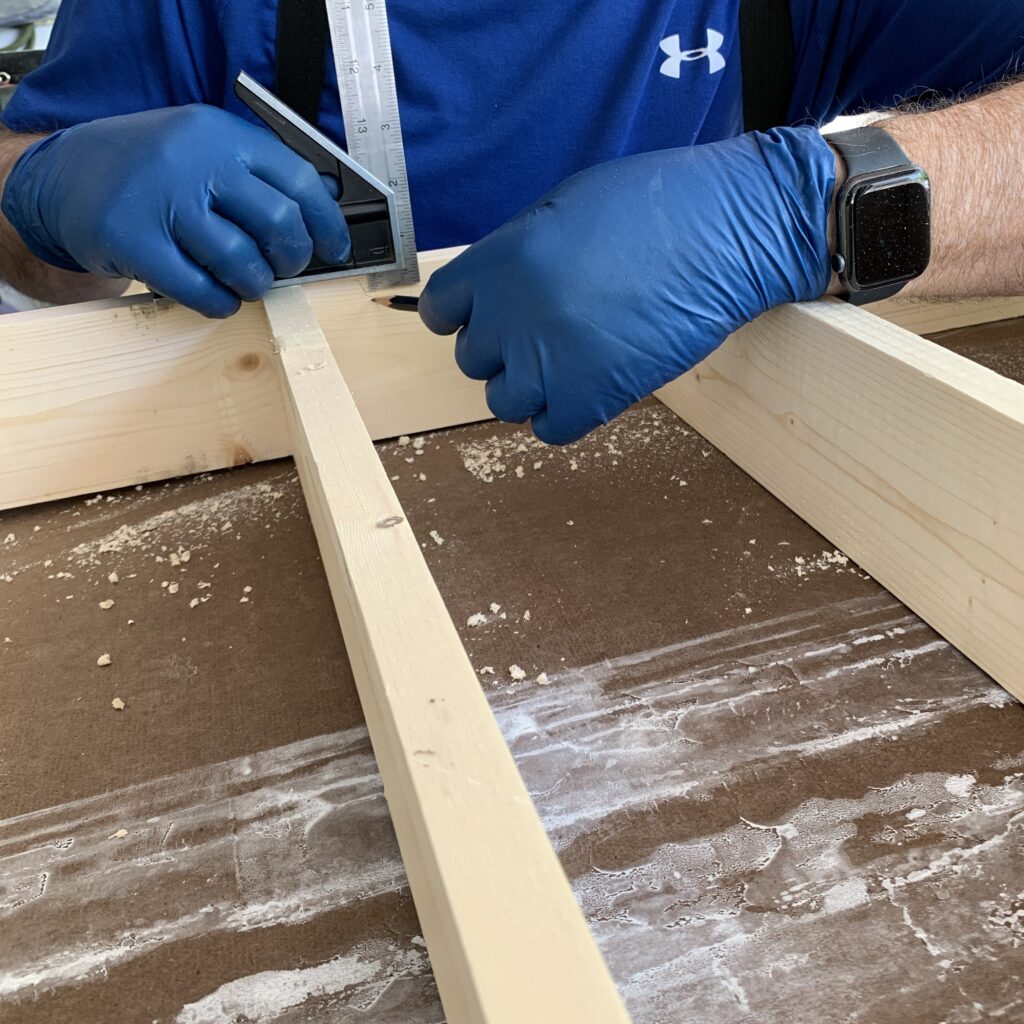
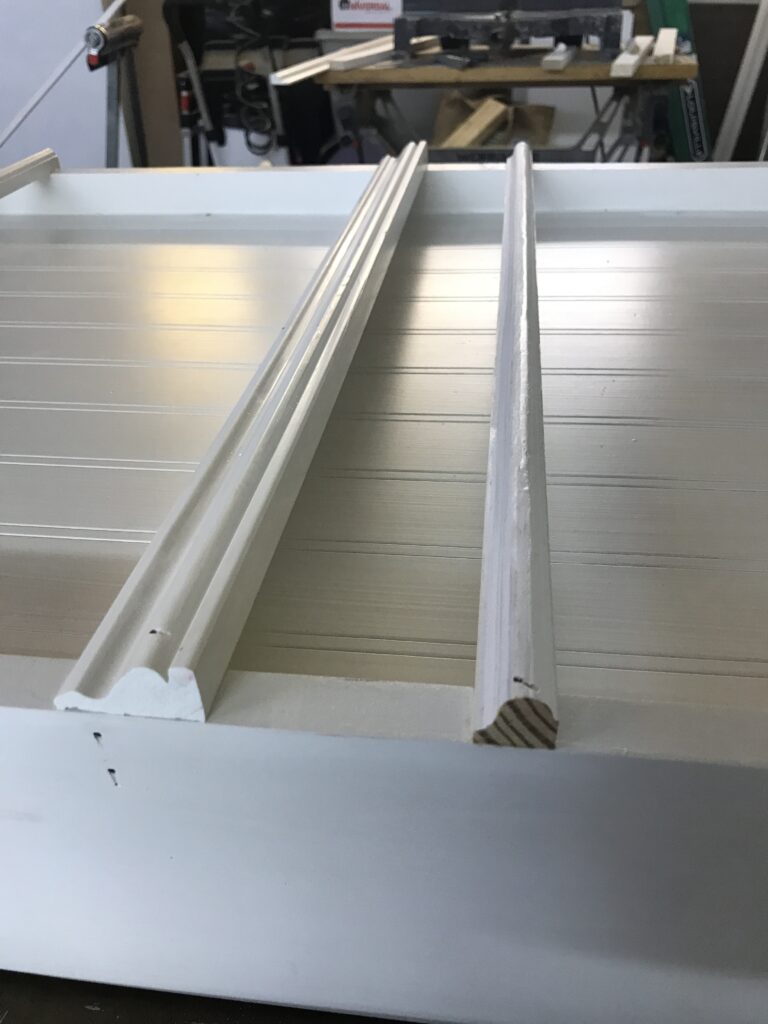
First, measure.
Measure the cabinet depth and height to get the frame size for the cabinet. Cut 1 x 4″ boards for the frame.
Let’s Add the Cookbook Rack to the back of the Spice Organizer Cabinet…
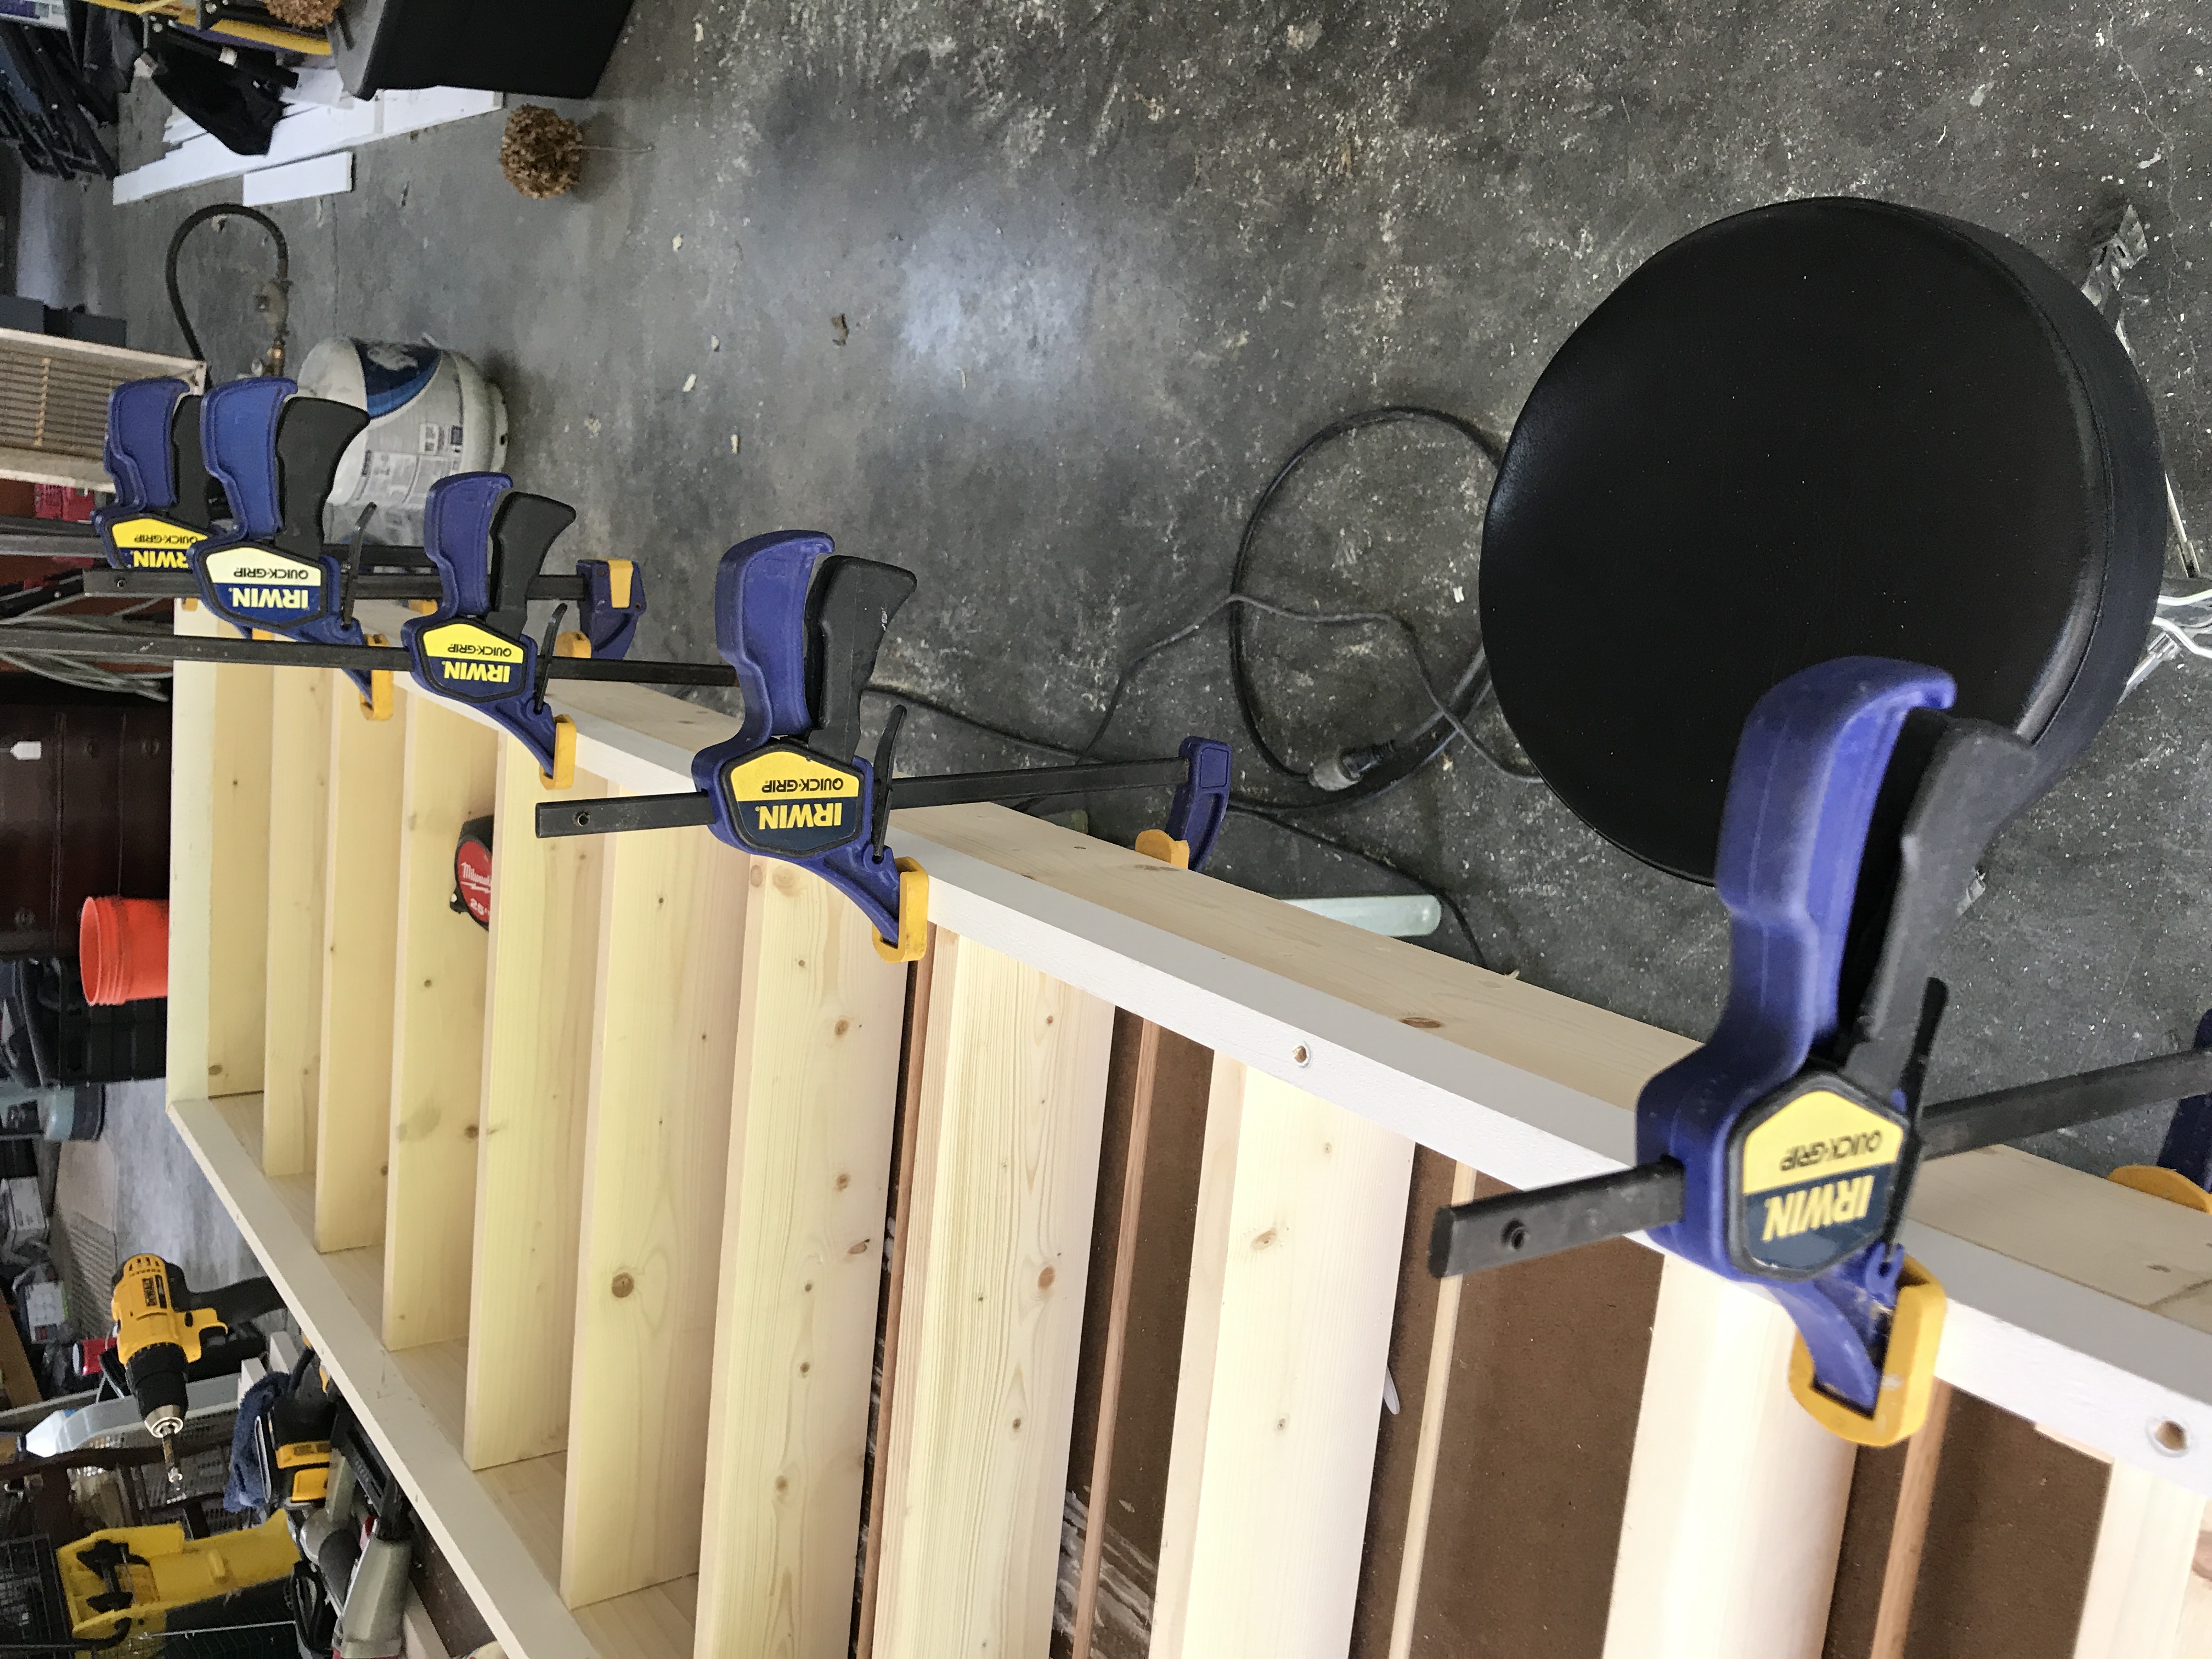
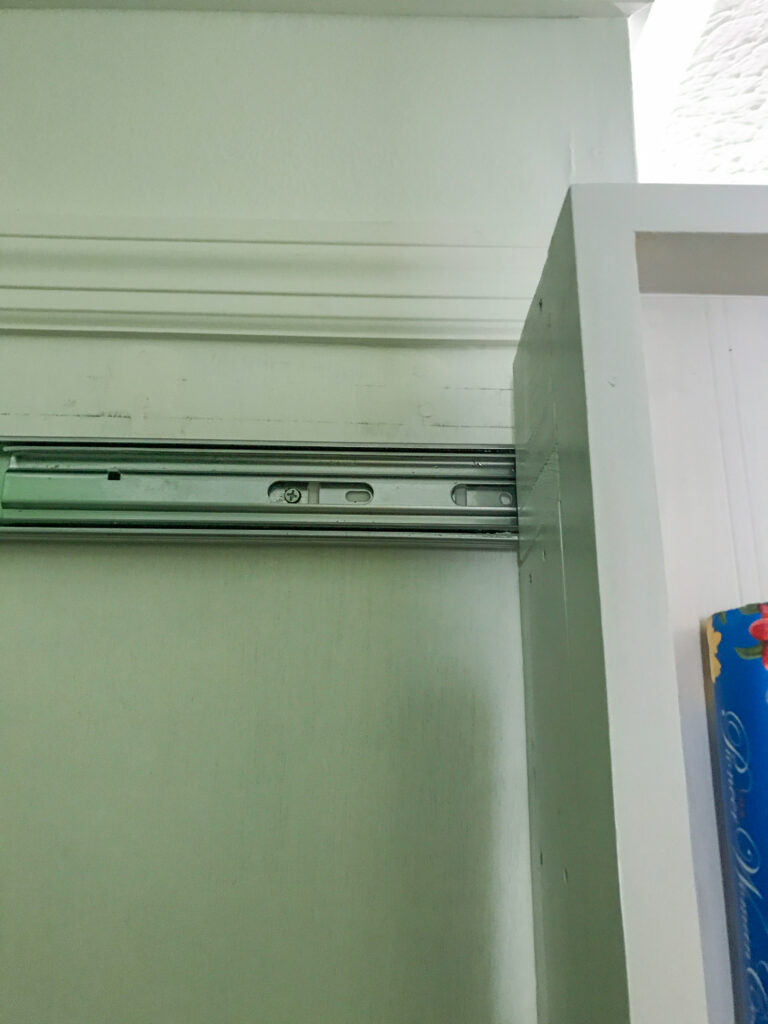
Attach the Drawer Slides to the Spice Rack Organizer Cabinet.
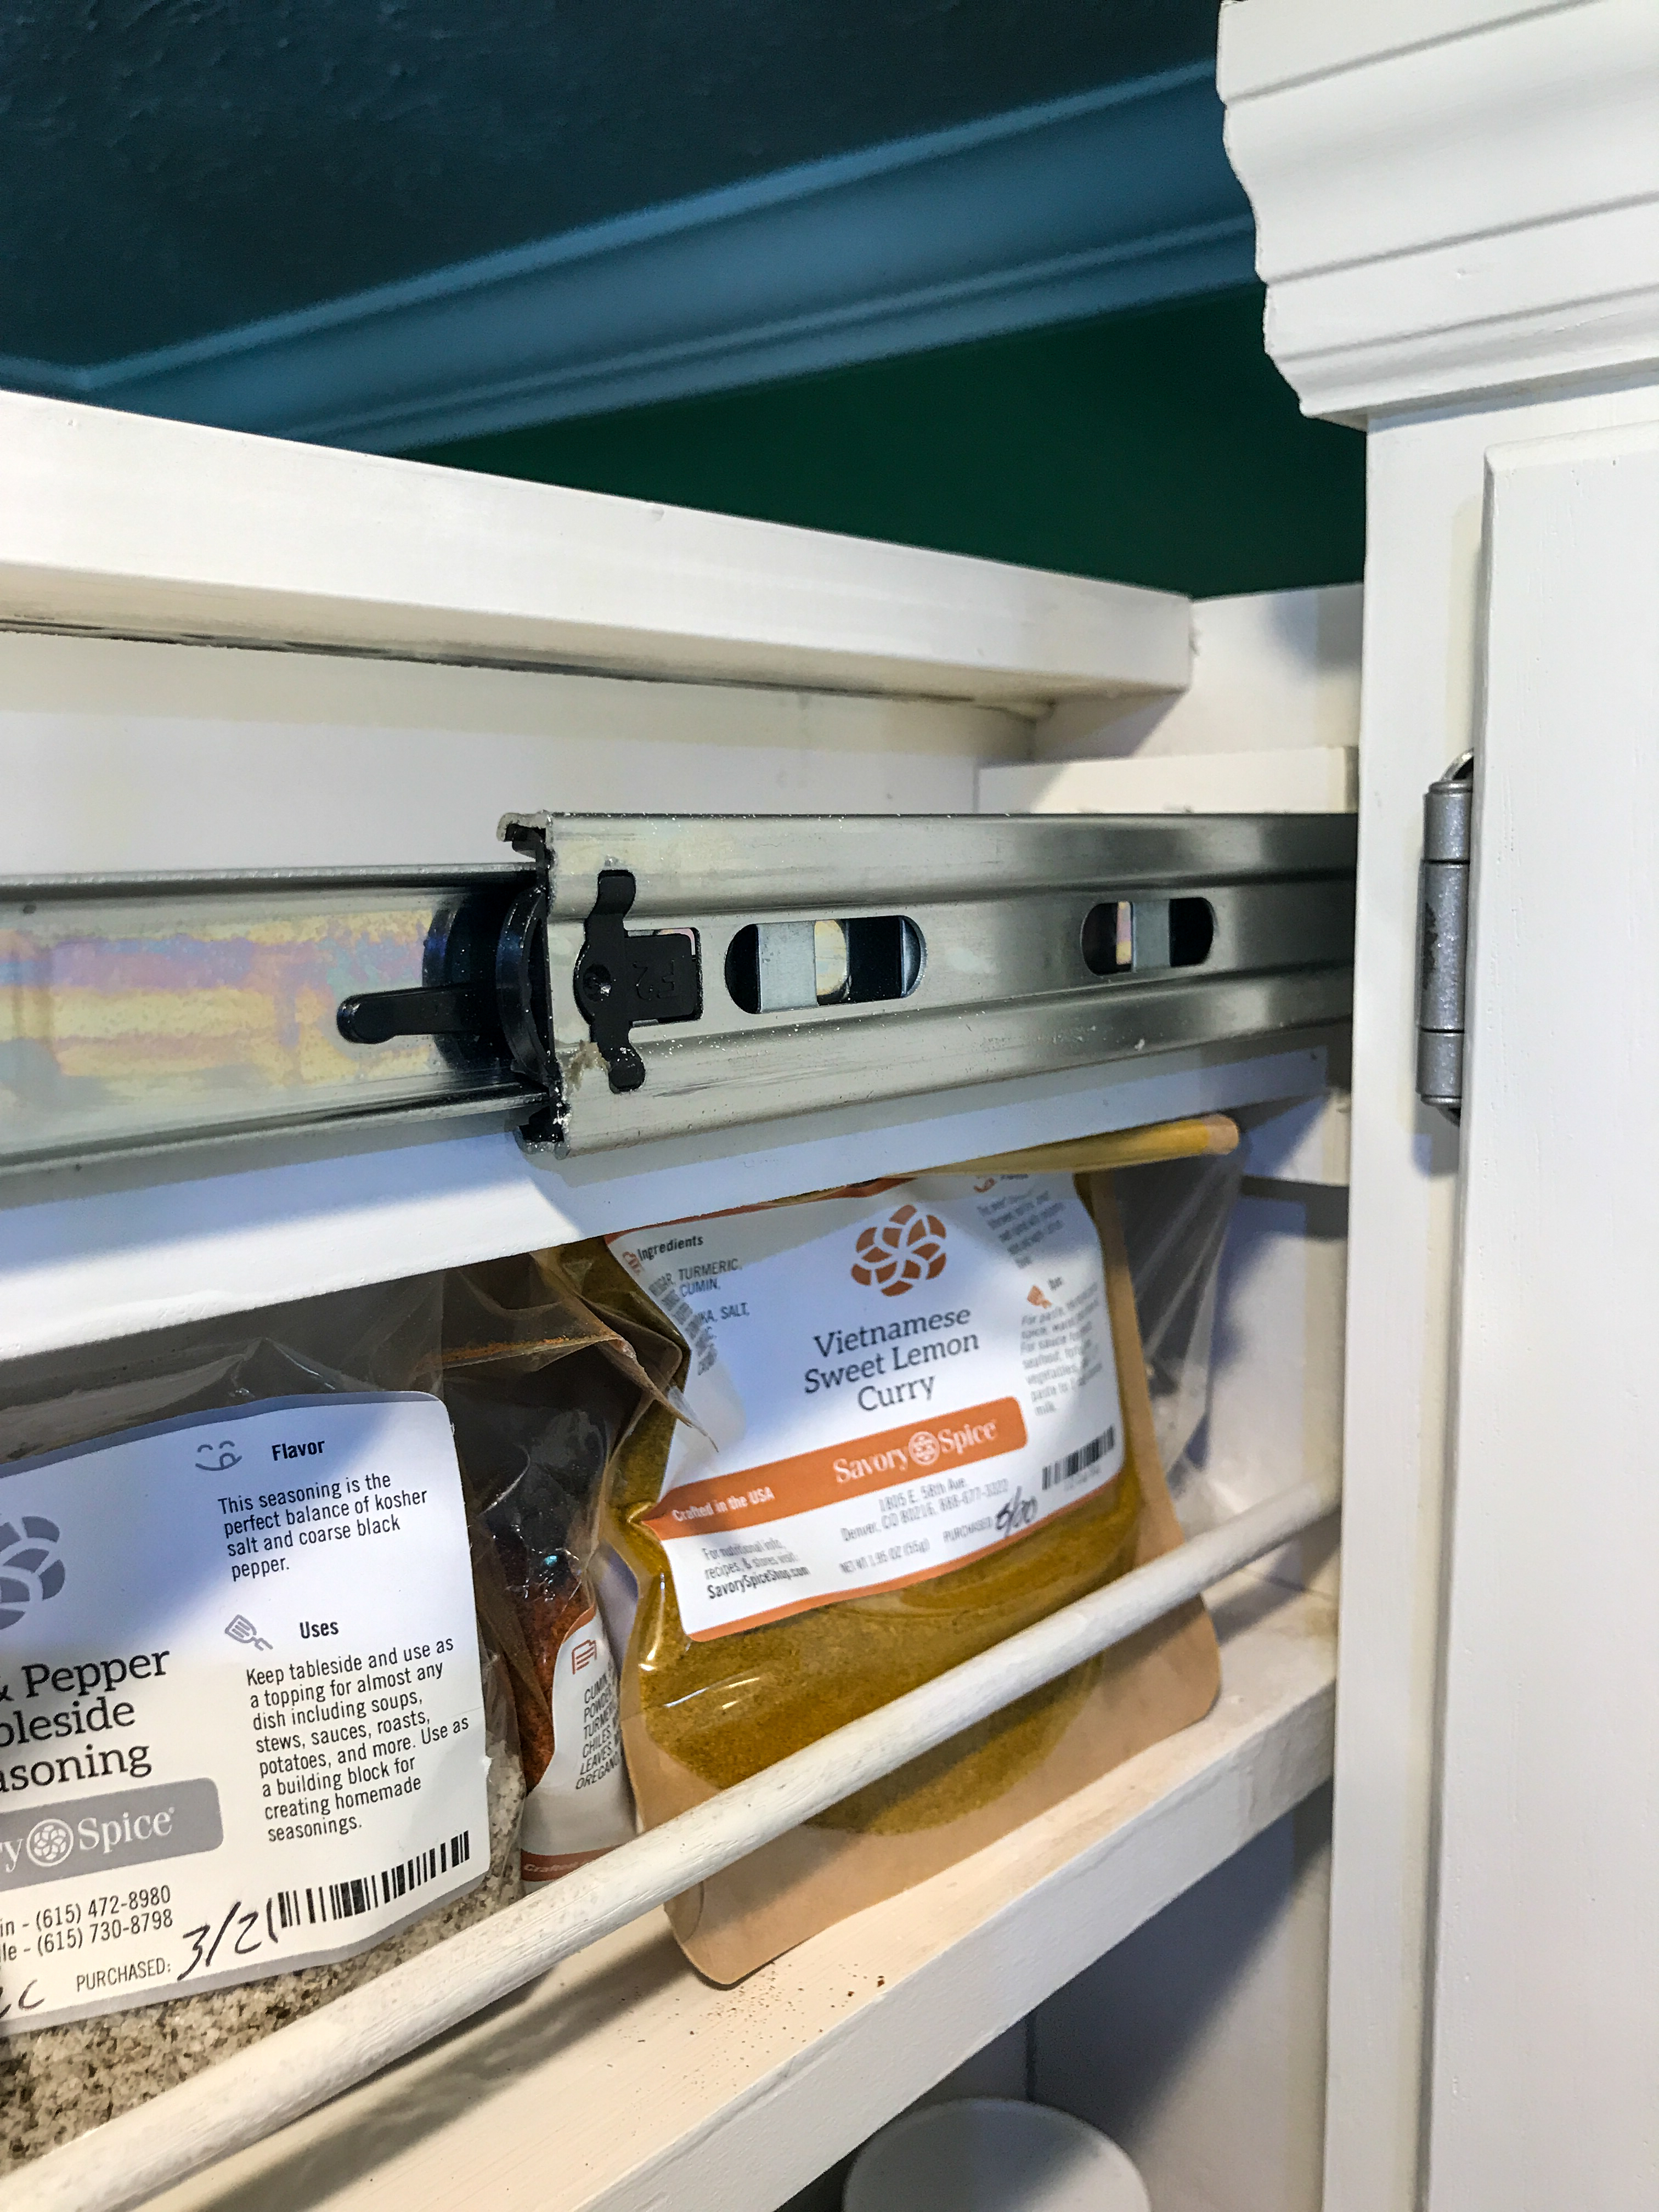
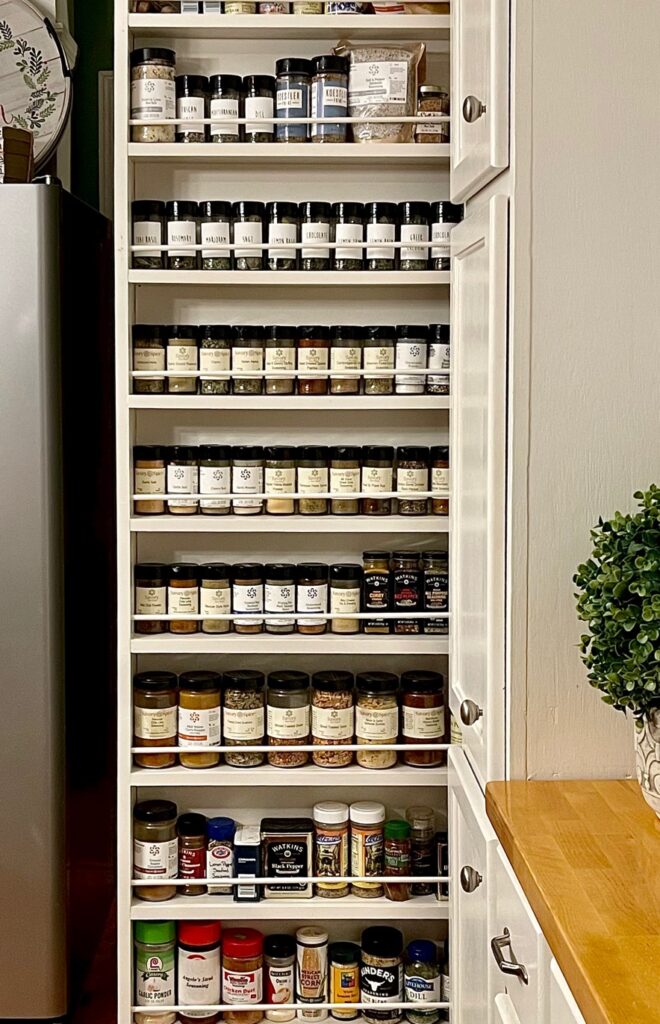
The result? I have found that with those spices in easy view, I use them so much more and know exactly what needs to be refilled…and YES! I use them all!
Reveal of the Cookbook Rack AND the Spice Cabinet Organizer!
Can you tell I am so in love with the finished spice rack organizer cabinet AND that cookbook holder?! Seriously! A true game changer to SEE and USE every spice now at my fingertips. Plus, I now have a beautiful wall of my favorite cookbooks ready to use and view.
Ooooh! Let’s just look at that cookbook rack one more time…simply can’t get enough of it!

So, friends, do you love it as much as I do???
I think I’ll keep this creative genius husband of mine! Wonder what he will think of next? I think I’ll have to pay closer attention next time!
And you know, I have to tell you about all of my Savory Spice favorites, right?
My favorite shop is in Franklin, TN. You can shop online here.
My favorite spices that I am loving right now are:
- Peruvian Chili Lime- perfect for Mexican Street corn, sweet potato chili, the list goes on!
- Mexican Street Corn seasoning is still available now–don’t miss it!
- Homestead Seasoning- great in breading for fried green tomatoes and pork chops.
- Sweet Smoked Spanish Paprika- so delicious in morning eggs.
- Brooklyn Everything Bagel Blend- love it on everything that I have tried! not just for bagels!
- Ground Saigon Cinnamon- the one I reach for the most when baking or cooking.
Thank you for joining me! I’m so thankful that you are sharing life with me here! I’d love to hear your comments!


78 Comments
Sweetie
They are just wonderful. Both spaces beautiful and such a wonderful way to integrate items to use and enjoy!
Leslie J Watkins
Thank you, Sweetie! I am so in love with it! He did such an amazing job!
J Michele Graves
What a great idea! The cookbook storage is a beautiful way to finish the exposed side of the cabinet. So…what’s your husband’s next idea???
Leslie J Watkins
Thank you! I can’t wait to see his next idea!
Grace Decken
OMG! I love it!
I’m going to have to show my husband (hint, hint)
You have such great ideas
Miss seeing you!
Vickie Ramey
Gorgeous, creative, and a well done project! Kudos to Gary for his creative ideas and talented workmanship!
Leslie J Watkins
Thank you! I know! Didn’t he do an amazing job?!! I should have videoed him since it was HIS creation…right?
Tammy
Leslie, I love this storage. I wish there was a space in my kitchen for something like this.
Leslie J Watkins
Thank you! 5″ at the end of the cabinet was all it took for this! Could not believe it could happen in that tiny a space. See if you have an end cabinet somewhere and then I can’t wait to see what you create, sweet friend. Loved talking with you tonight!
Leslie J Watkins
THANK YOU! He did great, didn’t he? Hope he gets the hint!
J Michele Graves
What a great idea! The cookbook storage is a beautiful way to finish the exposed side of the cabinet. So…what’s your husband’s next idea???
Leslie J Watkins
Hope your husband takes the hint and creates one of these for you. I have no clue how I lived without it!
Do Dodson
I LOVE this! I need a larger kitchen so I can build this. It turned out so well and I love the cook book storage. ❤️
Leslie J Watkins
Donna! THANK YOU, friend! It is ALL of 5″ wide added onto a kitchen cabinet! That’s the brillance! It adds so much organization in a tiny space–on both sides! I am so in love with it!
Martha Wallace
Amazing! Great job to both of you! I love it! Beauty and organition! The perfect match!
Leslie J Watkins
Thanks, Martha. I am so in love with the way it looks and the way it works! He did an amazing job!
Sue at Blu
Leslie, this is amazing and so inspiring! I need to customize my kitchen like this. Beautiful!
Leslie J Watkins
Thank you! Who knew I could love it so much?!! Using it CONSTANTLY! If you add one, please tag me! It will rock your world, friend!
KariAnne
I don’t know which I left more – – the project or you’re super cute smile on video! You are such a rockstar my friend!
Leslie J Watkins
YOU MADE MY HEART SO HAPPY JOINING ME HERE, FRIEND! All caps for celebrating! Thank you so much for ALL of your inspiration…I am learning to be a RockStar from YOU!
Cindy Rust
Wow!! I need one of these in my kitchen and I have just the spot! Pinning!
Leslie J Watkins
I know! I think everyone needs this after using it now! Thank you for pinning, friend!
Jayne
Wow! Your spice rack turned out amazing! I love the cookbook holder on the other side too – I need one of those! Pinning!
Leslie J Watkins
Thank you! and thank you for pinning! I am in love with both sides of it.
BJ
LOVE this!
Leslie J Watkins
Thanks so much! I love it, too!
Lynn
It’s genius. Such a great use of space. “Handy” redid my spice cabinet recently but not near the magnitude of yours.
Your video was perfect. Love it!
Leslie J Watkins
Thank you, Lynn. I am in love with both sides of this cabinet. AND I appreciate your comment on the video! Hurdles you know!
Kimberly Jones Snyder
What a great gift from your husband, Leslie! He is so talented! Thank you for sharing the project! Great video too!
Leslie J Watkins
He is a keeper for sure! Thank you so much!
Karen
They both are wonderful…
Leslie J Watkins
Thank you. I am loving both, too.
Cindy
Wow, how gorgeous is this and ao useful. I love the idea you came up with for your cookbooks. I absolutely love this project.
Leslie J Watkins
Thank you! I am sooo in love with it, too.
Jen
This is really amazing! I’m a little envious now.
Leslie J Watkins
Thank you, Jen. I am so in love with it!
elizabeth@pineconesandacorns
Leslie this is so beautiful and perfect for all of your spices and cook books. The iceing on the cake as they say is your beautiful video!
Leslie J Watkins
Thank you so much! Isn’t it amazing? He did a wonderful job and I can’t believe how much easily I can find and use those spices. Game changer, for sure! Thank you for the sweet compliment on the video, too. Hurdle for sure!
Mary Anne Russo
Love it! What a great idea! That man of yours! Love your video so natural!
Leslie J Watkins
Thank you, Mary Anne! That man of mine is a keeper! And thank you for the sweet video comment! Trying to embrace the video part!
Kim Waldorf
Ok….this is totally amazing! Aren’t you glad you finally gave in to his vision?? Now, I need one!! Thanks for sharing.
Leslie J Watkins
Kim- I think I will listen a little closer to him when he has an idea!
Carla
You and Gary are such an amazing team! I loved watching your video and seeing my stairs to your guest bedroom in the background. Someday I hope to see Gary’s clever cabinetry work in person.
Leslie J Watkins
I miss you so much, friend! Those stairs and that guest room always await you! And he’s pretty handy–I think I’ll keep him!
Paula@SweetPea
Your husband did an incredible job on this project. I absolutely love what he created.
Leslie J Watkins
Thanks, Paula! I think he’s a keeper!
Pingback:
AnnMarie - Simply2Moms
This is such a great diy project. Every kitchen can use more storage!
Leslie J Watkins
Thank you! And thanks again for sharing it on your blog. It has truly been a game changer here. To see and use and replenish all of those spices…and THEN…have cookbooks displayed on the other side?!! Who knew I could love it so much?!!!
Marie
What a sweet husband! It is really cute how he persisted in making this. It turned out wonderful!
Leslie J Watkins
I know, right? He is a keeper!
Stacey Olson
Wow! That turned out so beatifully. I’d definitley love to create one of those for my home. <3 what a great gift from your husband!
Leslie J Watkins
It has truly been a game changer, Stacey! I can see every spice in my collection at my fingertips. I use them all more often and know when my supply needs to be replenished. He did a great job, didn’t he? Over the moon with this one!
Cara
Leslie, I love the new spice and cookbook rack! Nice video, tell hubby he did a great job! 🙂
Leslie J Watkins
Thank you, Cara. Didn’t he do a great job? He’s a keeper for sure!
Lynne
Wow! I love this! What a creative and clever use of space! He did an amazing job!!
Leslie J Watkins
Thank you! He is truly a keeper! I love this each and every time I use it. It blesses my heart!
Linda Johnston
Looks wonderful!
Leslie J Watkins
Thank you, Linda. I’m loving it!
Libbie
Oh, I love this so much!!
Leslie J Watkins
I know! He truly did the BEST job. I am more in love with it each time I open it.
Rosemary Palmer
Such a great use of space, and I love being able to see all of my spices. I used to have a wall unit in my old house and miss it.
Leslie J Watkins
I am in love with it. Always seeing everything at a glance means using them more and replenishing easier. Can’t imagine life without it again!
Pingback:
Pingback:
Pingback:
Diane
This is absolutely brilliant! And your hubby is a very talented woodworker and very thorough in his details. I love it. Thanks for sharing it on Fabulous Friday! Have a great weekend!
Leslie J Watkins
Thank you, Diane! Didn’t he do well??! I am not sure how I lived without it…but, I am SOOO in love with it! So thankful you are hosting the Fabulous Fridays!
Renae
I love this idea. Thank you so much for linking up with Fabulous Friday Link Party! We sure appreciate you, Hugs and blessings to you.
Leslie J Watkins
Thank you, Renae. I can’t imagine life without this gift! Happy Weekend!
Pingback:
Pingback:
Pingback:
Pingback:
Pingback:
Pingback:
Pingback:
Pingback: