Week 3- New Updates for Bathroom Remodeling
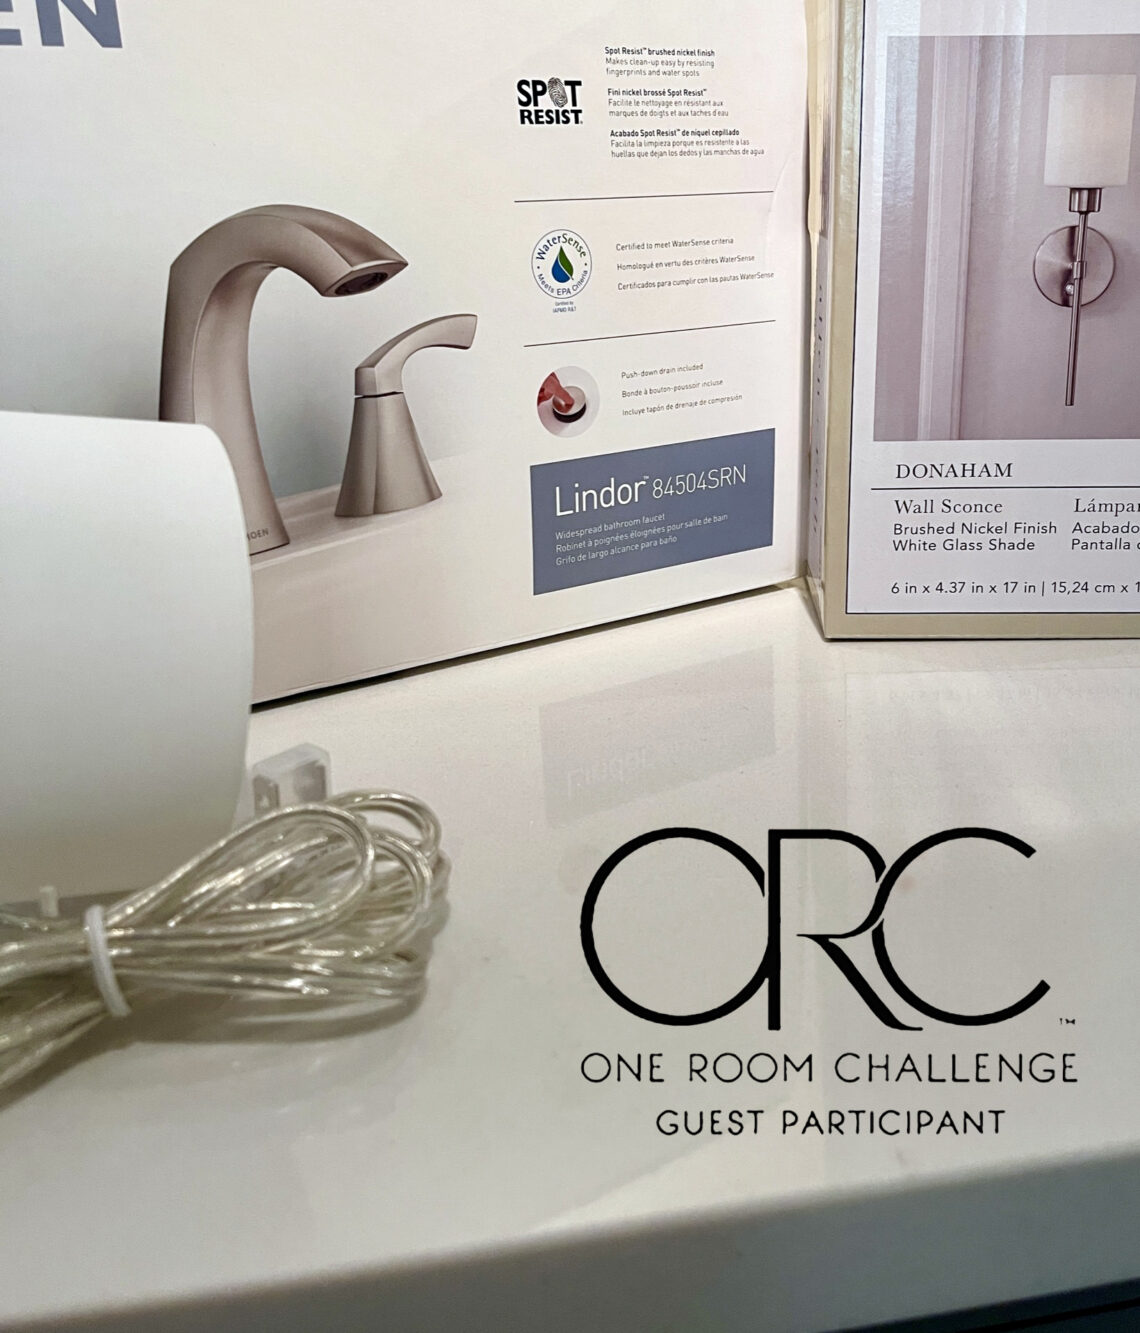
Welcome to week 3 with an update on the bathroom remodeling! If you are still here cheering us on…THANK YOU! A lot has been happening since we last shared with you. How do you like the choices of faucets and lighting that we have chosen for this bathroom remodel?
They were both needed this week for placement and establishing locations for the electrical and plumbing needed to get this job done.
If you are having an electrician or plumber complete remodeling your bathroom…purchase of these before they begin the project is a must.
If you are just joining us, we have taken the opportunity to be a part of the One Room Challenge to get a project completed that has been lingering for a long time. With a noncompetitive and encouraging group in the same boat, we are thrilled with the push and cheering to keep us going to finish this bathroom remodeling!

You can read how we began this project and last week’s beginning here.
This Week’s Update on the Master Bathroom Remodeling:
STEP 1: Sheetrock Removal.
- The first step was sheetrock removal behind the vanity area revealing more secrets…
- With just a pry bar, hammer and dry vac with sheetrock filter installed AND a large trashcan, we got the sheetrock removed.
- Sheetrock removal helped us see where to reroute electrical and plumbing lines. Genius move that we highly recommend.
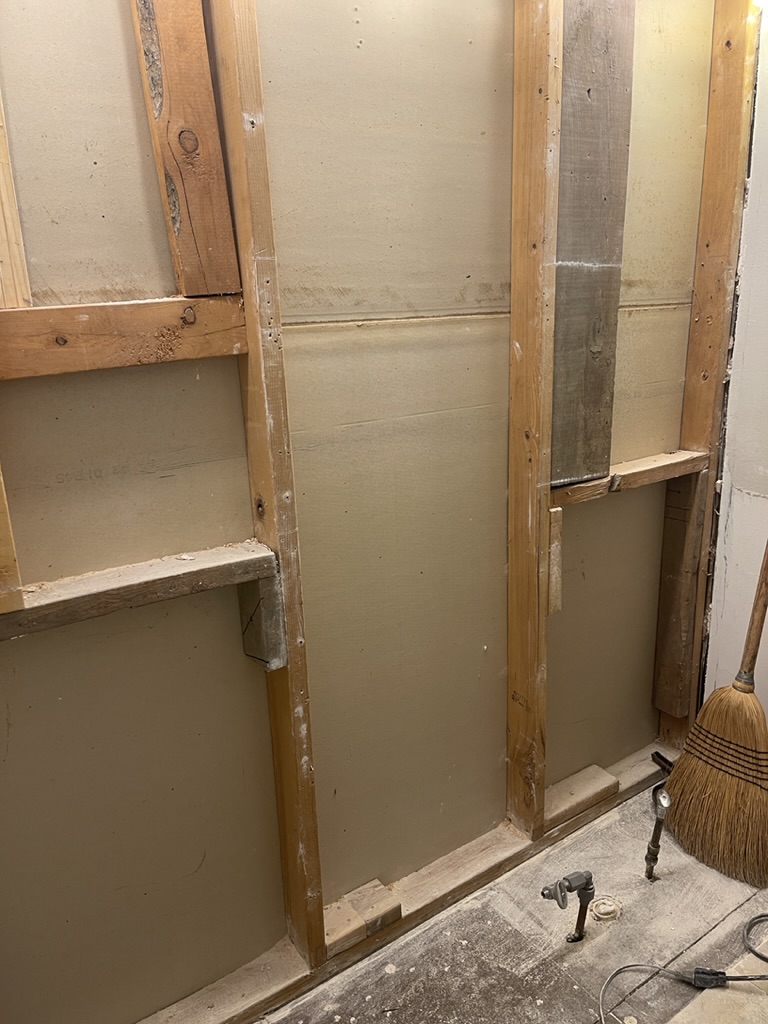
Seriously, we can’t figure out the extra pieces of wood that appeared in random places. Never any rhyme or reason with the previous construction work.
Do you have surprises that happen to you when remodeling jobs appear on your project list?
STEP 2: Changes in Electrical and Wiring
TIP: If electrical is not your area of DIY expertise, make sure that an experienced electrician is hired for the job. No “just watching you tube videos” works for us in this area of the bathroom remodeling. Seriously.
Once the sheetrock was cleared, work on the electrical changes began.
- First, new “canless” can lights were purchased. So much easier to install than other can lights!
- Then this “gizmo” was created by my husband that helped locate the BEST placement for new can lights.
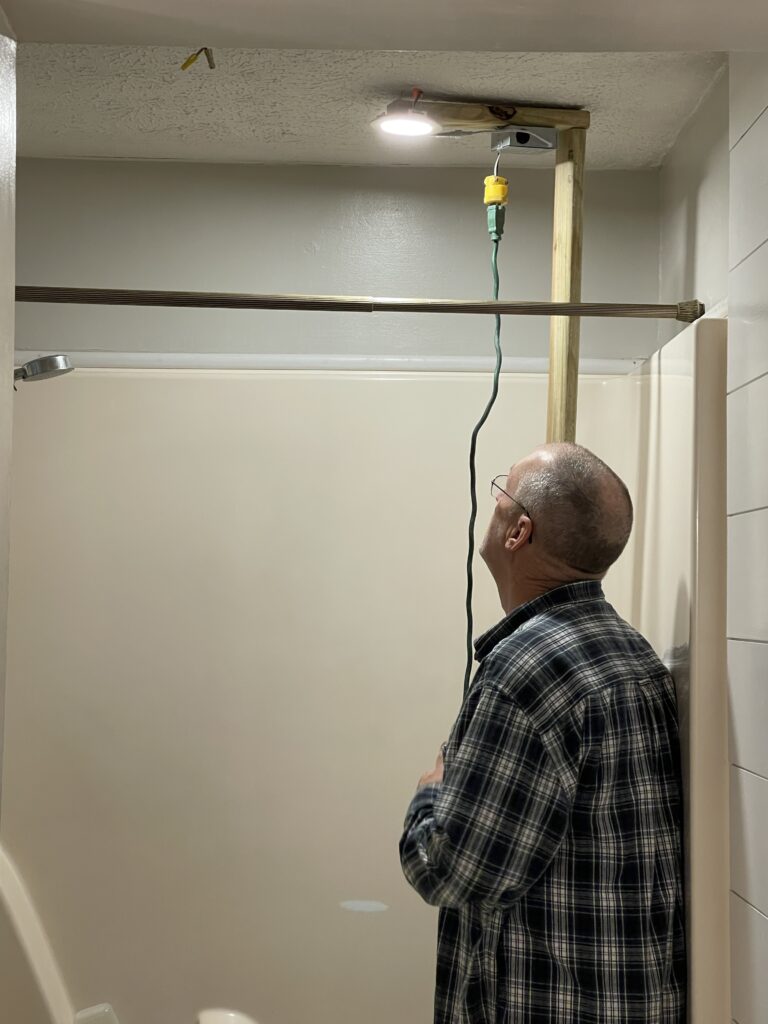
NOTE: My husband always comes up with ways to work SMARTER, NOT HARDER!
Now he actually attached the light to wood. Then he positioned the actual “canless” can light with an outlet source to plug it in. Then he could hold it in place to find the best location for each light.
Pretty amazing, huh?
The attic proved to be a challenge for the lighting expert, but my husband got it done!
More electrical work this week for the bathroom remodeling…
- Again, purchase of the lights is imperative for placing electrical wiring and boxes in the right places.
- After can lights were installed, we added new electrical receptacle boxes, outlets and wiring.
- Then, we repositioned wiring for new light fixtures.
- An addition of a new outlet to connect to the vanity’s power strip was the next step tackled.
- Then, guess what? With the wall open…a new outlet for the hallway on the other side was an added bonus! Yay! How long we have needed a hallway outlet. Problem solved.
- Finally, all of the electrical lines were run. Now they are ready for outlets and lights that will be added after the new sheetrock is hung.
***Pom Pom raising and cheers I am sure I hear from you!
STEP 3: Plumbing
Like the electrical work, let’s begin with the best advice for this step of the project: Reach out to professionals for advice or hire them to do the work if this part of the DIY is not in your wheelhouse.
- Purchase of the wide set faucets that would fit the new vanity was the next item of business. Making decisions on keeping the hardware the same color OR mixing the metals was a challenge with this one. The decision to match the vanity hardware just kept me happier.
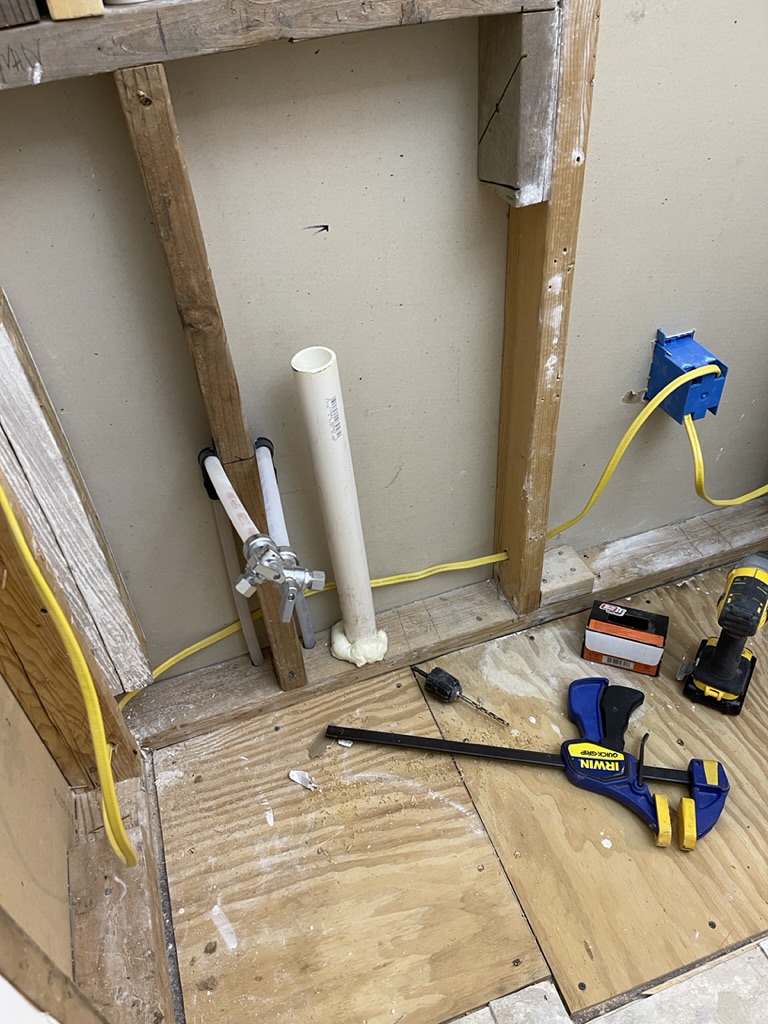
- The vanity required we relocate plumbing into the wall.
- It was so much easier to add plumbing in new locations for BOTH sinks and drains with that sheetrock removed.
- This week, plumbing with hot and cold lines run and new drain lines for each sink was accomplished.
- Shark bites are your friend for this project. This was long and tedious for both UNDER the house and in the bathroom. Lots of time was required to measure, cut and connect water and drain lines to fit.
Next week’s plans have been made for the bathroom remodeling..
- Preparing and leveling sub flooring before the sheetrock is hung. (Sneak peak in that photo above!)
- Making sure that the holes for electrical for fixtures and outlets are made in the right places in the sheetrock.
- Cutting, hanging, and finishing sheetrock.
- Priming and painting sheetrock to prep for the wallpaper.
- Making final ceiling decisions will be on the agenda, too.
TIPS to help with sanity!
- Revising plans in the right order to keep things running smoothly was my challenge this week.
- About the time you THINK you are ready for the next step…a change may be required.
- Go with the flow! No stress needed here. Roll with it…
- We need wallpaper before we make final wall, trim and ceiling color choices…see what I mean? It’s that step thing again…the domino effect is real in this bathroom remodeling project.
Goodness–Let’s hope we made good choices!
Do you ever doubt yourself on design decisions? If so, please let me know from the sidelines.
Thank you so very much if you are still hanging with us on this project week.
Please stay tuned for next week’s episode which will prove to be even more revealing on the design and scheme.
Don’t forget to follow along on Instagram @Feetundermytable, @oneroomchallenge, and @apartmenttherapy to see how projects in the one room challenge are coming along! More to be inspired by there.
On this blog, I may sometimes use affiliate links, which means a small commission is earned if you make a purchase via the link. The price you pay will be the same whether you use the affiliate link or go directly to the vendor’s website using a non-affiliate link.

Until next week, if you have any tips for hanging peel and stick wallpaper, let me know in the comments! A bit of anxiousness settling in over that step!


4 Comments
Vickie Ramey
Great job, guys! That device for checking proper placement of lights was such an “engineer” thing to do!! You talk about doubting your choices–NEVER have you ever made a bad choice! Always beautiful and out together! Unlike other people you know
Leslie J Watkins
That was engineering genius, wasn’t it? I think you have more faith in my choices than I do! Just got the wallpaper in and its truly having me reach out to a different color scheme.
Martha+Wallace
Love the lighting jig thing! Billy has to always make something like that for me to make the right choices! Smart man!
Can’t wait to see the wallpaper! Almost done!!!
Leslie J Watkins
We both have some pretty handy guys!