Canning Tomato Juice- A Labor of Love
Many years ago…becoming a new member to the Watkins family took me to Aunt Helen’s home. With her vast garden, the art of canning tomato juice was shared with me with my feet under her table. It was a true labor of love. There was lots of conversation with that woman who loved me. Canned tomato juice means so much more than just the delicious recipe.
The fact that she chose to spend time with me and pour into me the experience of the canning world probably means more to me now than during those early years.
You see when you are a young mother and wife, time is precious. Her calls to can meant–“drop everything and come now”…tomatoes are ready and can’t wait. What I was doing didn’t matter to that gardener. The important thing was that the produce abundant in her garden was preserved at the optimal moment for storing and enjoying later.
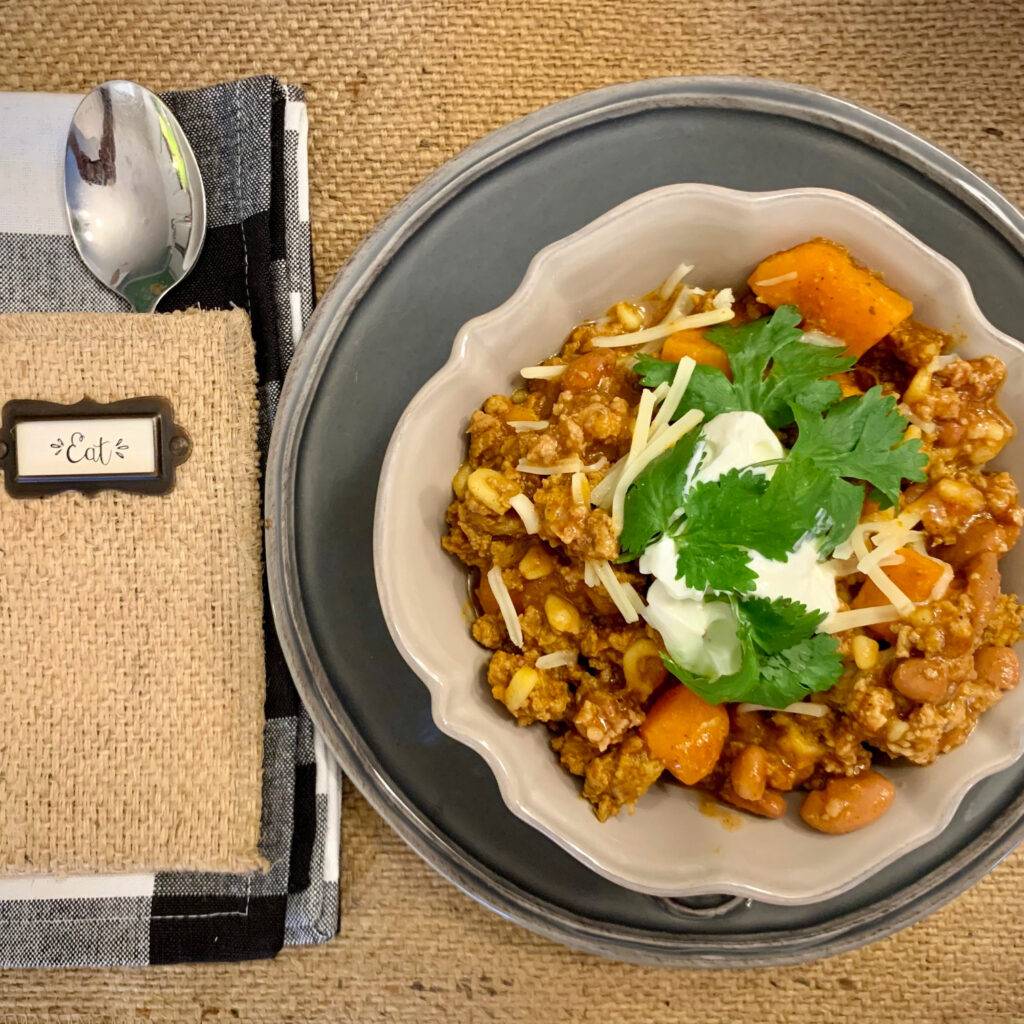
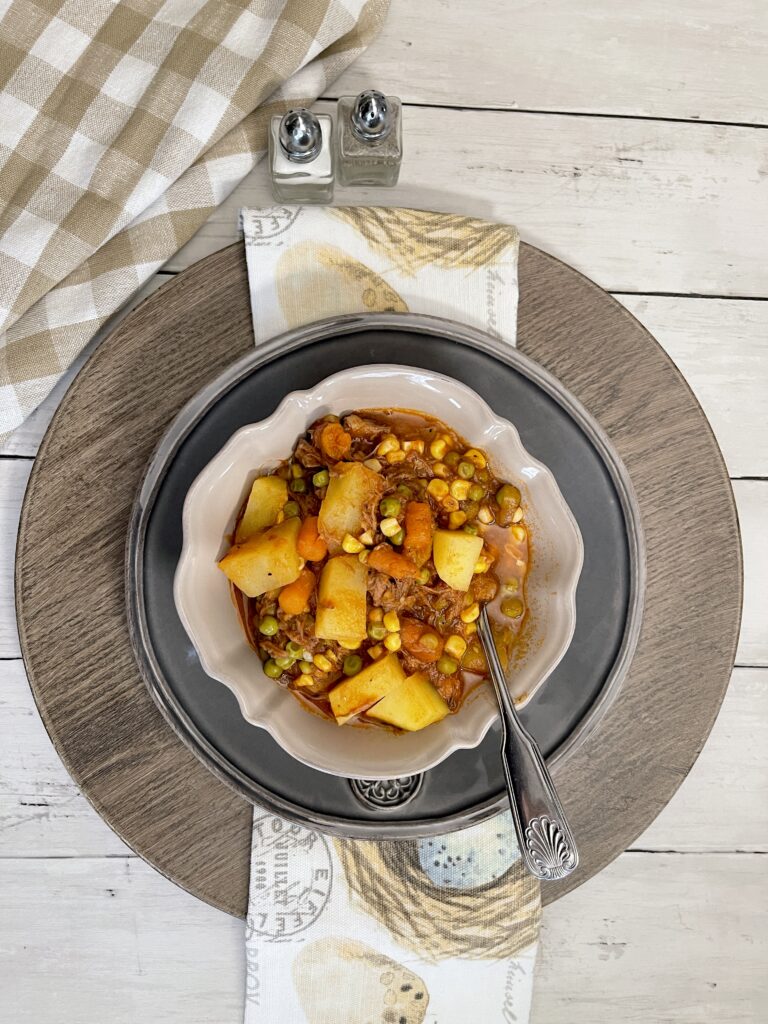
Enjoyment later was truly what happened. That canned tomato juice is a staple in the chili or beef stew that I make during those cold winter months.
Can I tell you that my husband can tell the difference in what I can in my pantry and what you can purchase from the grocery?
I ran out of home canned tomato juice one winter and I have never heard the end of how “bad” that chili was without it!
If I can only can ONE item with summer produce, he would tell you that he can’t live without my tomato juice. Not to drink…but added in every pot of chili or soup that requires a tomato flavor.

Aunt Helen’s Canned Tomato Juice
When we made Aunt Helen’s juice, we didn’t have the Kitchen Aid Food Grinder that I have today.

These attachments to my Kitchen Aid mixer have made canning tomato juice much easier with better control of hot juice now not going everywhere.
As the tomatoes are added into the hopper, I just keep the setting on low/stir so that I can more easily watch the pulp, add tomatoes and monitor the seed/peeling chute to make sure that they don’t dump back into that beautiful juice and pulp in the pan in the middle.
The Original Processor
The original processor was manually turned with the pulp and juice going out one way and the seeds and peelings out another tube. It worked beautifully. No need to peel or core the tomatoes.
Controlling everything while turning the crank was a little more difficult than my electric Kitchen Aid set up today.
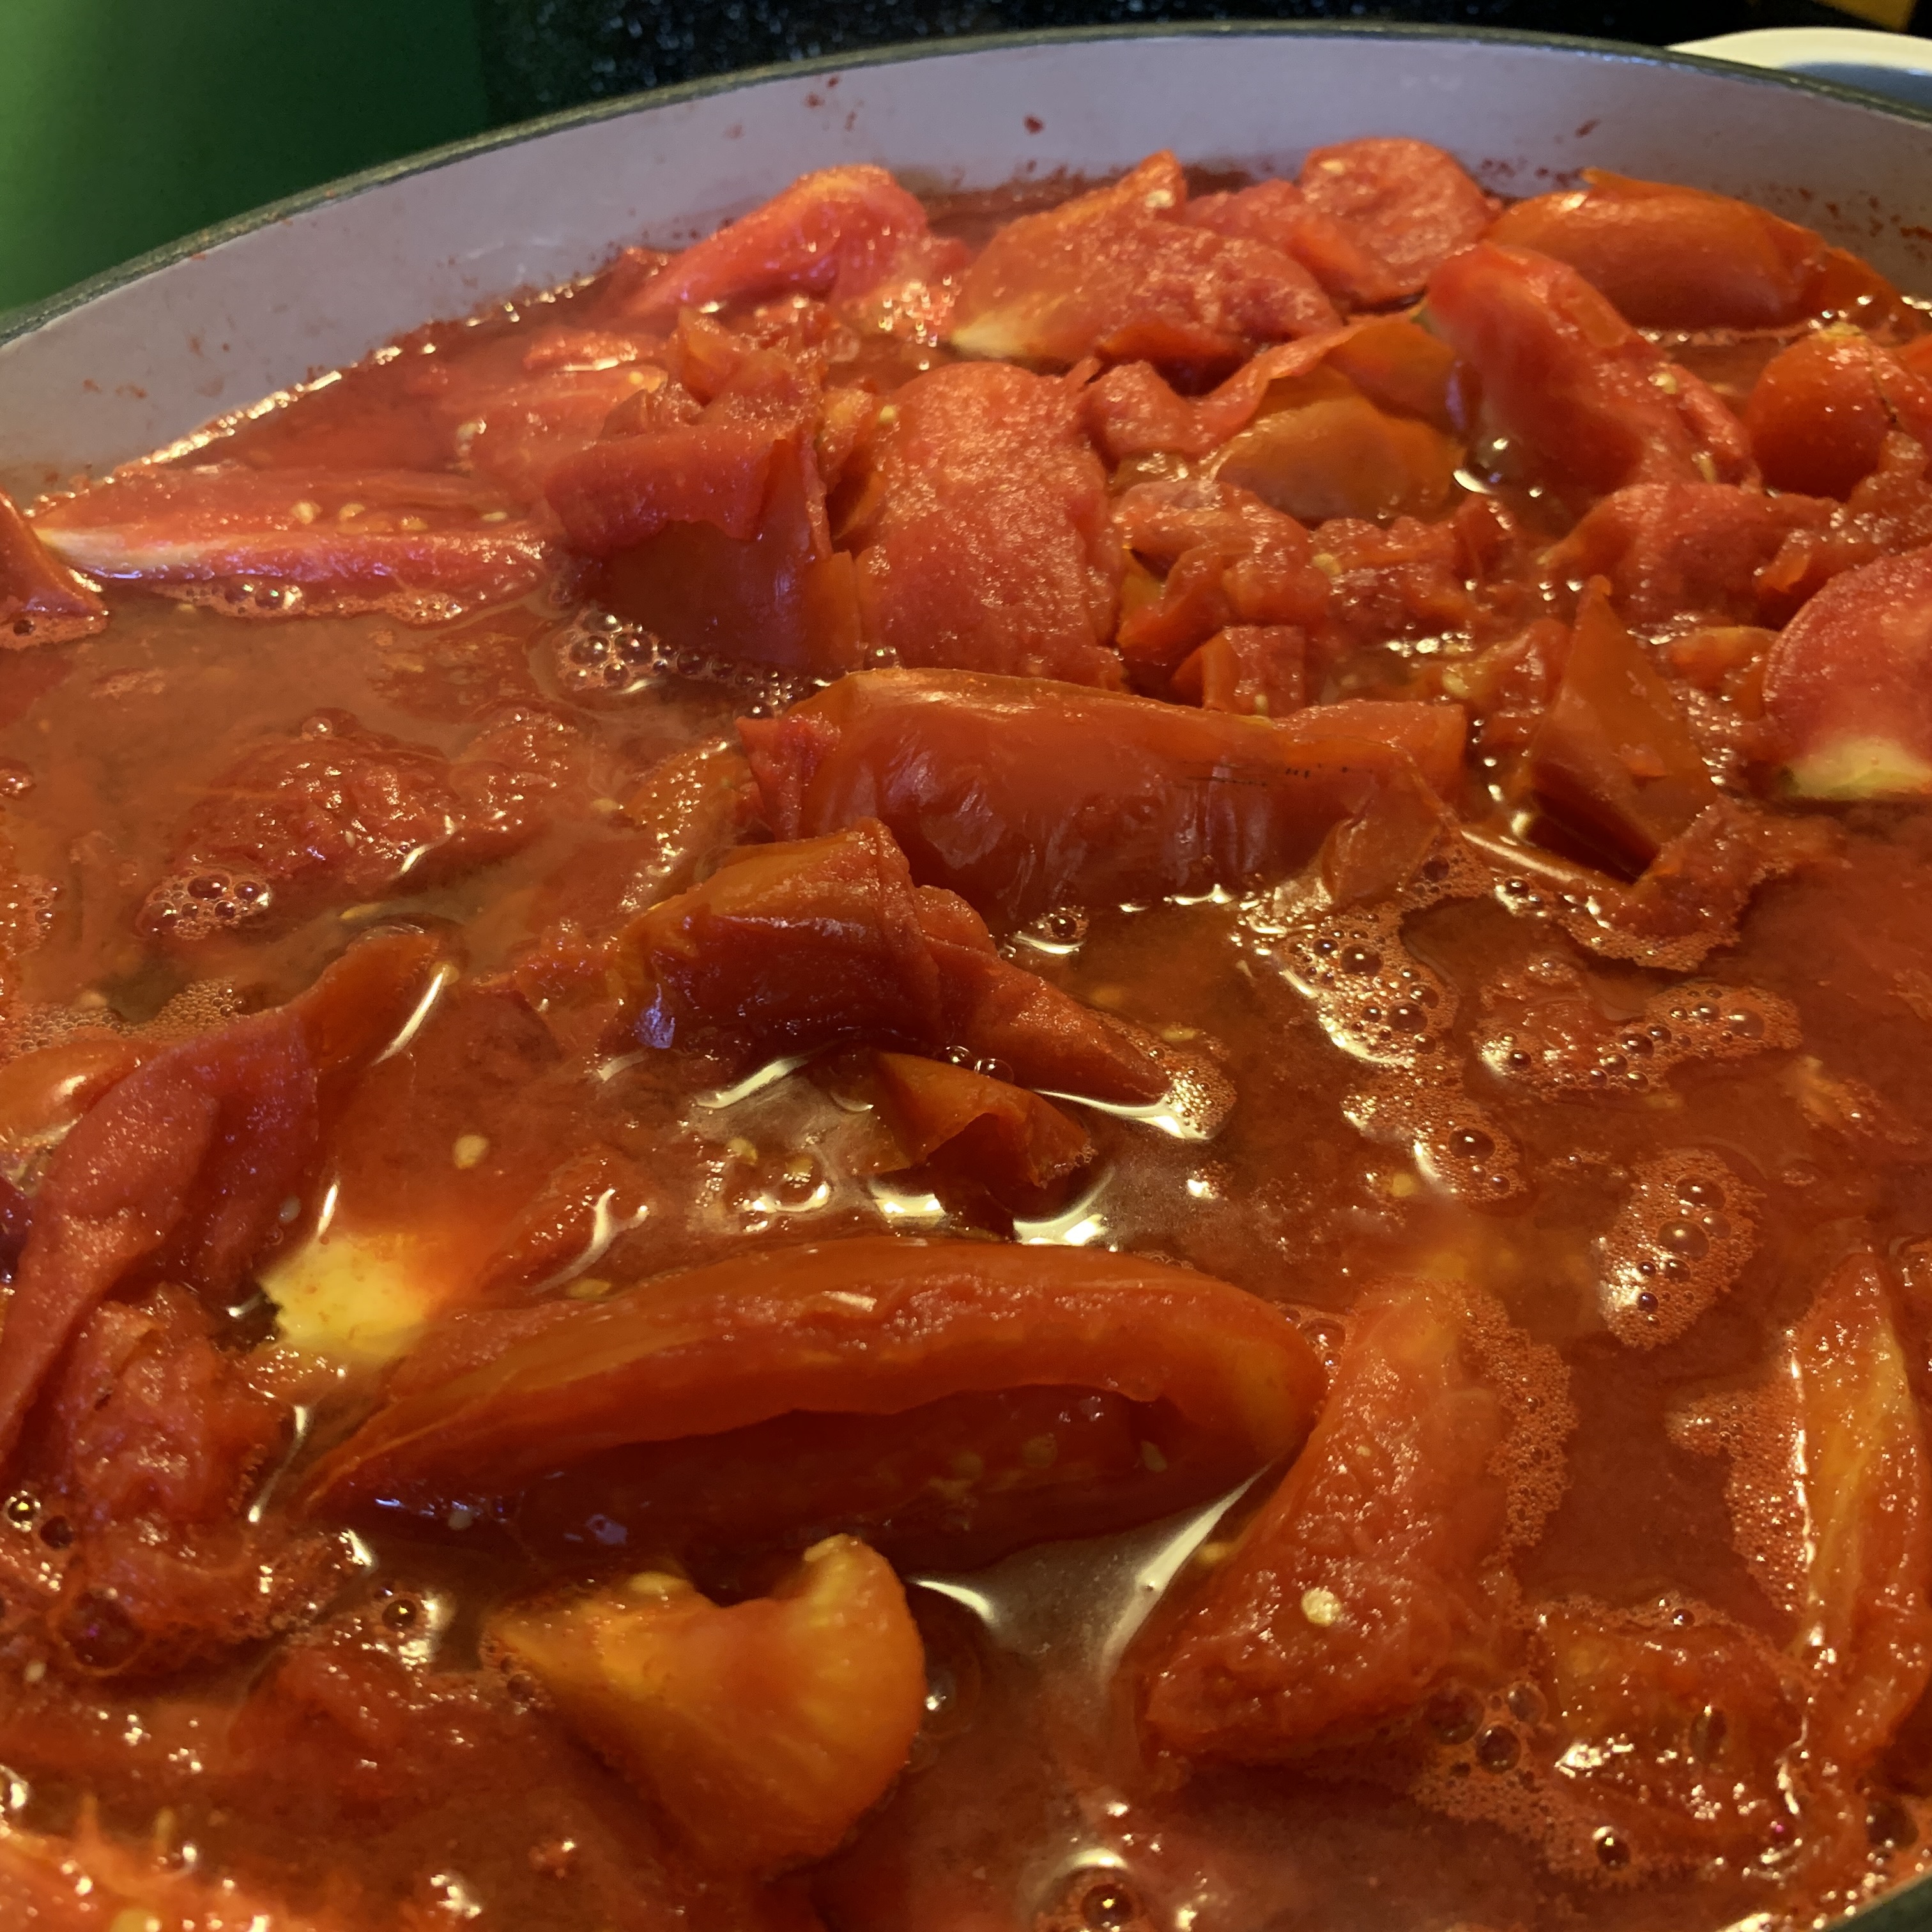
Aunt Helen taught me to just quarter the tomatoes, add them to dutch ovens (without water) and as they cooked they produced their own juice.
Once the tomatoes were cooked down –in about an hour–they were run through the press that looked something like this:

I still use one of Aunt Helen’s Club Aluminum dutch ovens when I make tomato juice today.
Sentimentality for sure.
And that tomato juice recipe?
Well, you see, Aunt Helen didn’t have a recipe for the tomato juice we made together.
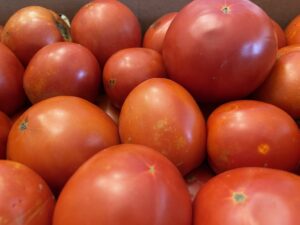
Tomatoes were never measured or weighed. They were just picked ripe from her garden and canned immediately.
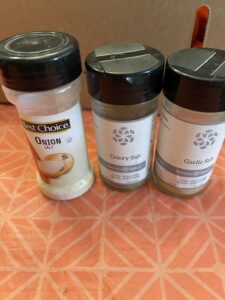
There were ingredients that had to be added by her little hand–onion salt, garlic salt and celery salt.
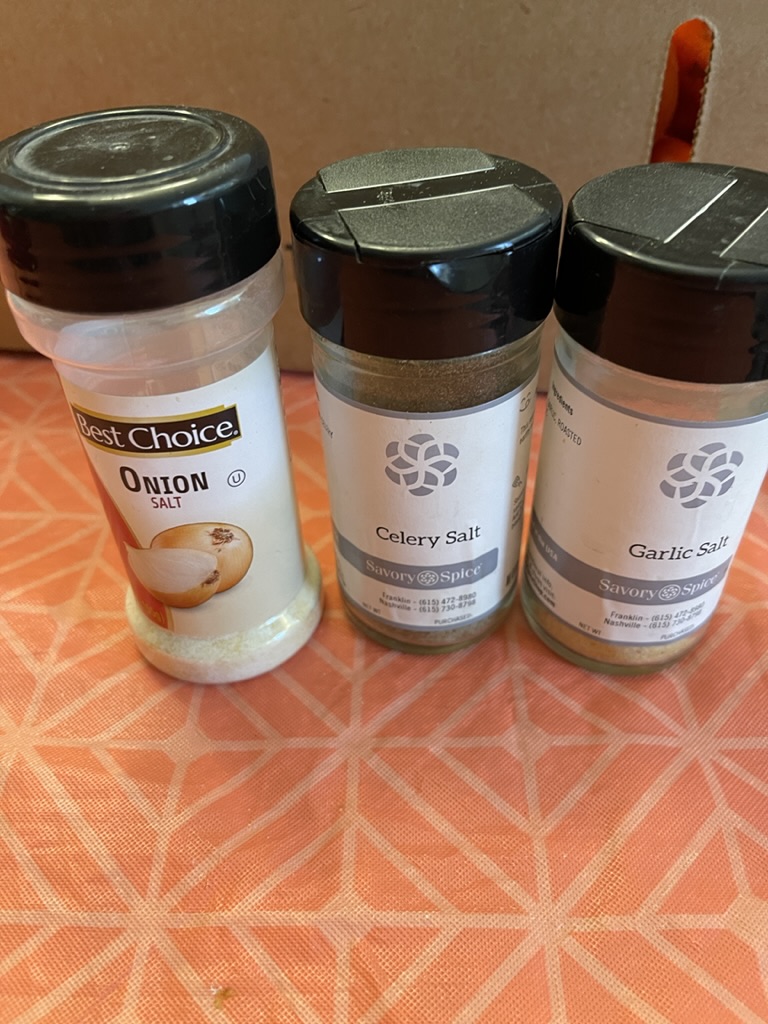
She would sprinkle them into the stockpot and then taste and have me taste.
When we loaded those hot jars with hot seasoned tomato juice, she just flipped the jars over to seal them.
The home economics teacher background in me was more than concerned about the safety of her method…and soon, a water bath canner joined our canning gatherings.
I miss those hours with her in her kitchen. The conversation and camaraderie of working side by side with that sweet woman who loved me was precious.
As I grew older, my need for a recipe to keep Aunt Helen’s tomato juice flavor intact became a priority.
Many of you may be reading this and reminiscing about canning on a farm or with a family group. One of my friends shared her family farm canning extravaganza on FaceBook.
Oh, my! 100 jars of tomato juice in one day, along with kraut and potatoes canned.
WOW! To have that ability, teamwork and lineage would be amazing.
Canned Tomato Juice Recipe
So, this is my version of “how to can tomato juice” that we created during our years of canning together. Feel free to add more or less salt if you create your version.
That best canner, (Aunt Helen), taught me that you always just wash and quarter those tomatoes and add them to a pot and let them cook down before running through the grinder. No water added–pure tomatoes in their own juice is the result. Beautiful tomatoes that produce the BEST pulp!
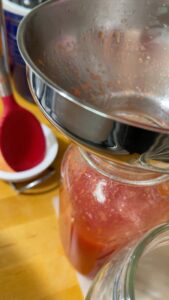
The tomatoes are placed into the top where the pulp and juice go into my favorite glass Kitchen Aid bowl to add back to the my lodge stockpot to reheat.
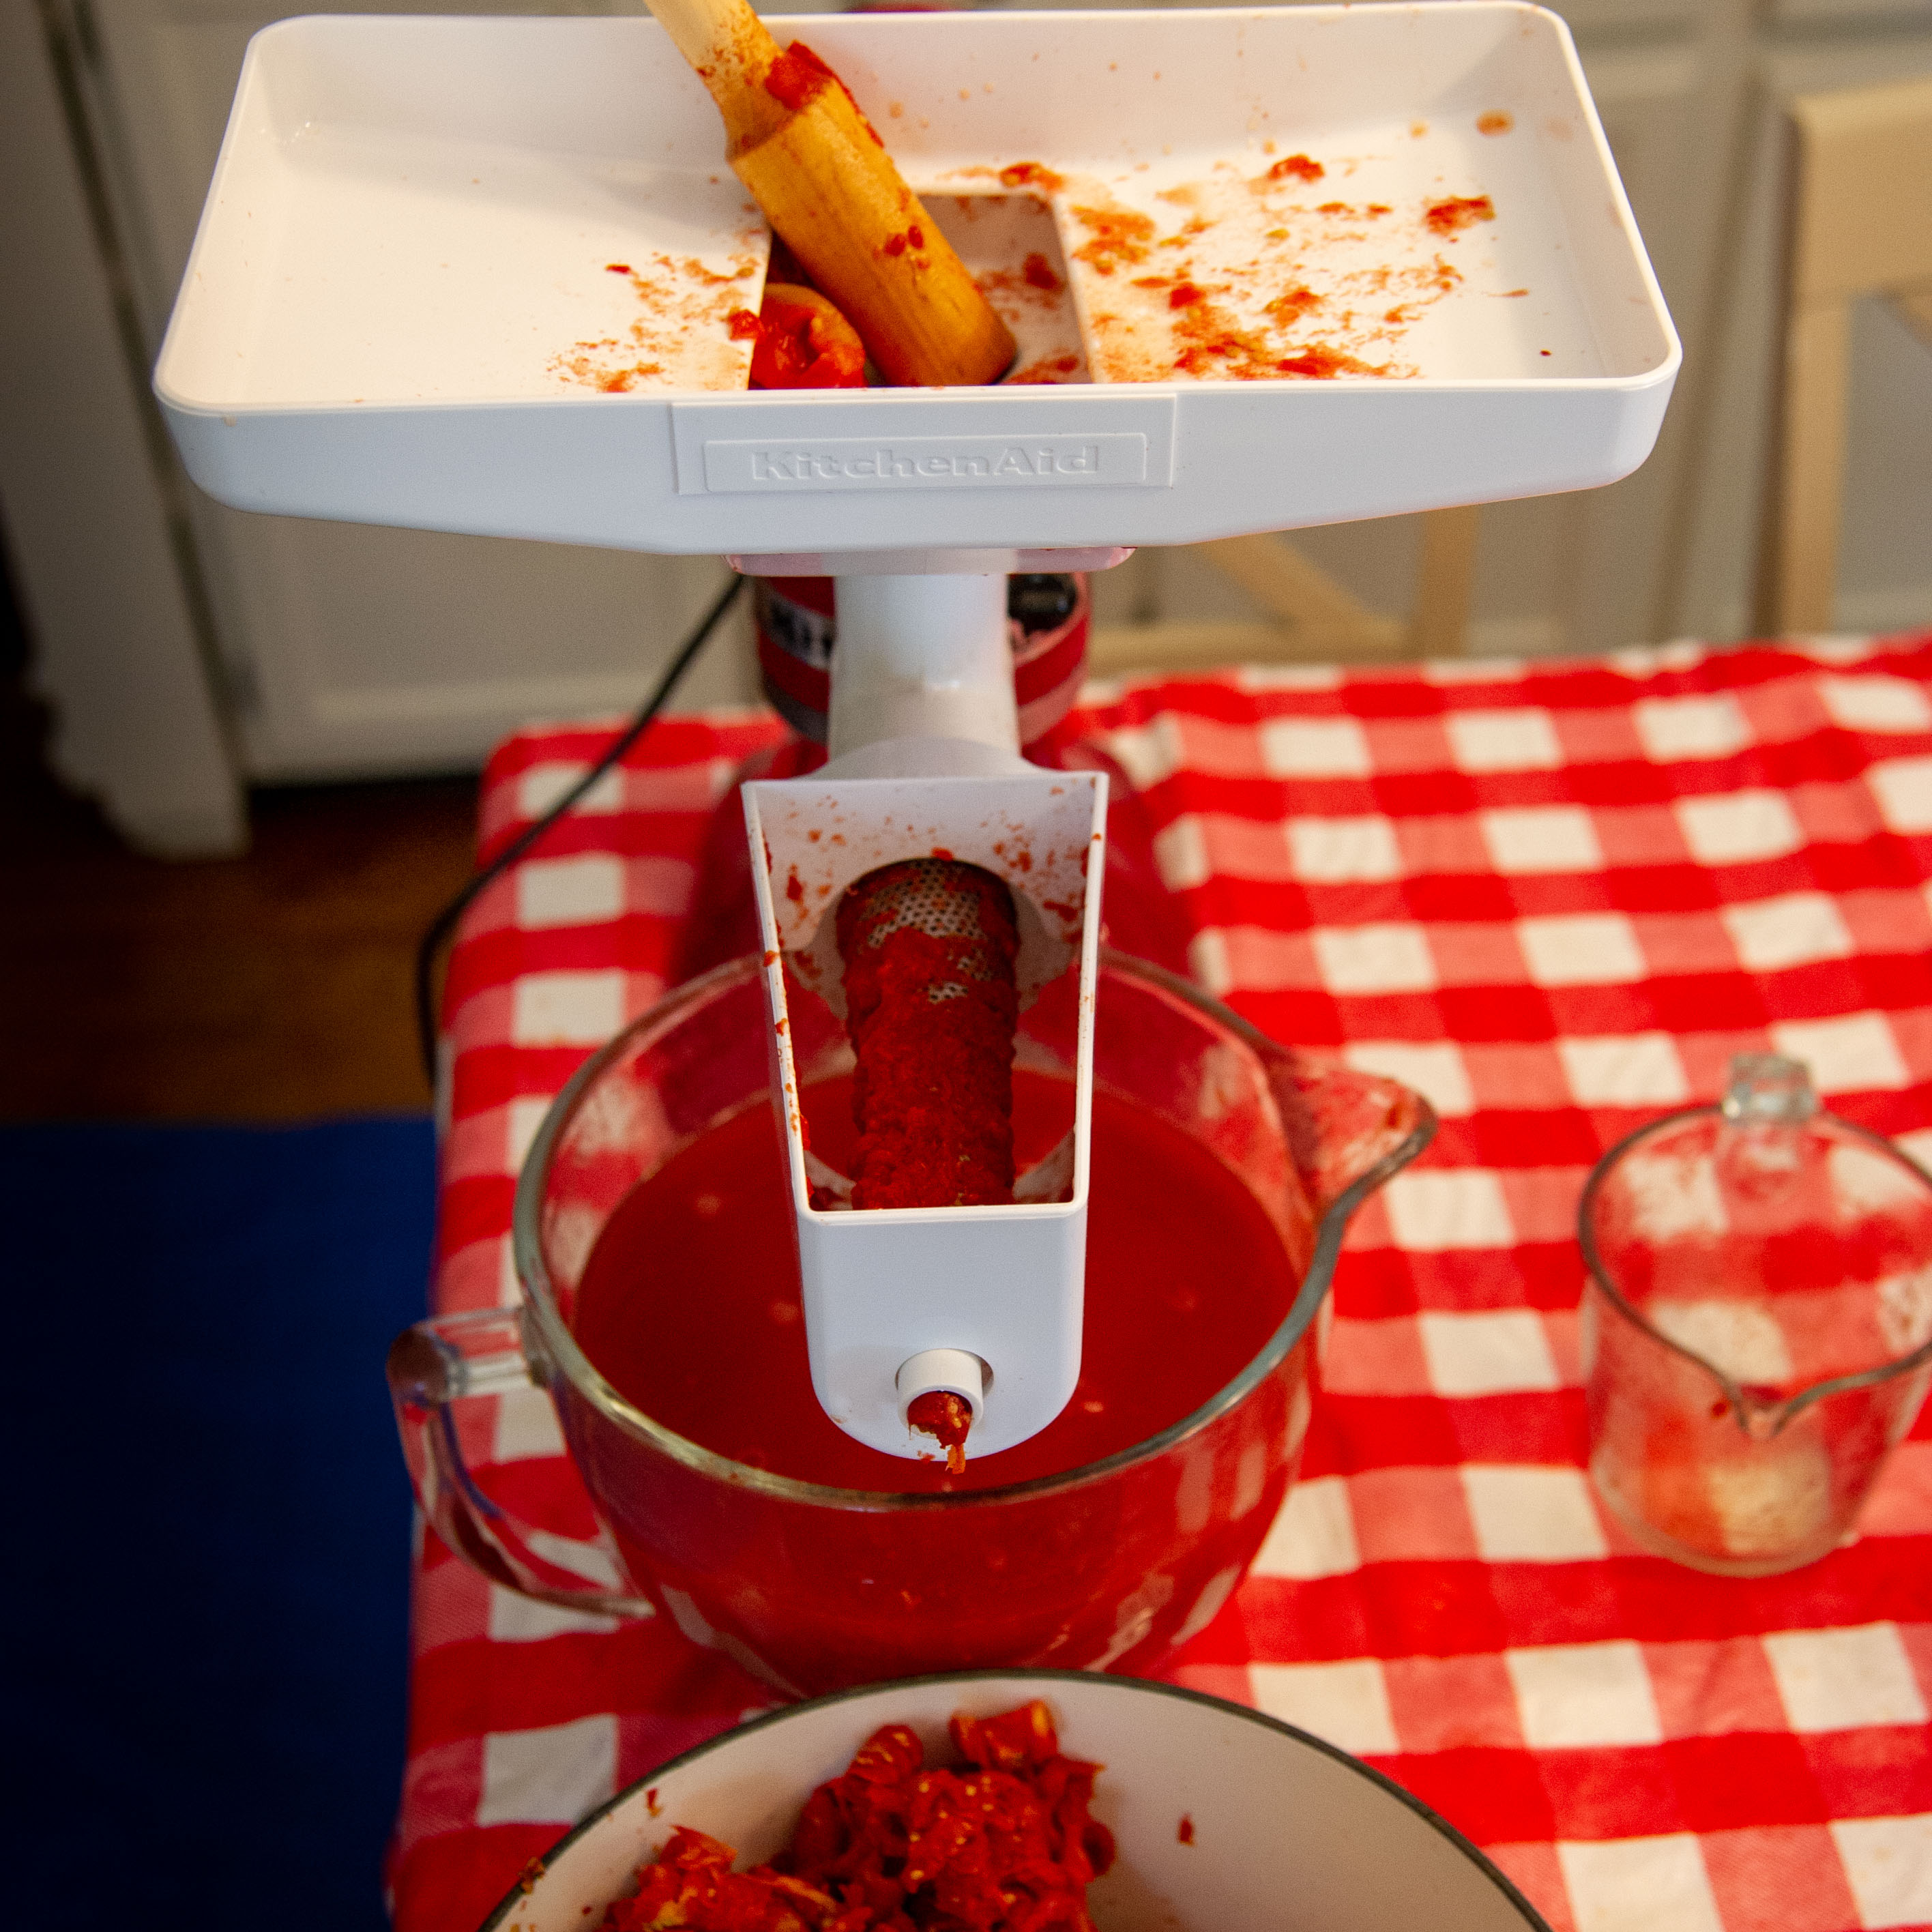
Do you see that great tomato juice and pulp in the bowl? and on the strainer? I scrape off the pulp from the strainer to make sure that none of it gets left behind! The bowl in front catches the seeds, peelings and cores.

That kitchen aid glass bowl is one of my favorites for everything.

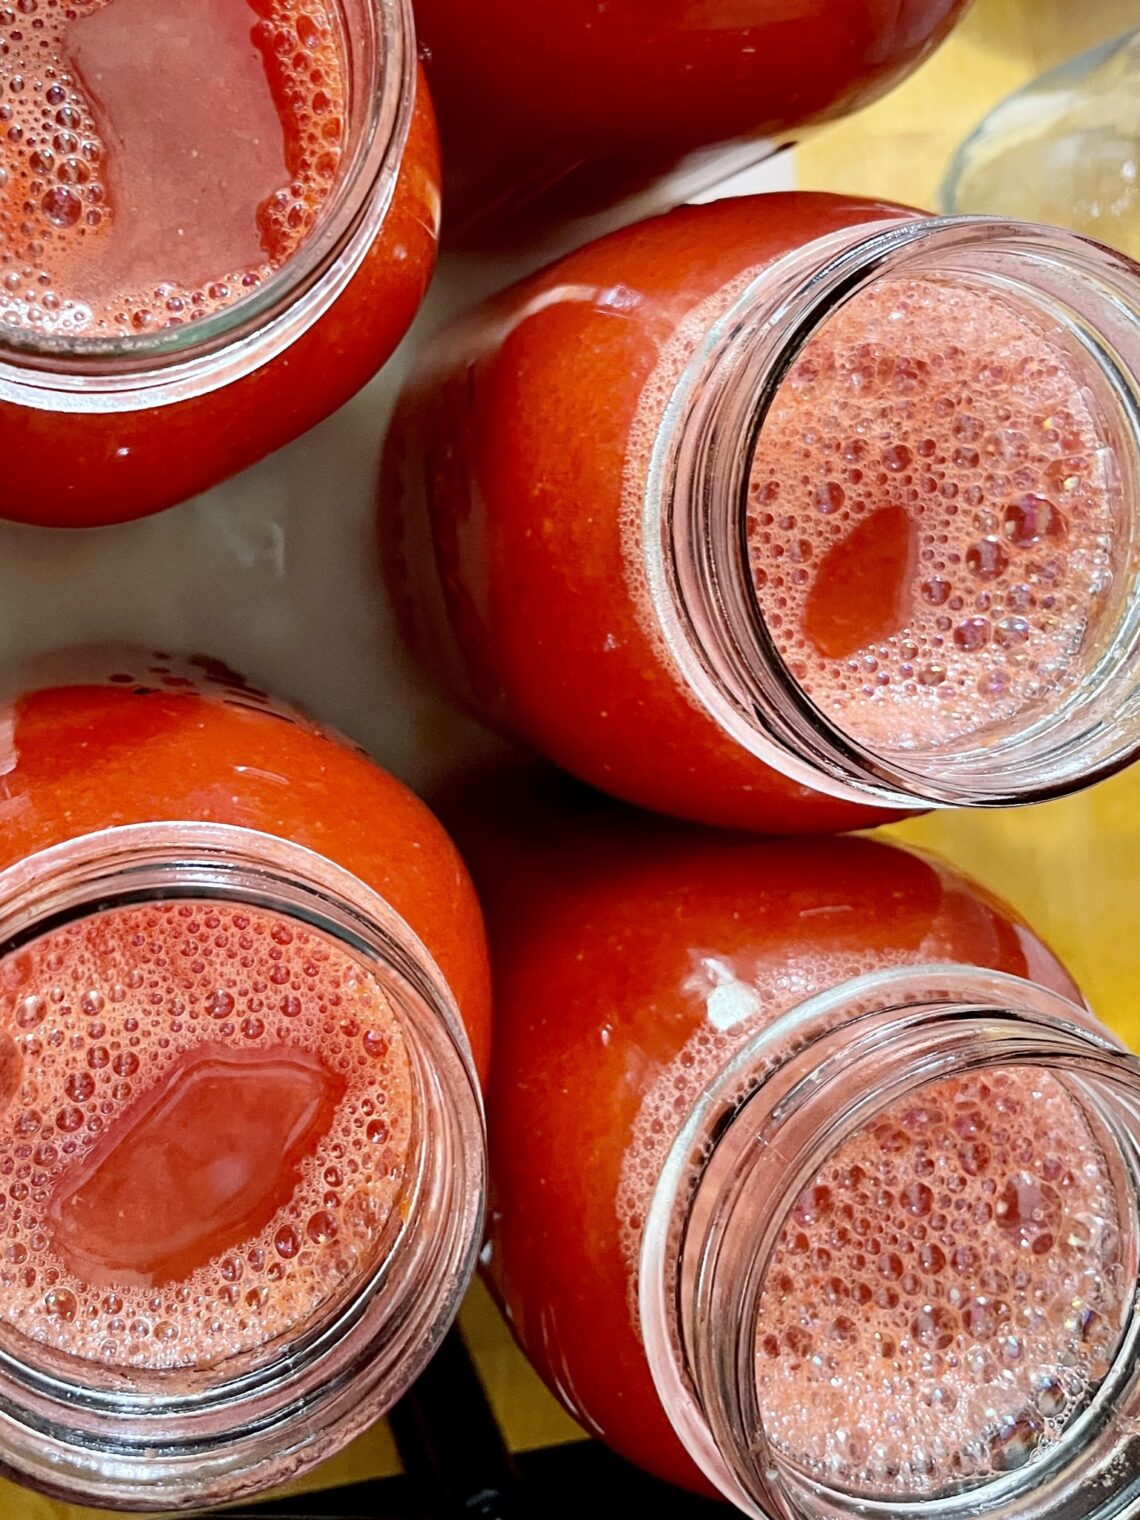
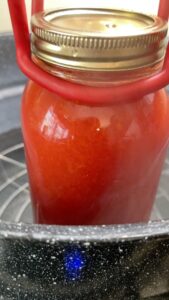
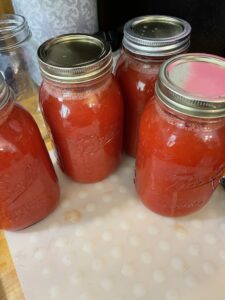
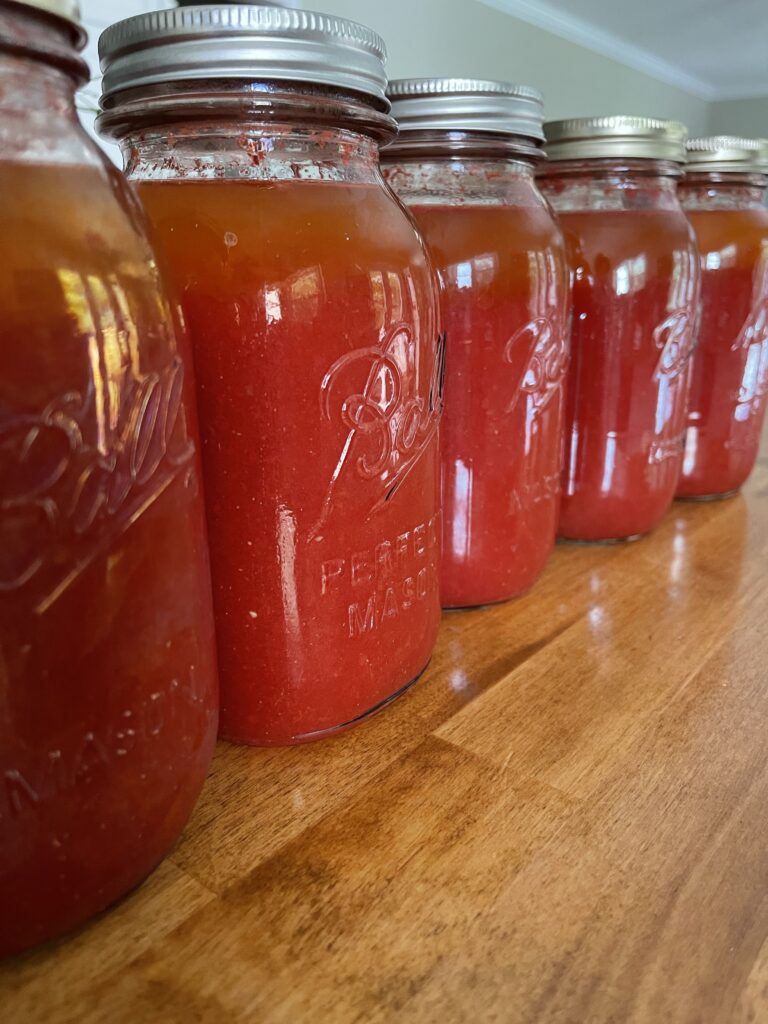
Canning Tomato Juice
After seasoning the tomato juice with celery salt, onion salt and garlic salt, it goes back onto the stove and is heated so that it’s hot when added to hot jars.
Home Canned Tomato Juice
Equipment
- 1 Stove
- 1 water bath canner
- 1 stockpot or 2 Dutch ovens
- 1 Kitchen Aid Mixer
- 1 Kitchen Aid Fruit/Vegetable mixer attachment
- 1 Kitchen Aid Stand Mixer Food tray
- 1 Kitchen Aid Food Grinder attachment
- 6 quart canning jars, lids and rings
- 1 Jar lifter
- 1 lid lifter
- 1 canning funnel
- 1 2 c liquid measuring cup or ladle
- 1 paring knife or chef's knife
- 1 cutting board
Ingredients
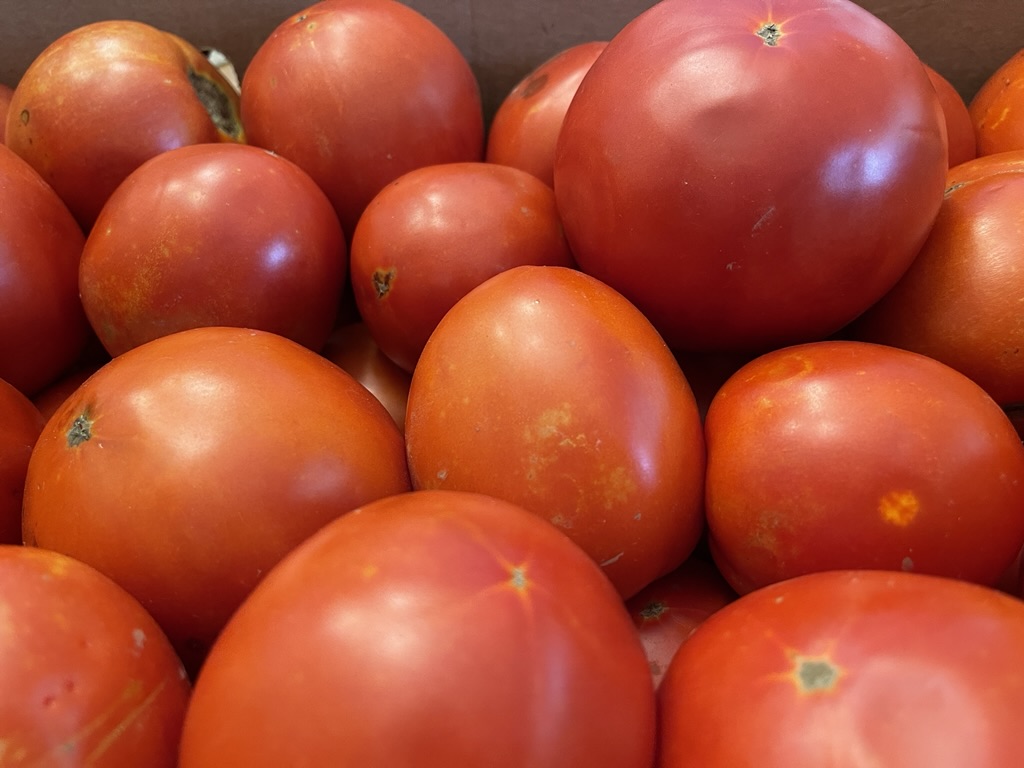
- 20 lbs canning tomatoes
- 1 T garlic salt
- 1 T onion salt
- 1 T celery salt
- bottled lemon juice
Instructions
- Make sure that you have all of the supplies you need before beginning: Clean water bath canner; stock pot/dutch ovens; kitchen aid mixer with attachments set up; jars checked to make sure there are no nicks and then have them washed and heated; canning lids/rings; tomatoes; and seasonings.
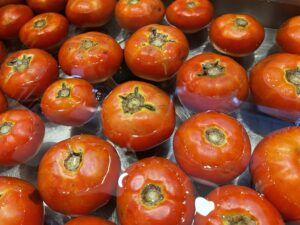
- Place all tomatoes in a sink of cold water and wash.

- Remove any bad spots from tomatoes with a knife.
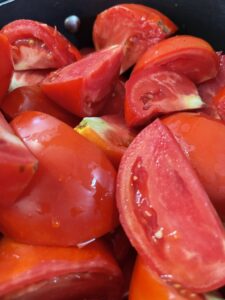
- Cut each tomato into quarters, leaving cores in and skin on. I find a cutting board helpful to cut the tomatoes into quarters.
- Add cut tomatoes into one stockpot or if dutch ovens–it may take 2 to hold all of them.TIP: If you are doubling the recipe, and making more than one batch, a large stockpot may be easier to heat the tomatoes/juice at one time.
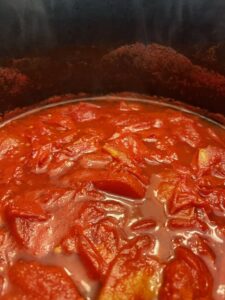
- Add no liquid to these! Simply place onto the burner of the stove and cook until the tomatoes are cooked down and falling apart. It usually takes me an hour to do this.
- Stir occasionally to prevent sticking.
- When tomatoes are cooked into "pieces", remove from the stove. I have cooled these down before adding to the Kitchen Aid strainer to make it less likely to get burned. But, they can be added while still hot, too.
- I always cover my work area for the mixer with a flannel backed vinyl tablecloth to make cleanup a little easier. and protect my counter top from the heat.
- Add the kitchen aid attachments to the mixer as directed.
- Place a pan (or your kitchen aid mixing bowl) under the mixer to catch the juice and pulp. TIP: To measure your juice, you may place a Kitchen Aid Glass measuring bowl to see how to divide into two dutch ovens to season and reheat if it produces more tomato juice than one pot can hold.TIP: It's easier to place the container you want to reheat the sauce in under the mixer rather than transferring hot liquid to the cooking vessel later to reheat.(if it will hold all of the juice).
- Add another pan at the end where the peelings and seeds are discarded.
- Turn the mixer on and add the tomatoes to the top hopper until all of the tomatoes are through the mill.TIP: A 2 C pyrex liquid measuring cup to scoop the hot tomatoes from the pot to the hopper works well.
- Make sure that you remove the pulp from the strainer attachment into the juice. Too much goodness there!
- Add the stockpot or dutch oven with the juice that has been milled back to the stove and reheat it after adding the onion salt, garlic salt and celery salt.TIP: Taste to make sure that it's seasoned to suit your taste.
- Prepare the water bath canner with water and begin heating.
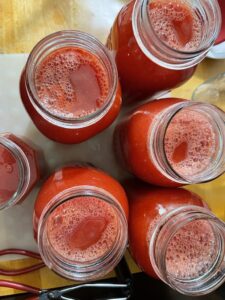
- Your jars should be hot when loaded with the hot juice. I often just run them through the dishwasher so that they are clean and hot when ready to load then with juice. Otherwise, you can add them to the water bath canner as it heats and then remove with the jar lifter when ready to load them.
- NOTE: In the past it was recommended to boil rings/screw bands and lids. There has been a change in lid production now and it is NO LONGER RECOMMENDED to boil lids as it will prevent them from sealing correctly.ALL lids have to be new, too. YOU CANNOT reuse canning lids for safety reasons. There are other types of re-usable types of lids called "Tattlers". If you have those available, follow their recommendations.
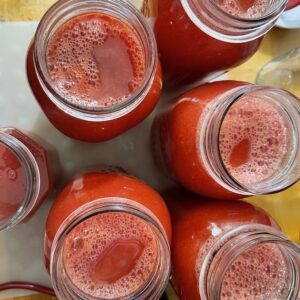
- Place the jars on a heat resistant flat surface, add the funnel to a jar and begin filling it with the hot seasoned juice with a ladle or 2 C liquid measuring cup.
- **Safe guidelines recommend that you add 1 T of bottled lemon juice to each pint or 2 T to each quart.
- Fill each jar with juice to 1/2" headspace from the top of the jar.
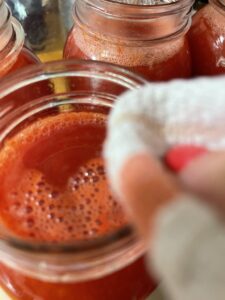
- Wipe each jar rim with a damp paper towel or damp cloth.
- Add the lid to the top and the ring/screw band to the lid to "finger tight" tightness. Do not over tighten.
- Using the jar lifter, add each quart jar into the water bath canner that has been filled with water that has been heating.
- Make sure that there is 1-2" of simmering water covering the jars in the canner.TIP: When I begin loading the canner I make certain that my electric tea kettle is full and hot so that I can save time by adding water to cover the jars.Cover with the lid.
- Begin processing time when the water begins boiling. Process covered for 45 minutes for quarts; pints, 40 minutes.
- Prepare for jars to rest by placing a clean dish towel on a counter in an area free from drafts.
- When time has ended, remove the cover and leave the jars in the canner for 5 minutes before removing the jars with a jar lifter to the dish towel covered counter.
- Leave jars to rest and seal for 12-24 hours before moving and labeling with contents and date.
- Make sure that all lids have sealed –lids are indented to make sure that they have processed correctly. NOTE: If they are not sealed, you may remove the lid, clean the rim again and replace lid and ring and reprocess OR add it to your refrigerator to have to drink or add to recipes with a few days.

Notes
Just a note…tomato juice will separate into pulp at the bottom and juice at the top when you store it. There’s nothing wrong with it–it’s just what it does!
Safety with home canning is my goal.
Always. There are some important guidelines that I always follow. I realize there are lots of groups that can lots of crazy things in lots of crazy ways…but, if it places my family in jeopardy…I will always lean on the side of safety.
A couple of things about safety:

- always make sure that all of your work area and equipment are clean.
- check your jars to make sure rims have no nicks and are smooth. Discard if they have issues.
- while we are talking jars–avoid using commercial jars– designed for single use only and may not withstand temperatures AND really old jars may not fit with today’s seals on lids.
- follow safe canning guidelines – I follow the Blue Book and the National Center for Home Preservation to find the best information.
- recommendations are to use canned foods within a year and monitor the color, smell and look when opened and MAKE SURE the lid is sealed when you open each can. I do use canned goods longer than a year, but I monitor closely to make sure it is sealed and looks and smells before using.
- ALWAYS label each jar you can with the name and date. I often will add where the produce came from, as well. You can add cute labels or simply write it with a sharpie on the lid.
- It’s recommended to remove the rings/bands before storing so that you truly know if it stays sealed. I’m guilty of leaving my rings on at times.
- Always use the recommended way to can each type of food for safety–water bathed or pressure canned.
Why Can?
One last thing before I leave you today is the answer to the question, “why can”?
Here are MY reasons:
- Home canning provides the BEST tasting food for my family! Hands down…can’t be replaced!
- I know what’s in my food–especially if I know the farmer and techniques used from where I buy my produce.
- The ability to take charge of the quality of food that my family eats–no preservatives or chemicals! That’s huge.
- It’s rewarding to take fresh produce and add it to my pantry.
- I’m passionate about canning! What else can I say?
Challenges?
There are definitely a few challenges in canning today.
- If you don’t have the equipment… cost of purchasing the set up with canners, jars, etc. to begin is the first hurdle.


- Cost of the produce if you don’t grow it is a huge one. Is it cost saving? It hasn’t been this year. Each jar has been like gold for what farmers need for what I have purchased this year. If you have to purchase produce…it won’t be the most effective budget friendly way to buy canned goods.
- It’s a lot of time and hard work!
But…for me? The benefits of home canning outweigh the challenges.
Don’t mind me…I’ll just continue to can as long as I can and share all of my sweet success and recipes with you!
Just finished canning 60 pounds of tomatoes this weekend into this tomato juice and more marinara.
This week I’ll be making more pepper jelly and sweet pickle relish before the last round of carrot cake jam for gifts.
ONE MORE TIP: with such hot weather this summer, I am seeing the canning produce leaving us earlier than usual this year…so, if home canning is on your plan…you might head to find produce NOW!
AND AN ANNOUNCEMENT!!!
For all of you who have reached out to me to learn to can…I hear you! I’m putting plans into place to host classes…if you are interested, let me know in the comments or message me! SOOOOO excited to share my love for canning with all of you! How much fun would that be?!!!
Happy Canning!
As an Amazon affiliate, I have added links to equipment that will make your canning a success! If you shop through the links…it costs you no more and provides a tiny commission to help this blog.


18 Comments
Rhoni Lowery
I want to learn canning.
Leslie J Watkins
We will make that happen, Rhoni! What do you want to can?
Martha+Wallace
What a joy to see all your fresh produce saved for cold rainy days. So glad you added the note about only using jars designated for canning. I knew people who would reuse any glass jar available only to watch them break!
Leslie J Watkins
I am part of a Facebook canning group who reuse old jars. I am so worried about their safety and well being when I read posts from them! Just a couple of more rounds of jam and I think the canning will pause for a while…but, then apples will be coming in, right? Oh, my!
Rachel
I loved reading this. It brought back so many memories of helping Mother. I need to start doing it myself.
Leslie J Watkins
We can definitely make that happen…wouldn’t it be fun in a group? Are you up for it?
Beth Wood
I love your article and website.
Just wanted to share that out neighbor at the lake also cans tomato juice, a ” good hundred or so” yearly.
I said, ” great! Is it for chili or soups?”
“No, wife can’t eat tomatoes,
But I make the best Bloody Mary’s in the Midwest!”
He’s so proud.
Thought I’d share
Leslie J Watkins
I’m sure for a bloody Mary drinker–it makes the BEST ones for sure! I have a friend who cans 300 quarts of tomato juice and then shares with her brother who is the farmer who grows the tomatoes. Once you get the system set up–if I had the tomatoes to can? I’d probably keep canning!
Pingback:
Rhoni Lowery
Relies to this last year. I want to can tomatoes only. I have everything’s I need except tomatoes and a good recipe.
Leslie J Watkins
Garrett’s have great tomatoes right now. Message me and I can help you out! I may be canning more tomatoes this week.
Linda Hart
Oh, Leslie! What sweet memories this conjured up for me! My family always used the Aunt Helen method and non one ever died from botulism… but there was always an element of doubt for me about the safety!! My table doesn’t have many feet under it these days but I love recalling when times required canning and freezing for all our families. It was a precious time in those hot, messy kitchens that yielded beautiful rows of goodness! We were not going to go hungry!
Leslie J Watkins
I know. They survived for years…I just have to be safe and water bath mine! We don’t have many feet under our table either, but, we both are spoiled by using home canned tomato juice for all of our chili and soups. And, we usually save individual containers of those in the freezer for nights when I just don’t want to cook. Soooo good! I would highly recommend it. If you need a canning buddy, come on over!
Pingback:
Pingback:
Pingback:
Pingback:
Pingback: