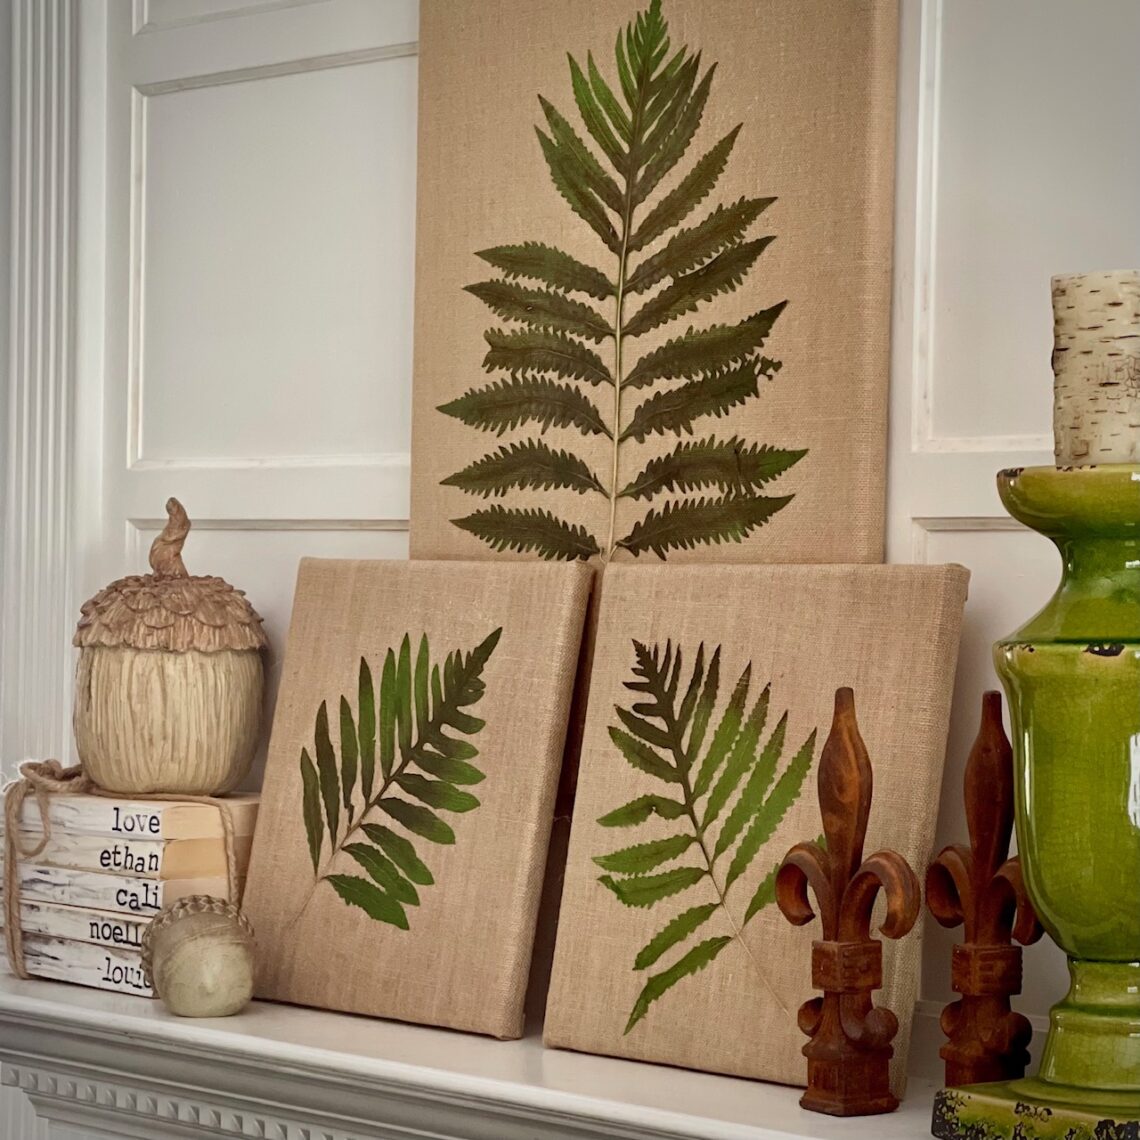
An Easy Way to Create Pressed Ferns
Do you have plants growing in your garden or landscape that you’d love to capture and extend that beauty? Stop time and just hold it closely? That’s what inspired the project that I’m sharing today. A pressed fern project for you to enjoy or to gift.
I was watching a video from a gardener I follow. I was awestruck as he took ferns from his garden and talked about drying those ferns, pressing and mounting them.
There before my eyes were prints that extended the beauty from that garden onto canvases.
That idea of extending garden beauty became a plan.
I have the most beautiful ferns that were gifted to me by a friend from her farm. Sensitive Ferns she called them. My husband diligently brought them home and planted them in the perfect spot along the borders of the woods surrounding our property.
They come up year after year. A little fuller and thicker and are stunning.
Away from the harm of the lawn mower or weed eater or pruning shears–they stay unscathed.
Perfectly shaded and with enough drainage that they stay happy.
Can I tell you that this idea was a near the end of the season project? and those ferns were just not at their best. But to gather the best ones I could was how I began.
A trip to Office Depot for a large pad of newsprint paper to press them into was the next step in the process. Then weights of books were placed on top and tucked under a bed in a guest room out of view for the duration of the “pressing process” to take place.
The first round of instructions said a minimum of six months…
Well…it had been longer than that, so, now was a perfect time to remove them from their drying and try my hand at the next step to mount these.
Can I tell you when I pulled those pressed ferns out for mounting that they were so dry and brittle that I was back to the drawing board?
My second attempt at a new method to press ferns didn’t fare any better.
Mod Podge has a spray that was recommended to spray on leaves to seal them.
Yeah, well…guess what it did to those dried ferns?
I’m sure you guessed it…
It rehydrated them. All of the moisture from the spray put them back to where they were before they dried. I was back to square one. No longer did they lay flat for mounting. They were full and back to their original glory.
Added that to my DO NOT DO AGAIN list.
I realized that my experience in pressing leaves like I did for those school projects from elementary through high school would serve me well again.
Here’s the EASY method that I created and WORKED for pressing ferns to mount:
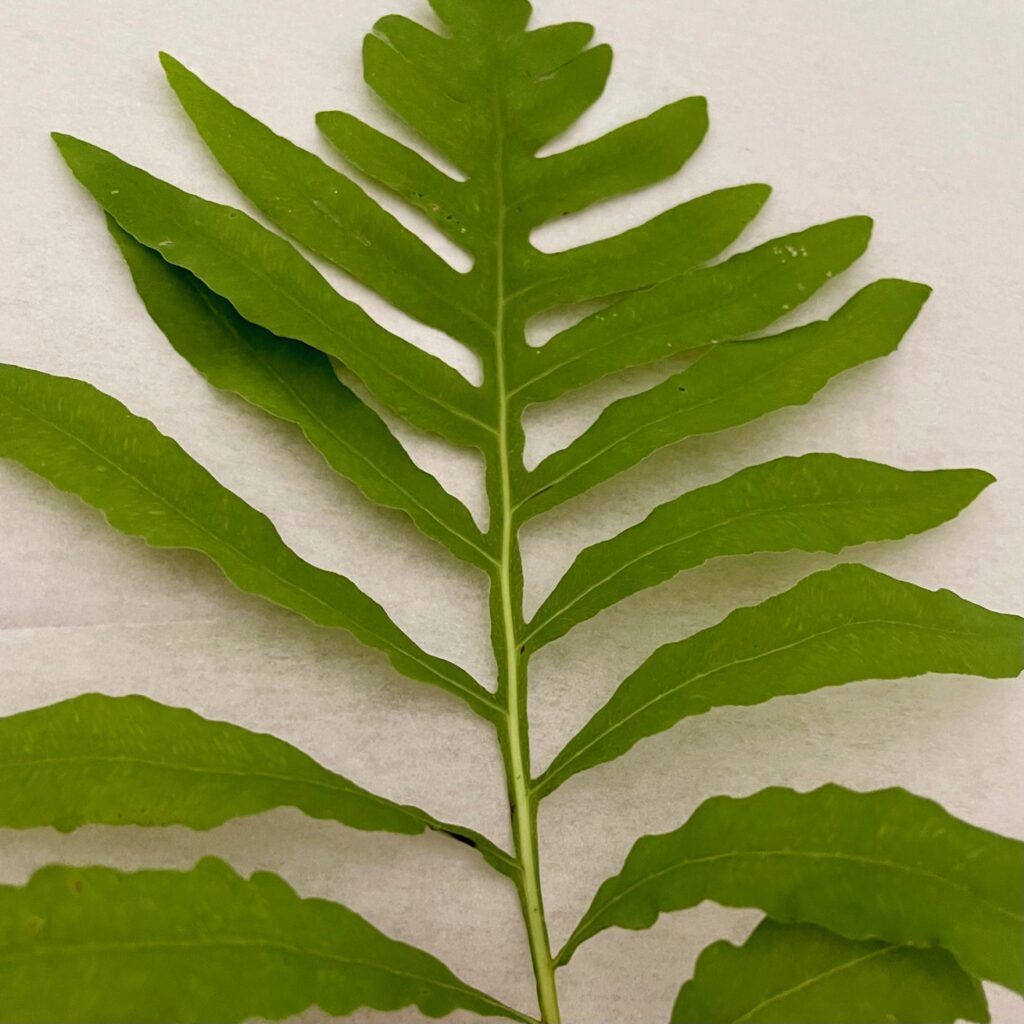
- Snip fresh ferns the size you want, making sure that the leaves look intact.
- Place brown paper over your ironing board to prevent wax from coating the cover.
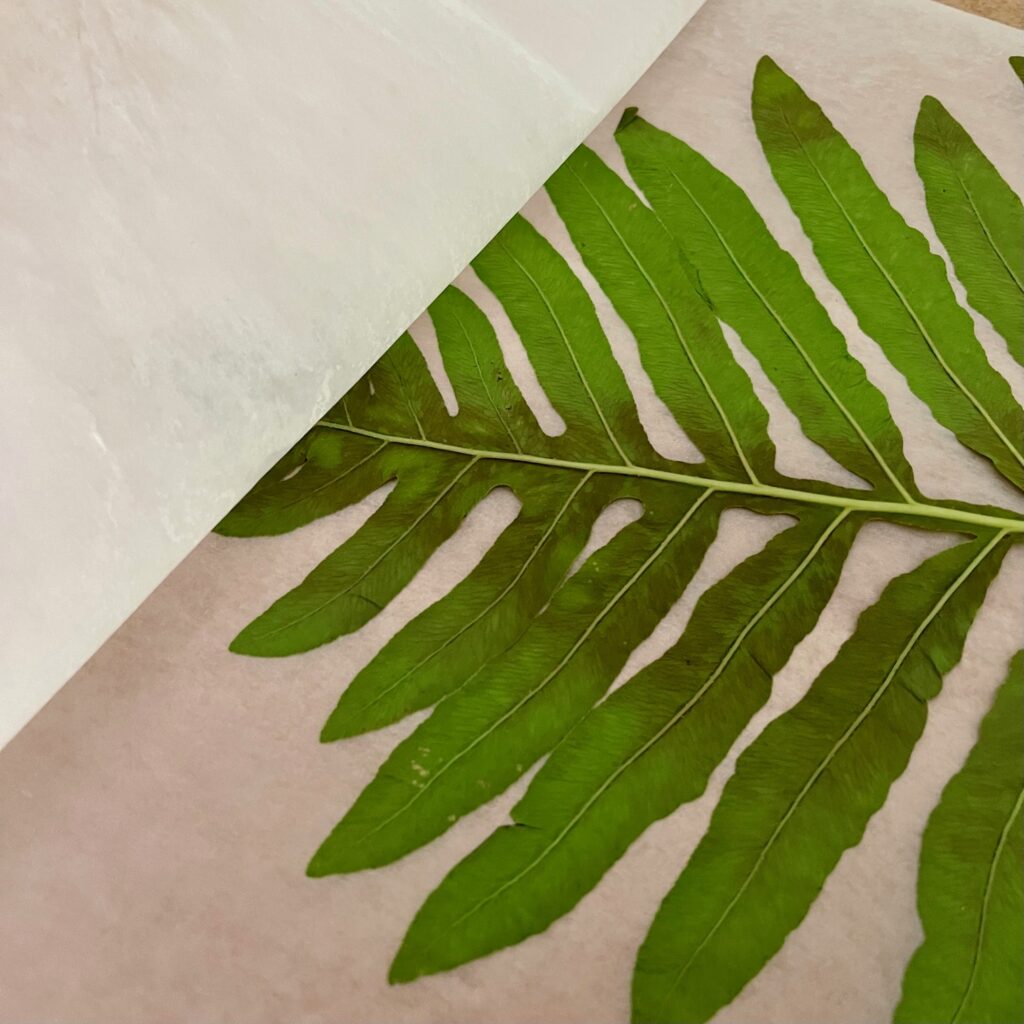
- Lay your ferns carefully between two pieces wax paper.
- Carefully place the wax paper on top of the brown paper on the ironing board.
- Add another piece of brown paper over the wax paper to prevent wax coating on the iron.
- Heat the iron–no steam–and carefully iron the fern between the brown paper and wax paper, coating the fern with wax and sealing. TIP: I carefully lifted the brown paper and flattened each stem before ironing to ensure that it was not twisting as I ironed.
- Flip over and make sure that you iron the back side.
Now that the pressed ferns were flat and sealed with wax, I could begin the next step.
- Carefully remove the waxed paper from the back side of the fern.
- In a well ventilated area (outdoors), spray the back side of the fern while it is still attached to the waxed paper on the front side.
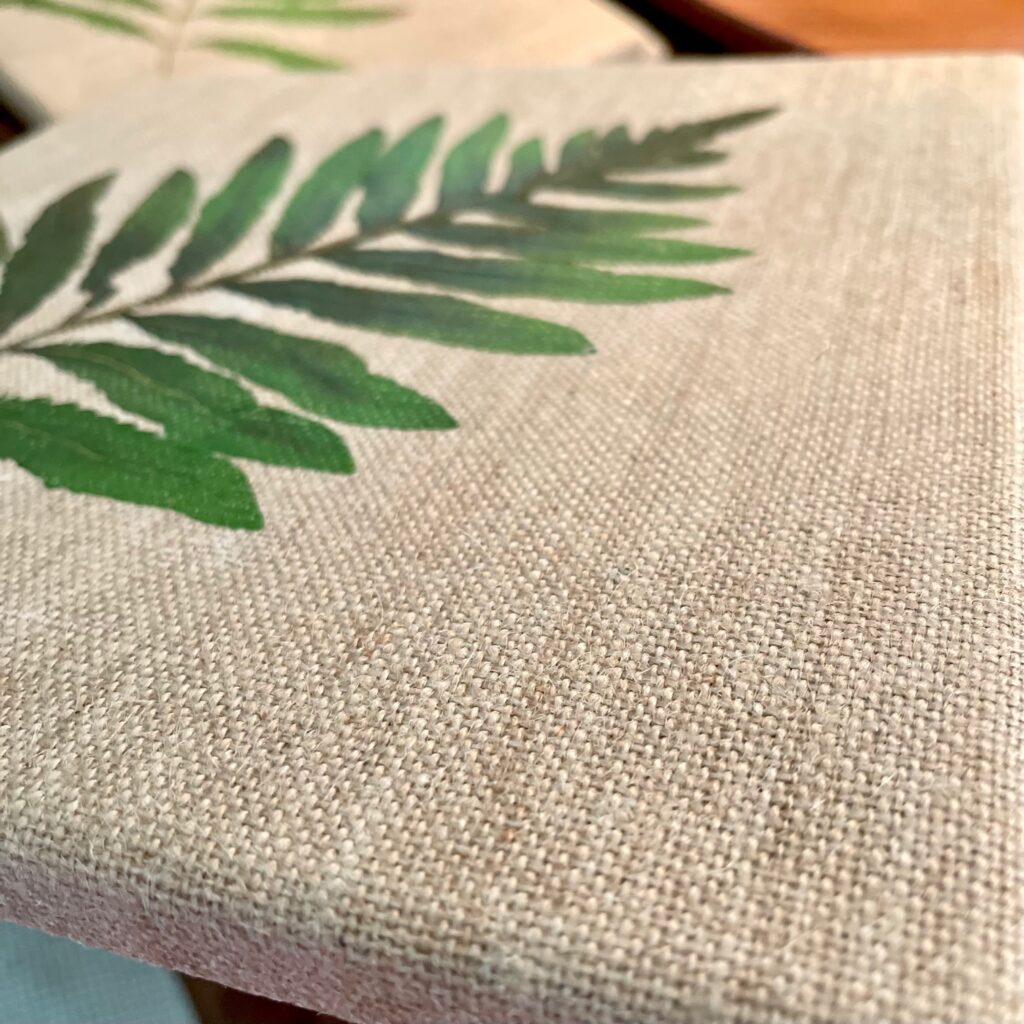
- Flip over and position on whatever you are mounting it to. I chose burlap canvases.
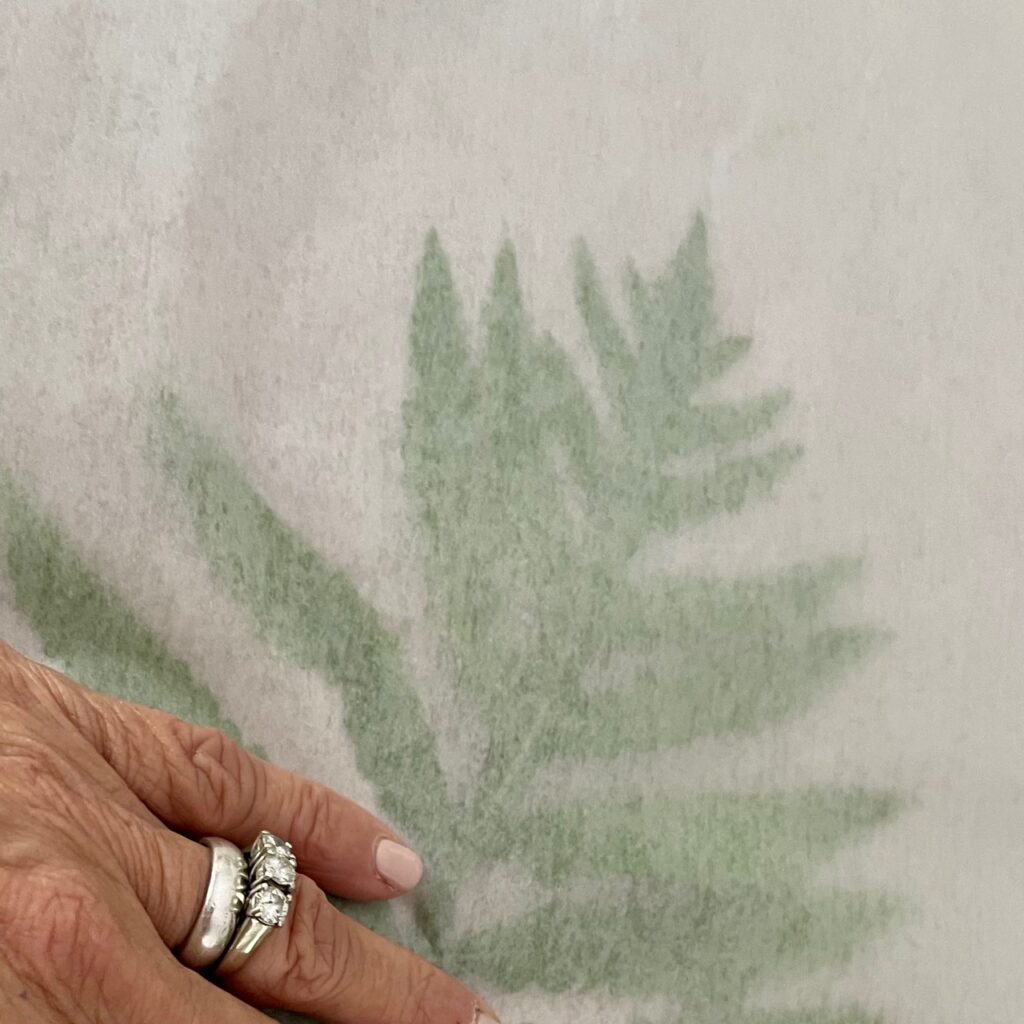
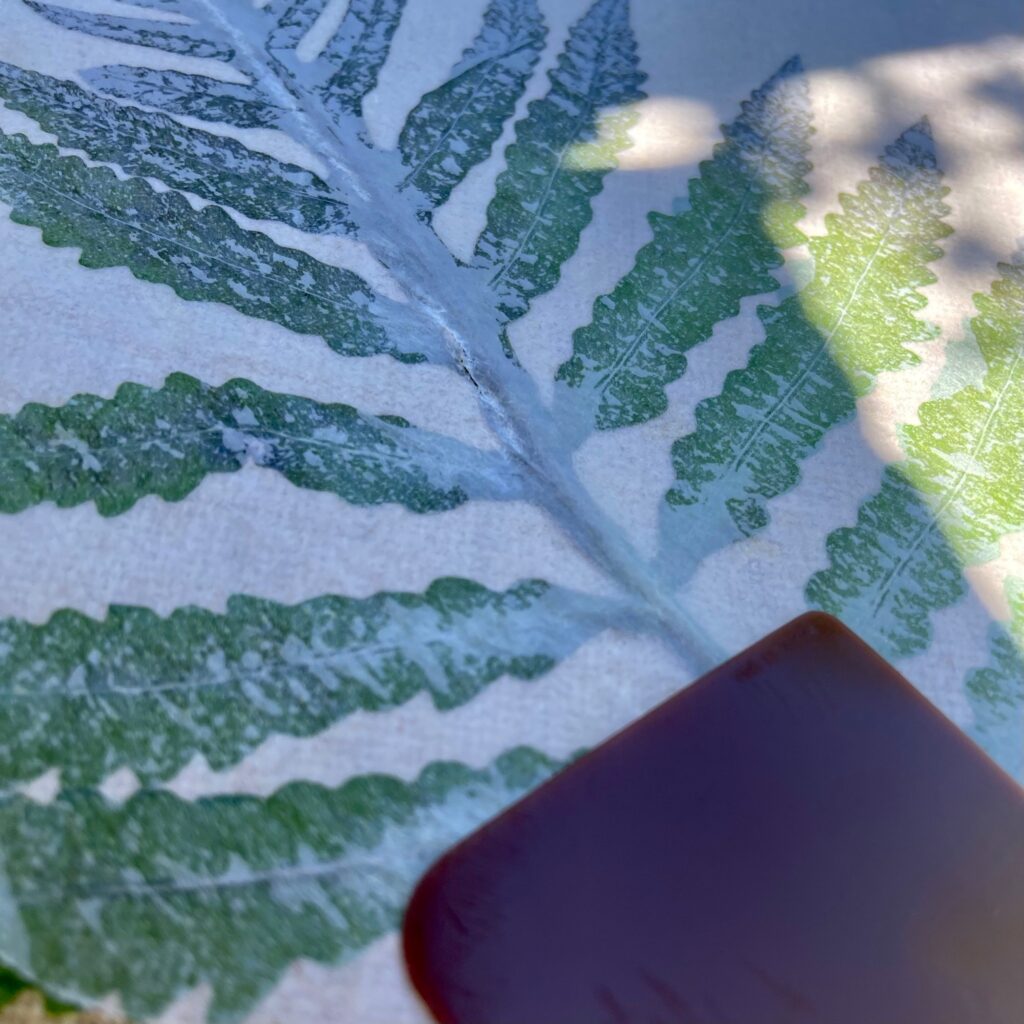
- Press down and rub a nylon scraper or credit card over the fern through the waxed paper. You will notice it lifting from the fern.
- Be careful to remove the waxed paper gently–ensuring that the fern stays on the mounted surface. I loved the burlap because the fern looked embedded into the fabric.
- A layer of mod podge over the surface will seal it and keep it protected.

Pressed Ferns
Equipment
- Iron and ironing board
- garden shears
Materials
- Waxed paper
- Craft paper
- Nylon Scraper
- Spray Adhesive
- Stretched canvases
- Mod Podge
- Foam brush to apply Mod Podge if not using spray form.
Instructions
- Snip fresh ferns the size that fit the frame or stretched canvas that you want to add it to.
- Place brown craft paper on your ironing board large enough to cover beneath and above the fern.
- Position the fern between two sheets of wax paper to completely cover, making sure that the frons are separated and laying flat.
- Put the waxed paper holding the ferns between the craft paper, making sure that the craft paper completely covers the wax paper to protect the iron and ironing board cover from the wax melting from the wax paper.
- Heat the iron with a DRY setting. NO STEAM needs to be used when pressing the ferns!
- Begin ironing the craft paper applying pressure and heat to all areas of the front. Then flip over and completely iron the back.
- Remove the wax paper from the craft paper and peel away the BACK side of the wax paper.
- Take the wax paper OUTSIDE and spray the back side of the fern with spray adhesive.
- Flip the fern over to the right side and carefully line up where you'd like it on your canvas. CAREFUL! Once you lay it down, you are committed!
- Leaving the wax paper on top, use a nylon scraper and begin scraping the fern through the wax paper. The wax paper will lift a bit, embedding the fern into the canvas and leaving the wax coating on the fern as you do this.
- Gently remove the wax paper a little at a time after scraping the entire fern. If there are areas that want to come up, go back over them and apply more pressure so that they will adhere to the canvas.
- Remove the wax paper completely making sure that all of the fern has adhered to the canvas.
- Seal the fern with Mod Podge. Cover the canvas, as well, to cover the bits of adhesive that are stuck onto the canvas and could collect dust if not sealed.
- Hang and enjoy! Or give as gifts! You choose!
Notes
That’s it!
A year of wrestling in getting pressed ferns to give me the look I desired, COMPLETED!
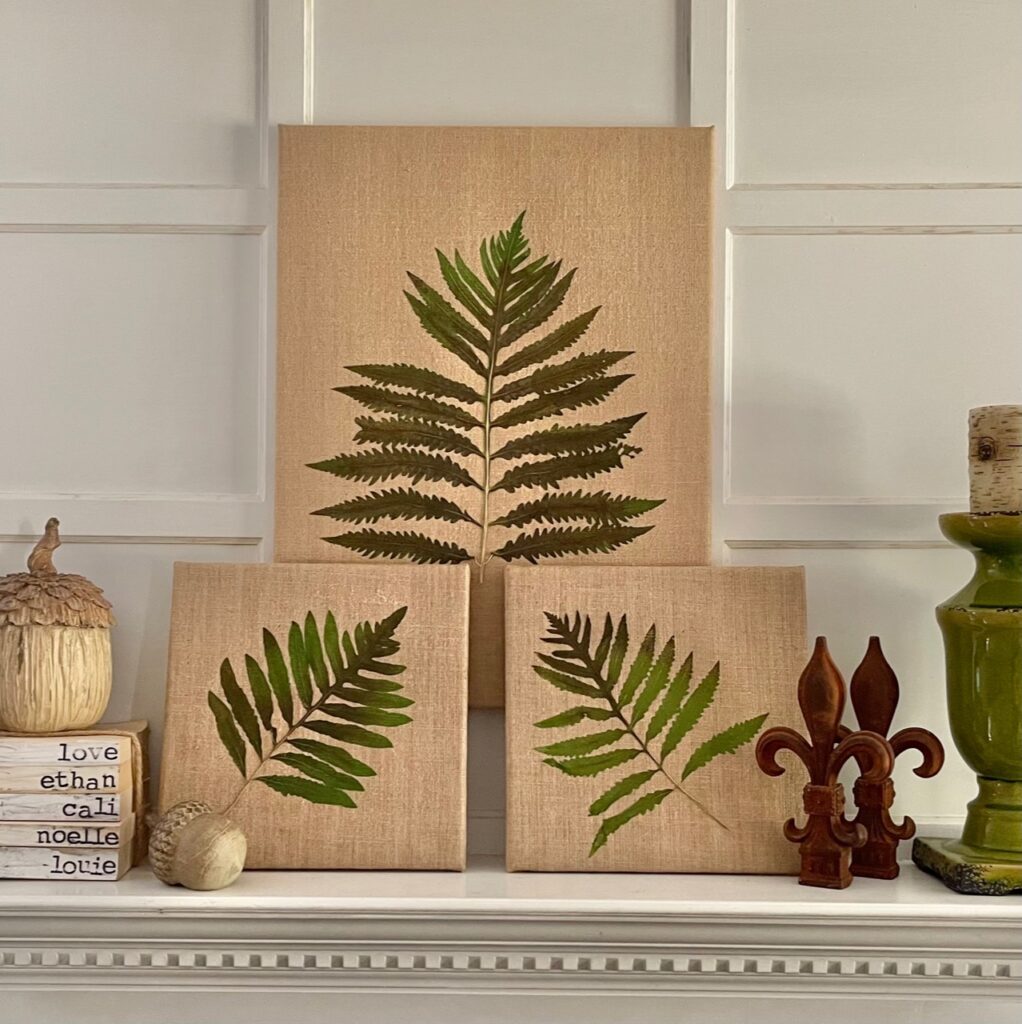
My problem now? I love these so much, I think I need more of them! I think I’ll press more of them next time…these are too good not to share as gifts.
Who knew adding beauty from the garden into my home would be so easy and rewarding?
I just solved your Christmas shopping. You’re welcome!
If you need more ideas for gifting from the garden, you can find them here and here.


31 Comments
Cindy
Leslie, love thus project! Ferns don’t do well in our yard.
I’m going to look to see if Boston ferns work. Friends have one and would let me have leaves.
Leslie J Watkins
I hope you’ll give it a try with those Boston ferns and let me know about it. I’ll be trying this again with other ferns I have in my garden and this time on white canvas and perhaps a few framed. I think I am addicted to doing this. SOOOO easy and fun!
Renae
Wow! I love this idea. It’s gorgeous!
Leslie J Watkins
Thanks! I am not stopping with these. I have a few other ferns that I’d love to add to white canvases. I’ll be sharing when I get them done!
Have a great Sunday!
Karen
Leslie….
These look so nice! Very professional…I will hang on to the instructions and give it a try!
Thanks for sharing!
Leslie J Watkins
Thank you! I’d love to see how yours turn out if you give these a try!
Paula@SweetPea
What a great idea, Leslie! Pinned and scheduled to my FB page.
Leslie J Watkins
Oh, thank you so much for sharing!! I am honored!
Kimberly Snyder
Wow! I wish I would have known about this earlier this year! I could have preserved some fern leaves from the farm. I will have to use this technique on some Florida ferns instead! Thanks for sharing!!!!
Leslie J Watkins
Oh, friend! I have been working on the best way to press and preserve these for a year. Hope you will love it with your Florida ferns!
Martha Wallace
Oh, my! Who knew those ferns could enhance a canvas to make a perfect piece of art! Amazing! And thank you for your year’s worth of trial and error saving me time!
Melba
Wow! This is stunning Leslie! Totally me! I really love the simplicity and the organic base of the fabric you used.
Leslie J Watkins
Thank you! So glad you love them. I’m working with some different ferns to add to white canvases and a few framed for my bedroom now. Warning! This may be addictive! and HINT: they would make the BEST Christmas gifts ever!
Jayne
These are gorgeous, Leslie! We’ve got lots of ferns in our garden so I’m definitely going to give it a try! Thanks for all your tips on what not to do too!
Leslie J Watkins
Oh, this makes me so happy! I can’t wait to see yours…please share!
Marie
These turned out so beautiful! Thanks for experimenting with the different methonds and reporting back to us!
Leslie J Watkins
Thank you, Marie. To finally create a method that worked was so rewarding. I’ll still be pressing more different types of ferns on white canvases this week for my bedroom. I’m thinking I’ll frame those! Hope you will give it a try and share yours, too!
Elizabeth@pineconesandacorns
This is so cool! I am going to have to make a few of these botanical prints.
Leslie J Watkins
Thank you! You have to give it a try. I’m going to add other types of ferns to white canvases and probably frame for my bedroom. Stay tuned!
Janet
These are beautiful Leslie. They turned out so good. They look like many of the high end decor prints you can get. You did a great job.
Kippi Ohern
I love botanicals! Great idea to use my beautiful fern for decor!
Happy Fall,
Kippi
Meegan
What a beautiful way to bring nature into any home. Your pressed ferns are so fun and creative. Thanks for sharing.
Julie Briones
These are SO cool, and just lovely, Leslie! How smart to use real ferns to create these lovely canvas wall hangings! Pinned, and I’m so delighted to be featuring you at Tuesday Turn About tomorrow!
Leslie J Watkins
Thank you, Julie! I am so glad you love them and THANK YOU for featuring them! I’m so truly thankful!
rachelle
These beautiful works of art are right up my DIY alley! Wonderful job Leslie!
Leslie J Watkins
Thank you, Rachelle. I am getting ready to add smaller ferns onto white canvases for my bedroom. It truly can become addictive!
Pingback:
Pingback:
Pingback:
Becky Cardwell
Hi, can you tell me if these yellow over time or does the Mod Podge prevent that? I have pressed ferns and put between the double glass frames and unfortunately those yellowed within a year.
Leslie J Watkins
Good morning, Becky. Mine have begun to change from the vibrant green to more of a brownish green over the past year. Even with that, I am still enjoying them. I think for mine, they may have needed more modge podge, so you might give that a try. My ferns are gorgeous right now and I think another project will be happening soon with them. Happy crafting!