Finding Friday- Creating Beautiful Door Mat Gifts
Welcome to Friday! A couple of updates on the inside are happening…but, until the rain ends, no more work on the outside restoration can be completed. Pausing on the home restoration update to share a DIY with you today! If you have followed along this blog for long, you will know that heart gifts and those thoughtfully and hand created are our favorite things in this home. Last Christmas, my husband perfected this process to create the most beautiful door mats for gifts. Since it’s the season for Mother’s Day, weddings, anniversaries and Father’s Day gifts…what could be better than creating a beautiful door mat gift for the recipient?
Lots of people share their front door mats each season…and often layering of double mats. I get it.
Our front porch redo gave me the opportunity to do the same.
Here’s a creative way to make these personal for gifts.
Each recipient’s was personalized for them and I think they loved them.
Sure, you could probably find an Etsy shop to order one—but, if you are creative and especially if you have a Cricut machine—I’ve got the project for you!

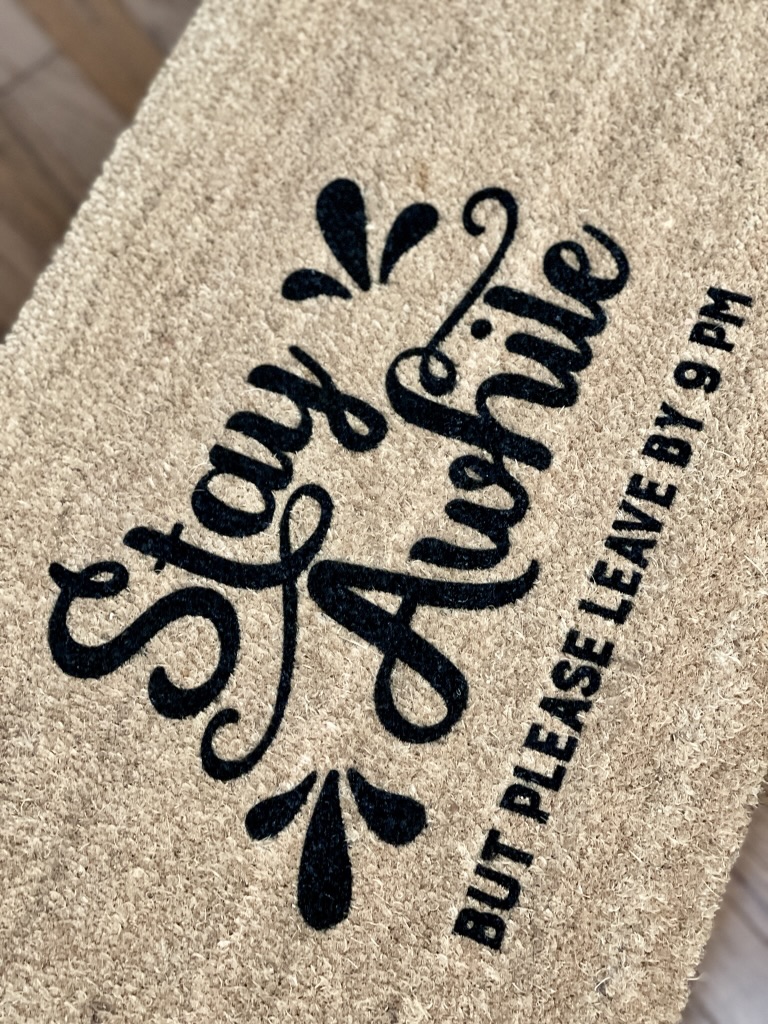
Personalized Door Mats

Customize Personalized Door Mat
Equipment
- 1 Cricut machine
- 1 hair dryer
- 1 brayer roller
- 1 12" x 24" Cricut mat
- Cricut tools
Materials
- 1 Star Craft HD Permanent vinyl ***Great location for inexpensive vinyl!
- 1 Coir & Vinyl Door Mat Home Depot is where I found mine
- 1 can spray black Flex Seal aerosol
- 1 can spray clear Flex Seal aerosol Optional- for extra protection
- Brown craft paper
- Masking or painter's tape
- vinyl transfer tape
- parchment paper
Instructions
- Decide what design you want for the door mat.
- Search for Door Mat SVG files to give you some inspiration.
- Choose your design and download it.
- Import the design into your Cricut design space.
- Resize your design, if needed.
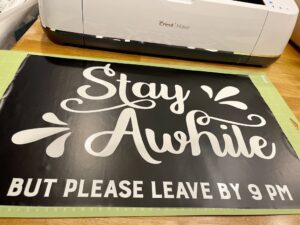
- Print out the design onto the vinyl. NOTE: color of the vinyl doesn't matter since this is only a template.
- Weed out the center of the letters to make a template.

- Cover the entire surface with clear vinyl transfer tape.
- Center and attach the vinyl onto the mat.
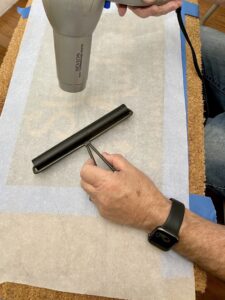
- Cover with parchment paper.
- Using a hair dryer, heat the vinyl in sections so that it adheres to the mat for a cleaner outline of design.
- Use a braying roller to press down after heating for better sealing.
- Mask off the outside so that no overspray gets anywhere else on the mat.
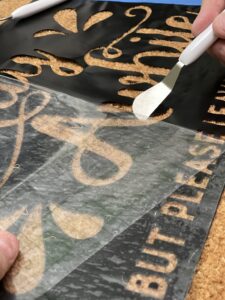
- In a well ventilated area, spray the templated design with the rubberized flex seal.
- Let dry. Repeat spraying the flex seal for 2-3 coats and let dry completely between coats.
- For added protection, you may choose to spray with the clear Flex Seal.
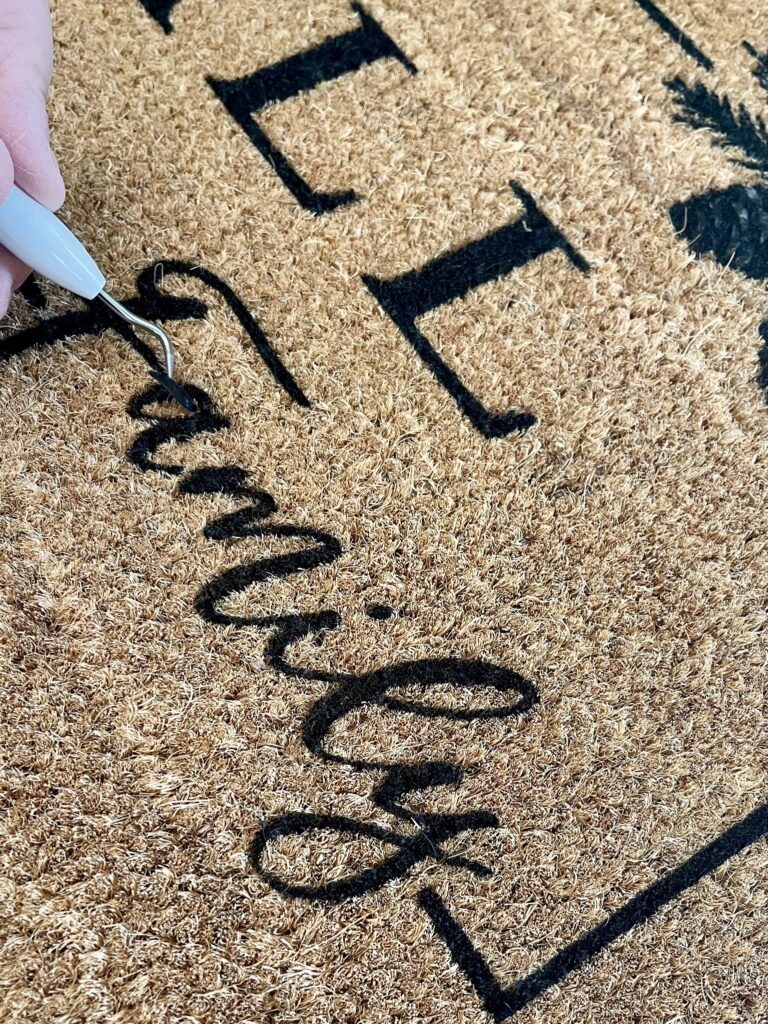
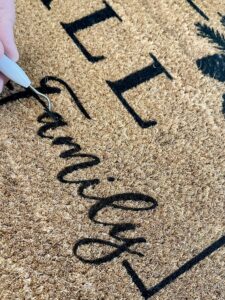
- Wait until the flex seal is dry and carefully remove template.
- Check to ensure that you have removed center of all letters and image is complete before gifting!

Notes
Here’s some tips:
- Decide what design you want for the door mat.
- Search for Door Mat SVG files to give you some inspiration.
- Choose your design and download it.
- Import the design into your Cricut design space.
- Resize your design, if needed.
- Print out the design onto the vinyl and weed out the center of the letters to make a template to add onto the mat.
- Cover the entire design with the clear transfer vinyl.
- Center and attach the vinyl onto the mat.
- Using a hair dryer, heat the vinyl in sections so that it adheres to the mat for a cleaner outline of design.
- Use a braying roller to press down after heating for better sealing.
- Mask off the outside so that no overspray gets anywhere else on the mat.
- In a well ventilated area, spray the templated design with the rubberized flex seal. Let dry.
- Repeat spraying the flex seal for 2-3 coats and let dry completely between coats to completely cover.
- For added protection, you may choose to spray with the clear Flex Seal.
- Wait until the flex seal is dry and carefully remove template.
Links for Making Custom Door Mats
- This is the mat that we used from Home Depot.
- We found a 12″ x 5′ roll of vinyl here– you can use any color because it simply is a template for this project.
- The Cricut Maker and tools we used.

- Spraying the image with black rubberized flex seal provides a great durable image. Finishing it with the clear flex seal spray before removing template is just a great protector.

Don’t you need one of these door mats in your life? or to make and give?
If you are a planner…start making them ahead for all of the gifting occasions in your life.
And, if you make one, won’t you share it with me?
Warning! This project can become addictive!
Thanks for joining me…have a great weekend!
Happy Creating and Gifting!


8 Comments
Tracey D. Buchanan
Fun/Cool/Great DIY, Leslie!
Leslie J Watkins
Thank you, Tracey! Gary took over the creativity of these! Warning–they can be addictive to make–but such great gifts!
Cindy
These are a creative and thoughtful gift. Homemade gifts are so special.
Great tutorial. Pinned
Leslie J Watkins
Thank you, Cindy. Making gifts is just a treasured thing for us.
Stacey
Leslie!!! These are so cute. What a fun and creative gift idea – thanks for the inspo!
Leslie J Watkins
Thank you, Stacey! This can become addictive! But, we love making and gifting these!
Jen
What a fun idea. Leslie. I’d love to share a photo and link to your post in my weekly round-up tomorrow.
Leslie J Watkins
Oh, thank you, Jen! I’d love for you to share it…feel free to grab a photo and if you need me to email you one, let me know!