A Fun and Easy Spring DIY
I don’t know about you, but maybe even before Valentine’s Day this year, I was looking for spring to arrive. Somehow, I think I’ll help it along by decorating my home for spring. Look for any way to bring spring inside; perhaps, thinking that somehow, someway, I’ll coax spring to come earlier and sit by me. Right here, at the table. Or on the couch. Maybe even by the fireplace. I’m not picky! Just join me here! So…have I got a great spring DIY for you today.
I was asked to be part of a Spring DIY blogging event…and this came to mind when this happened.
I was looking for encouragement. Perhaps inspiration. Maybe, just maybe something to launch me into decorating mode.
And there they were on the endcap of Home Goods.
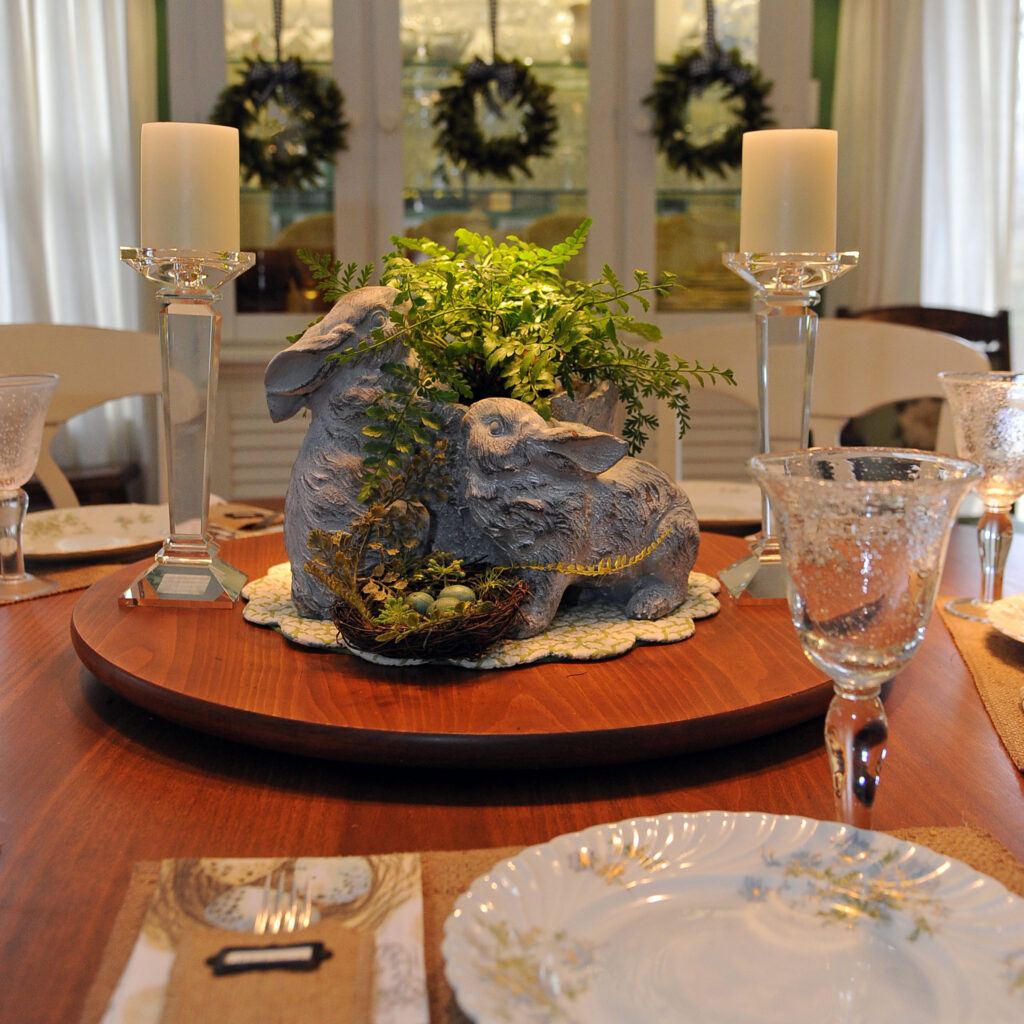
I’m always looking for tablescape ideas. I picked up bunny teacups. Table runners and placemats. I LOVE bunnies and am not sure this year that I actually ever put them away. I tucked pine cones in one for my lazy susan on my island. Placed one bunny in a vignette in my kitchen. I simply couldn’t part with them.
But, the thing that caught my eye on that endcap were these napkins. They had two sets.
They yelled SPRING to me!
Not quite a spring DIY yet…but, I had to have them.
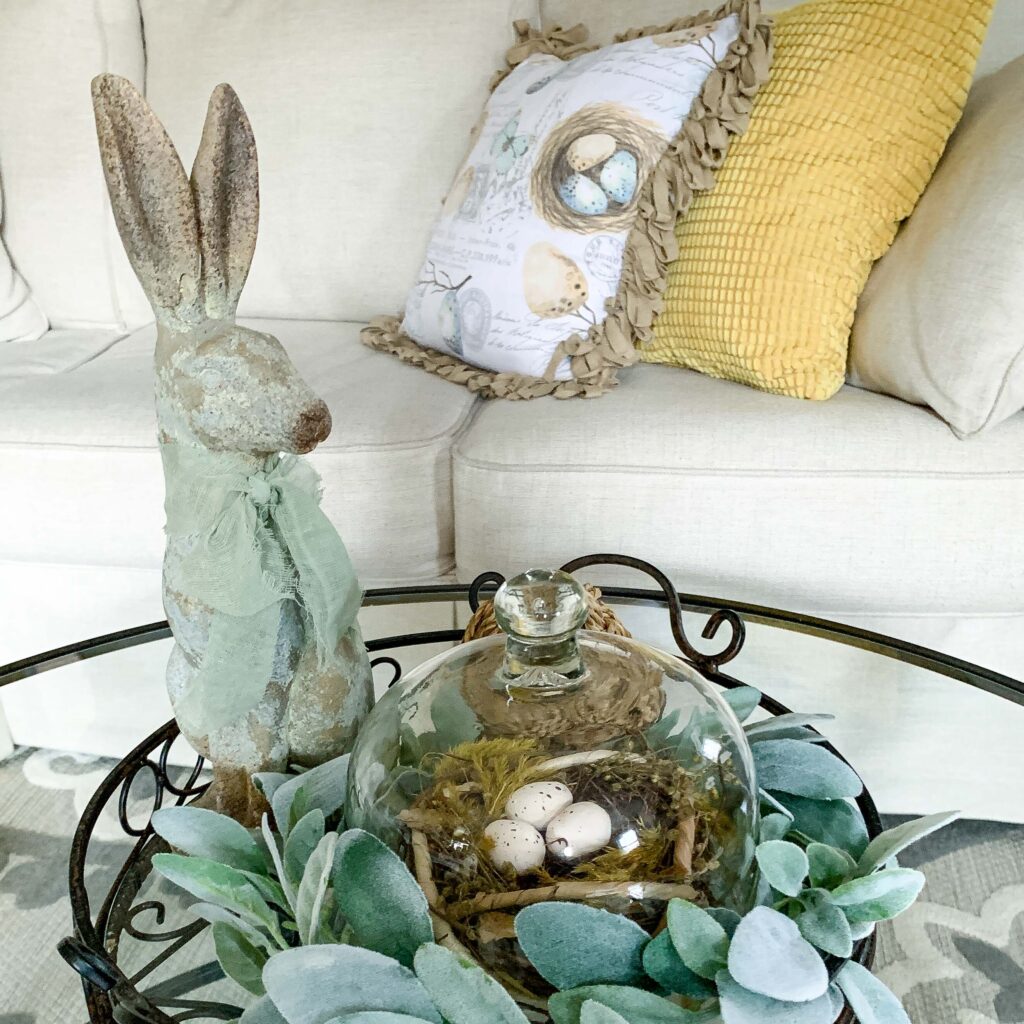
Anyone who knows me ALSO understands that I love bird nests. Some with robin eggs. A few to tuck into vases or wreaths or on mantels or olive buckets.
TIP! If you have ever had a problem with birds nesting in a wreath on your door, tuck a nest with eggs in and it sends an “Occupied” sign to all of them and solves your problems.
Because we don’t use our front door as often as the back, it was always a surprise to all of us when that door was opened and a Mama bird flew into the guest’s face; or worse, into the house! This tip has prevented that from occurring again. Try it!
Back on track here from the bunny (and nest) trail…
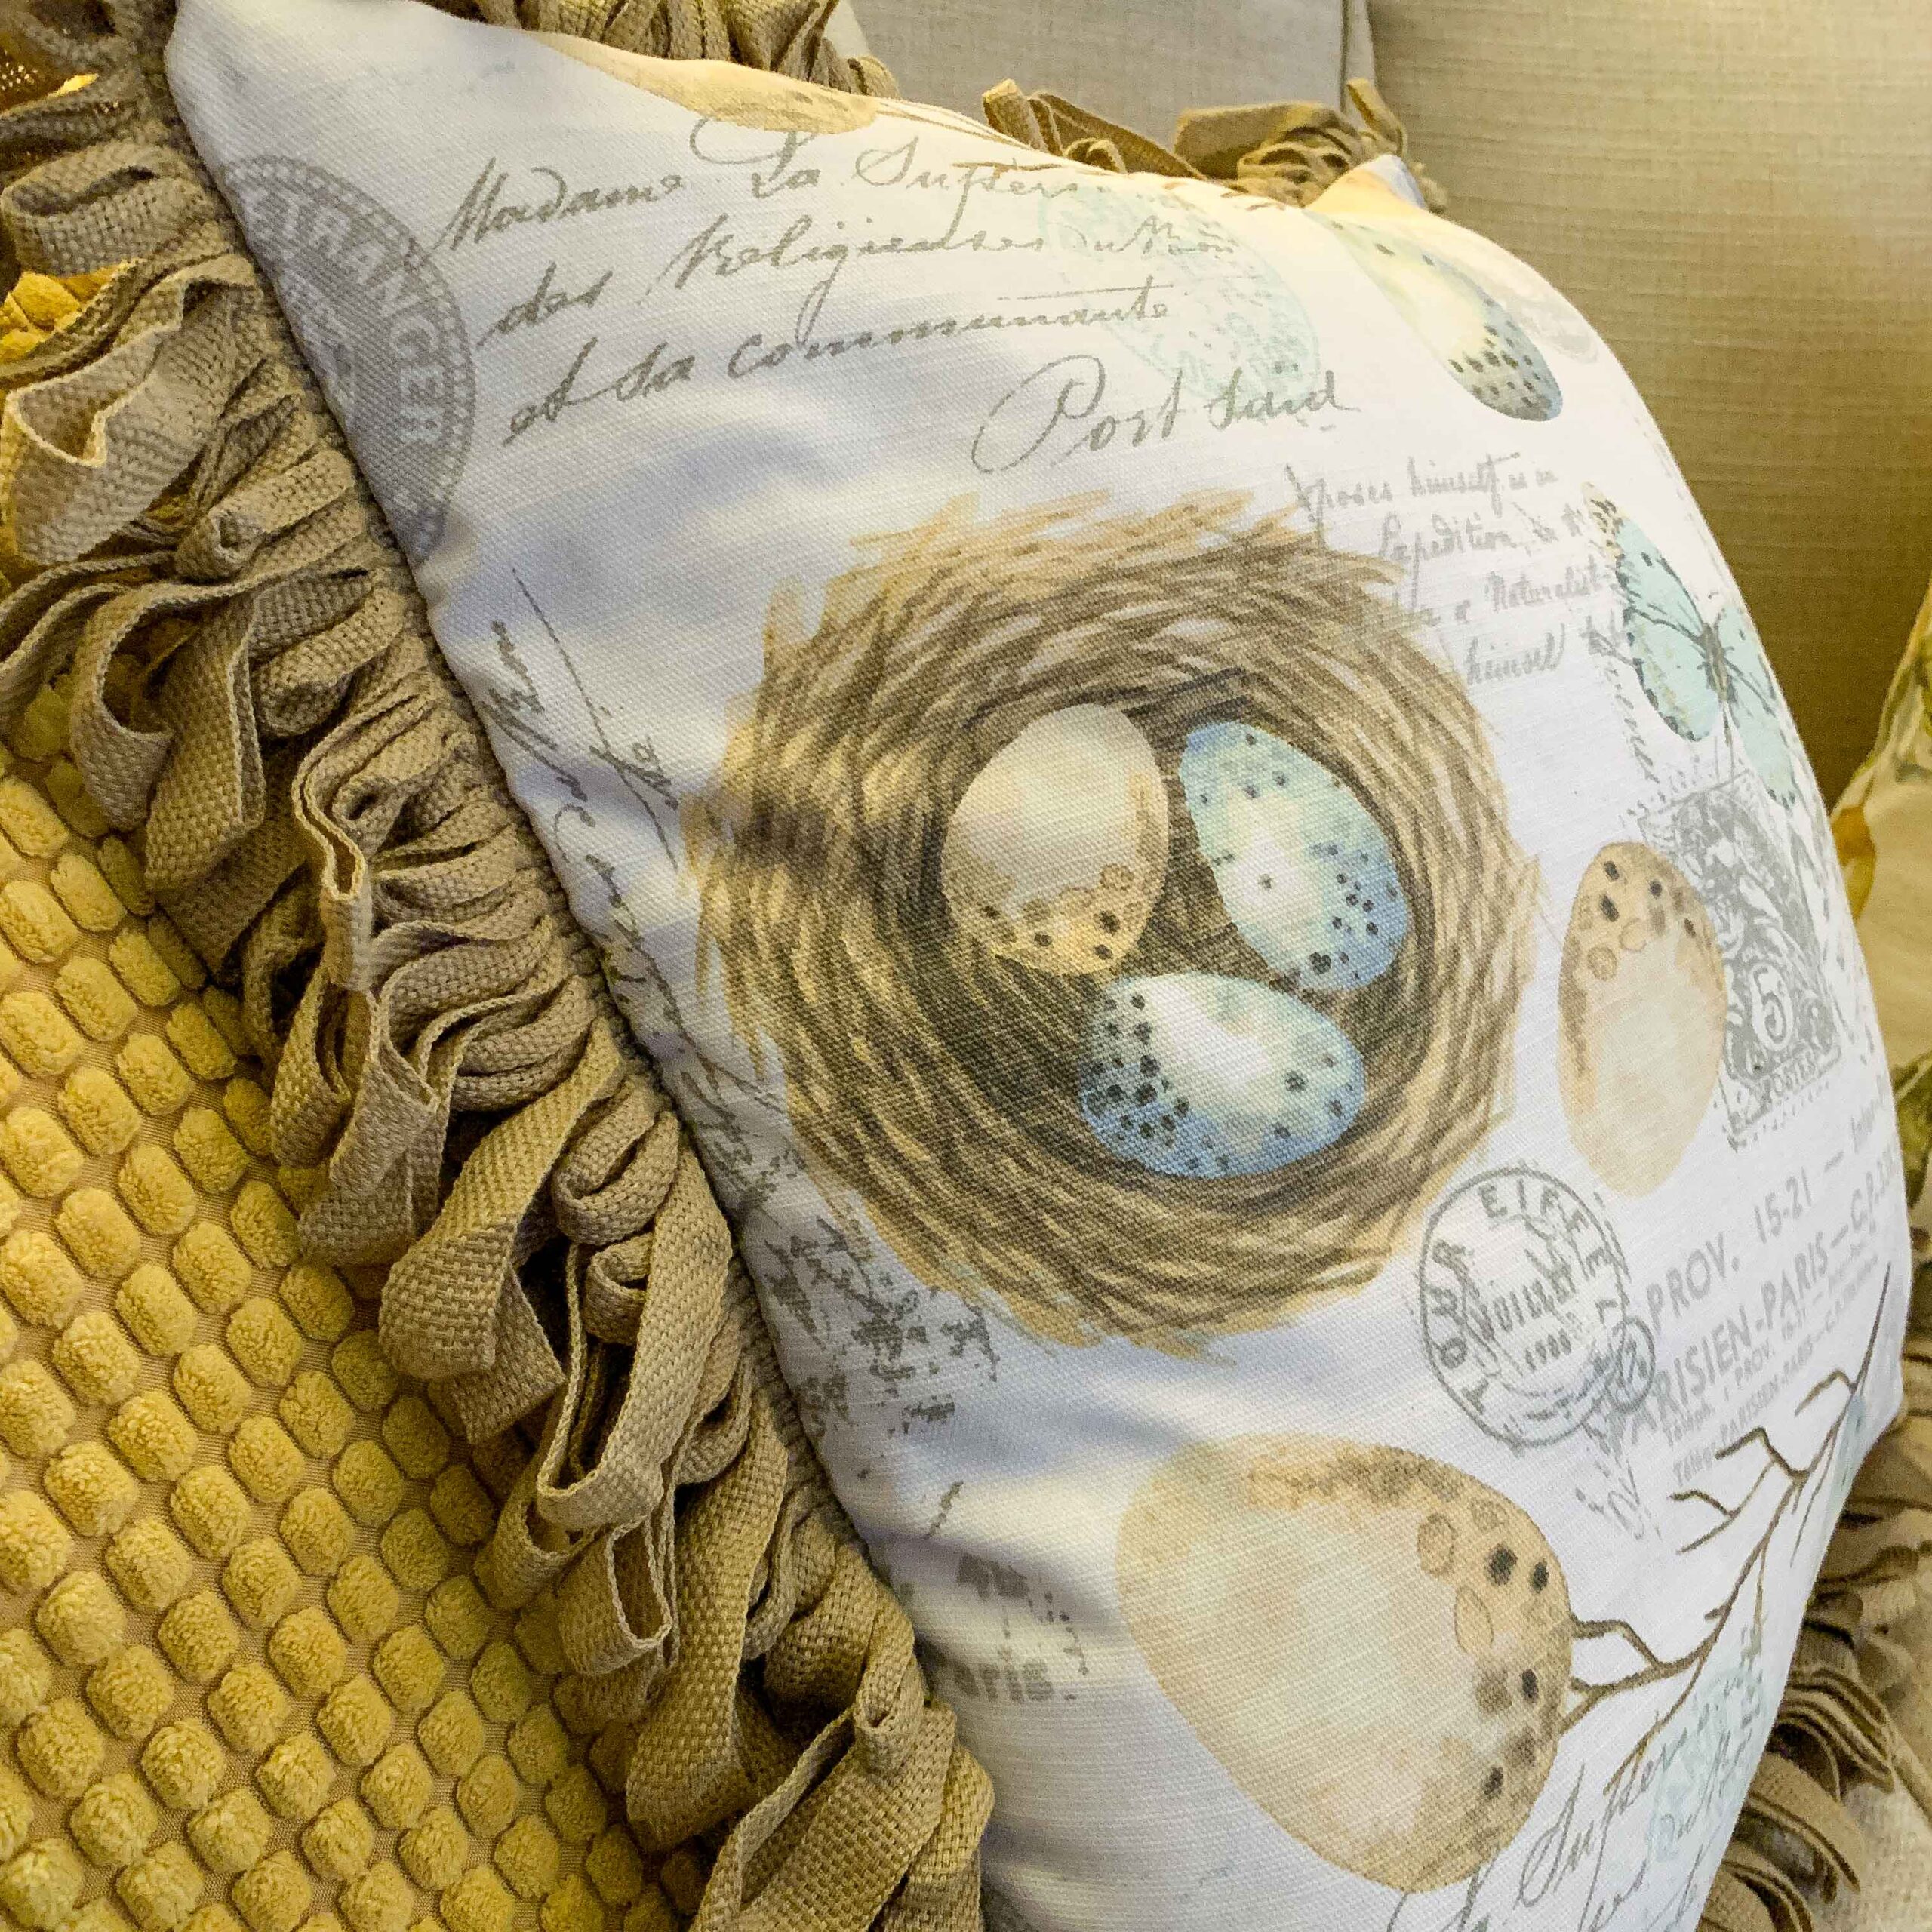
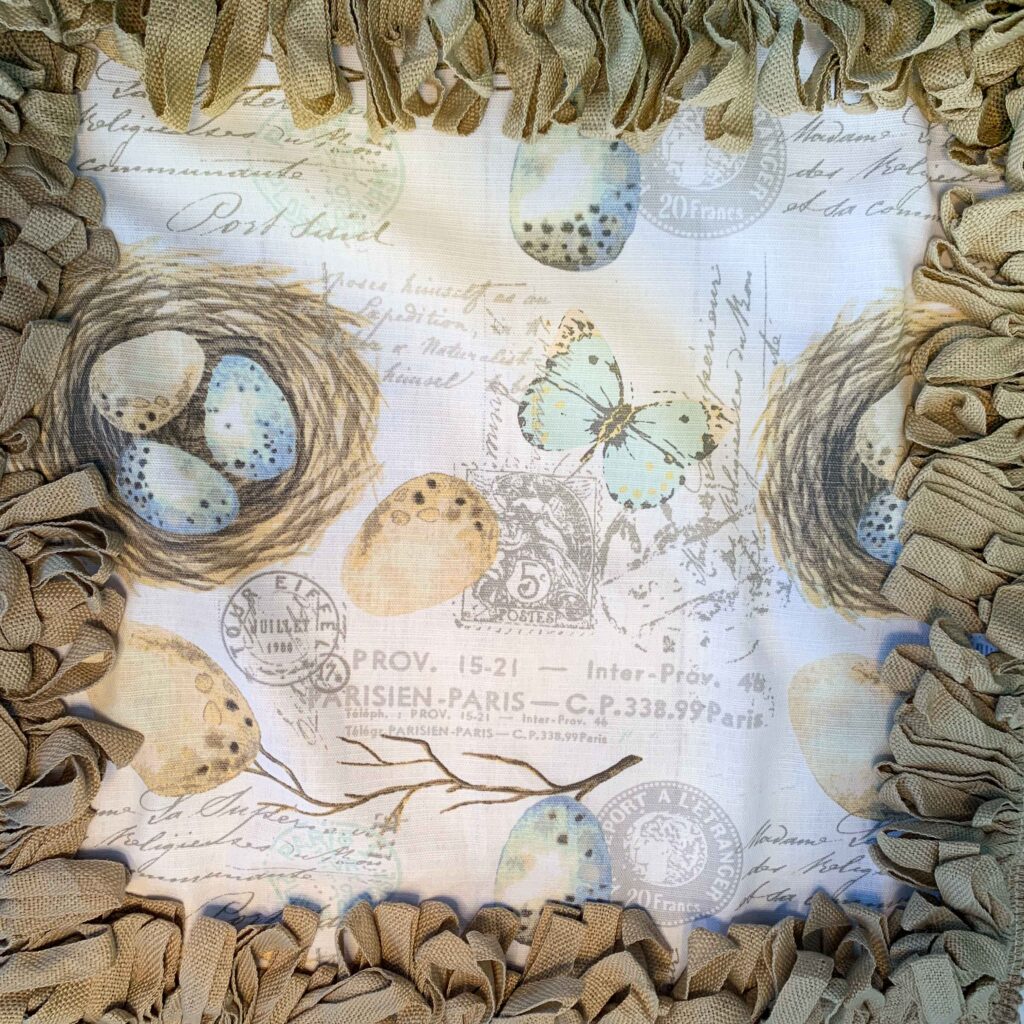
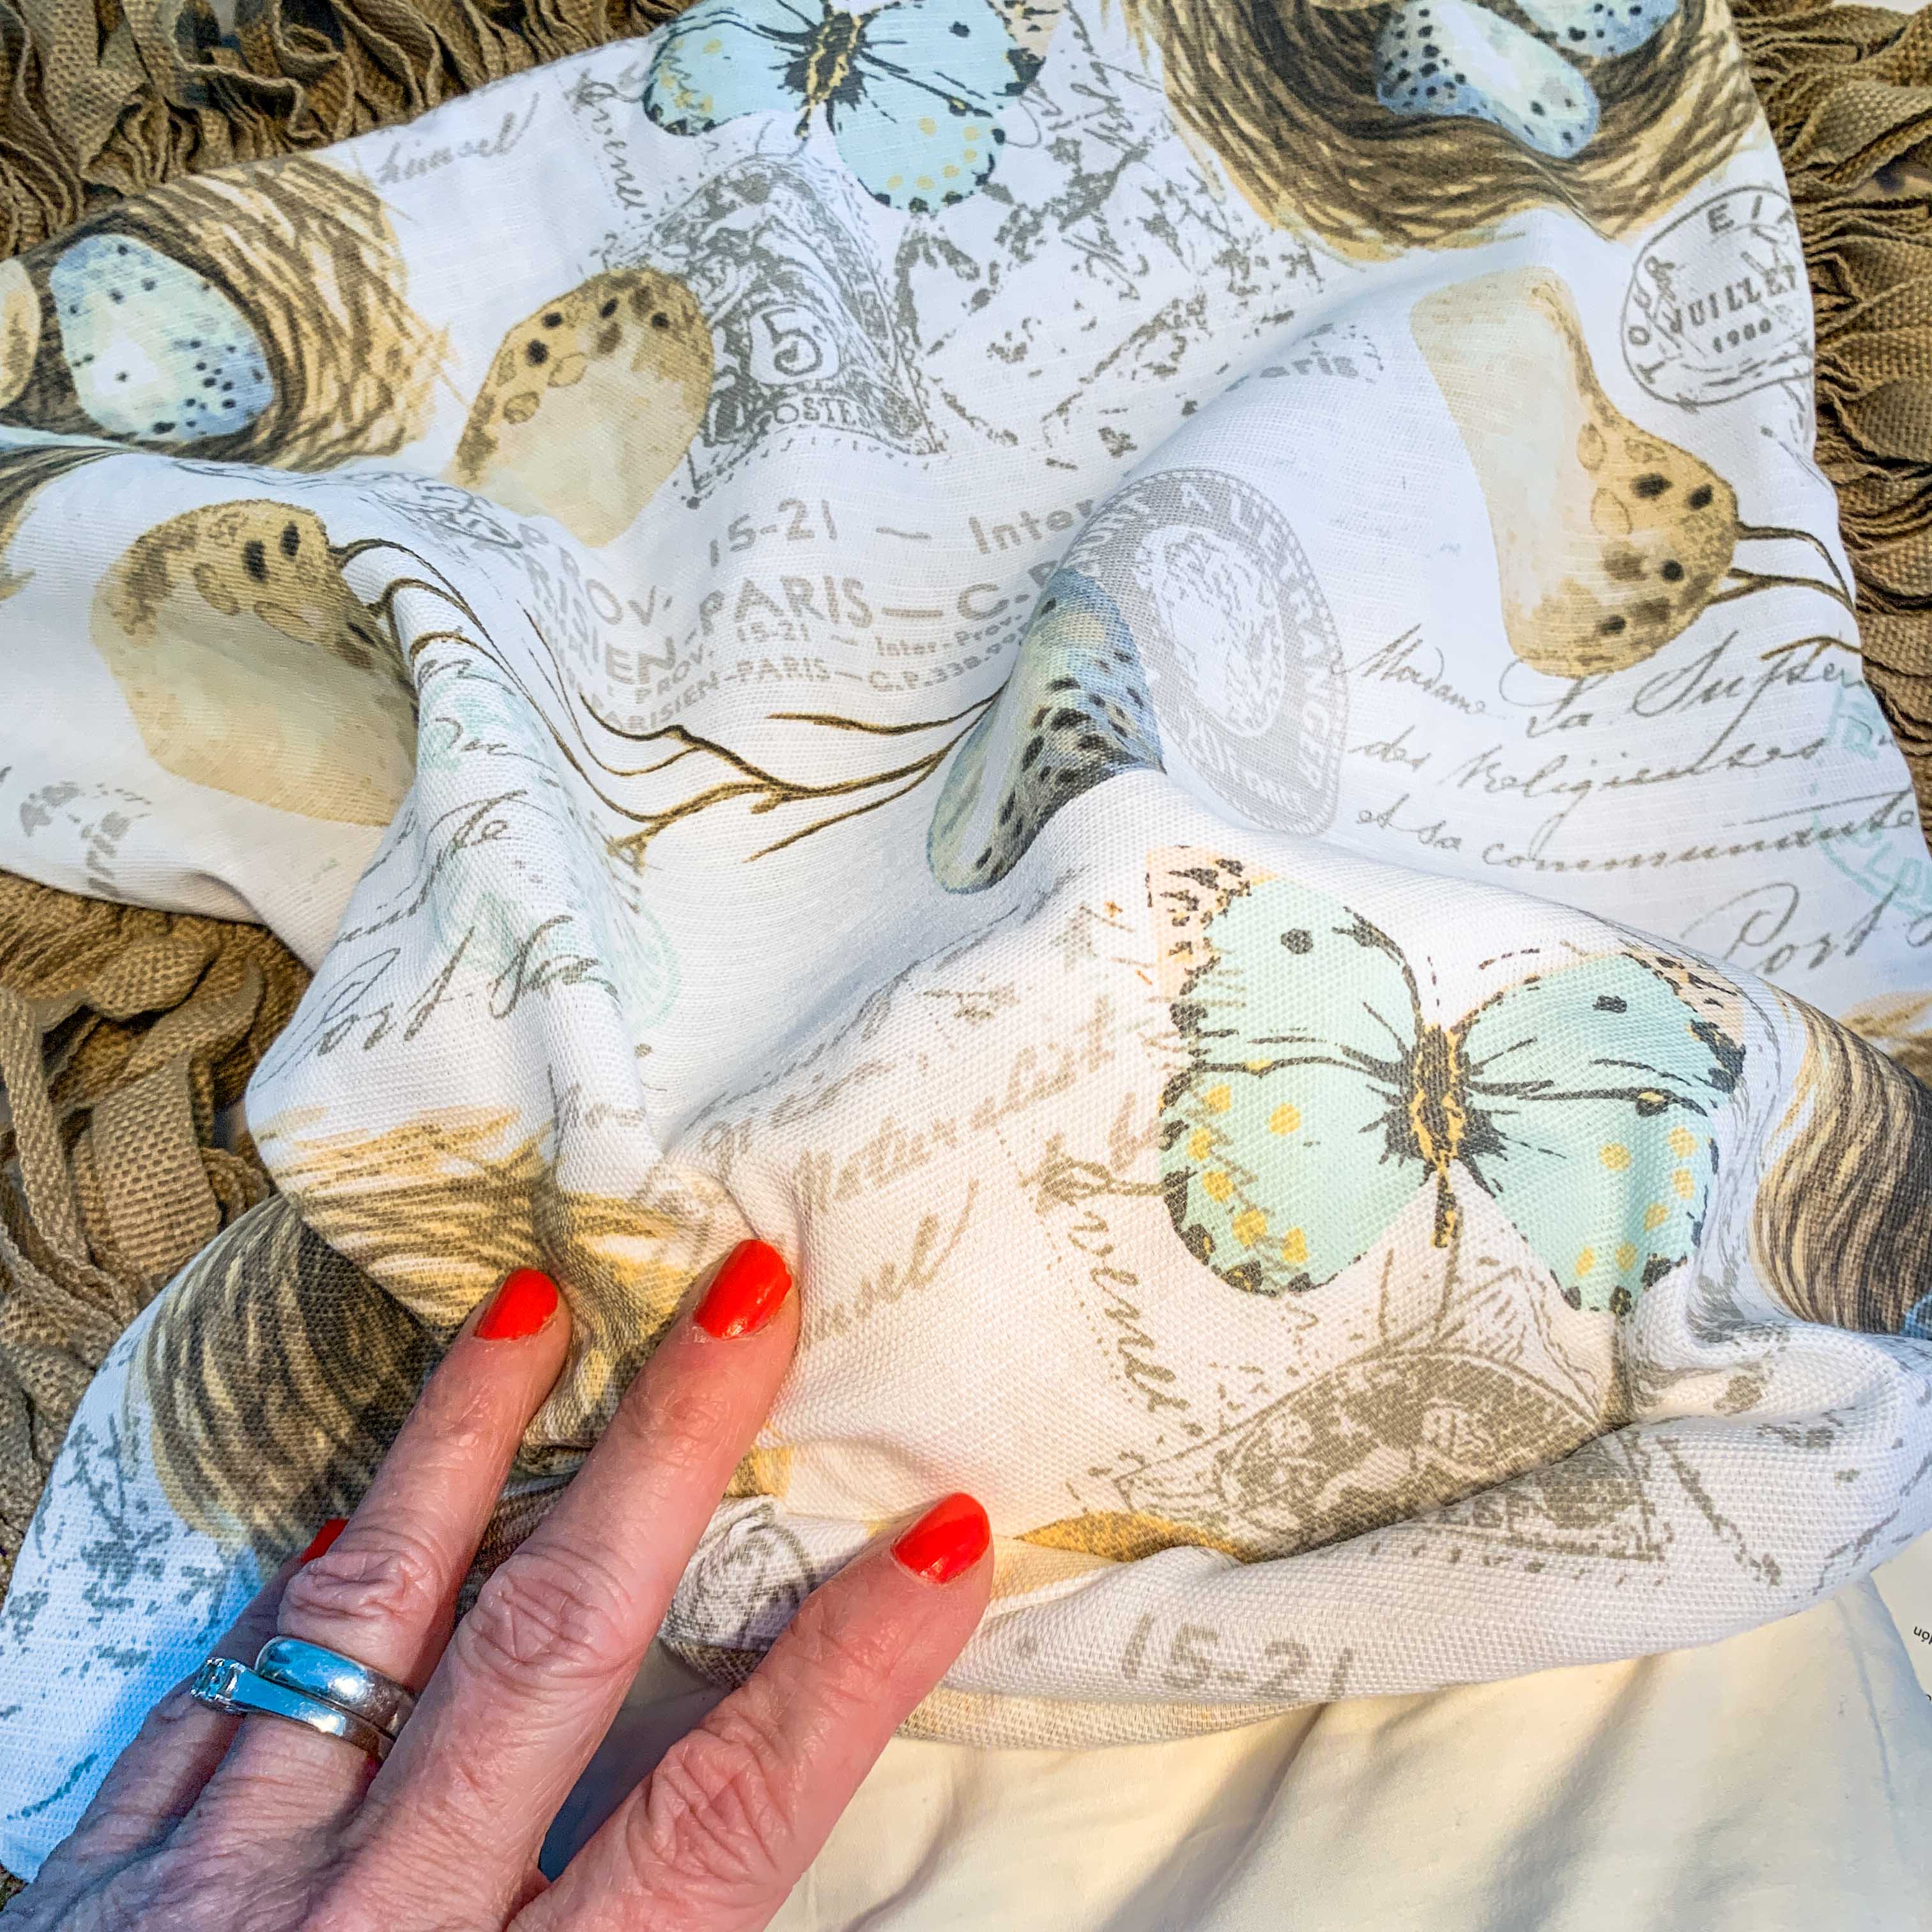
Those napkins had the sweetest bird nests on them. I had to have them. Into my cart they went and home to my dining table. You know the one that I love to have feet under…
I was deliberating how to set a spring table. I had bunnies in the center, but thought perhaps those would have to be replaced with a bird nest.
As I opened up that napkin and looked at the package, a light bulb went off! Do you remember the dilemma I had when trying to get a 20″ pillow cover for my favorite IKEA pillows when I was working on the nursery?
The napkins were 20″ squares.
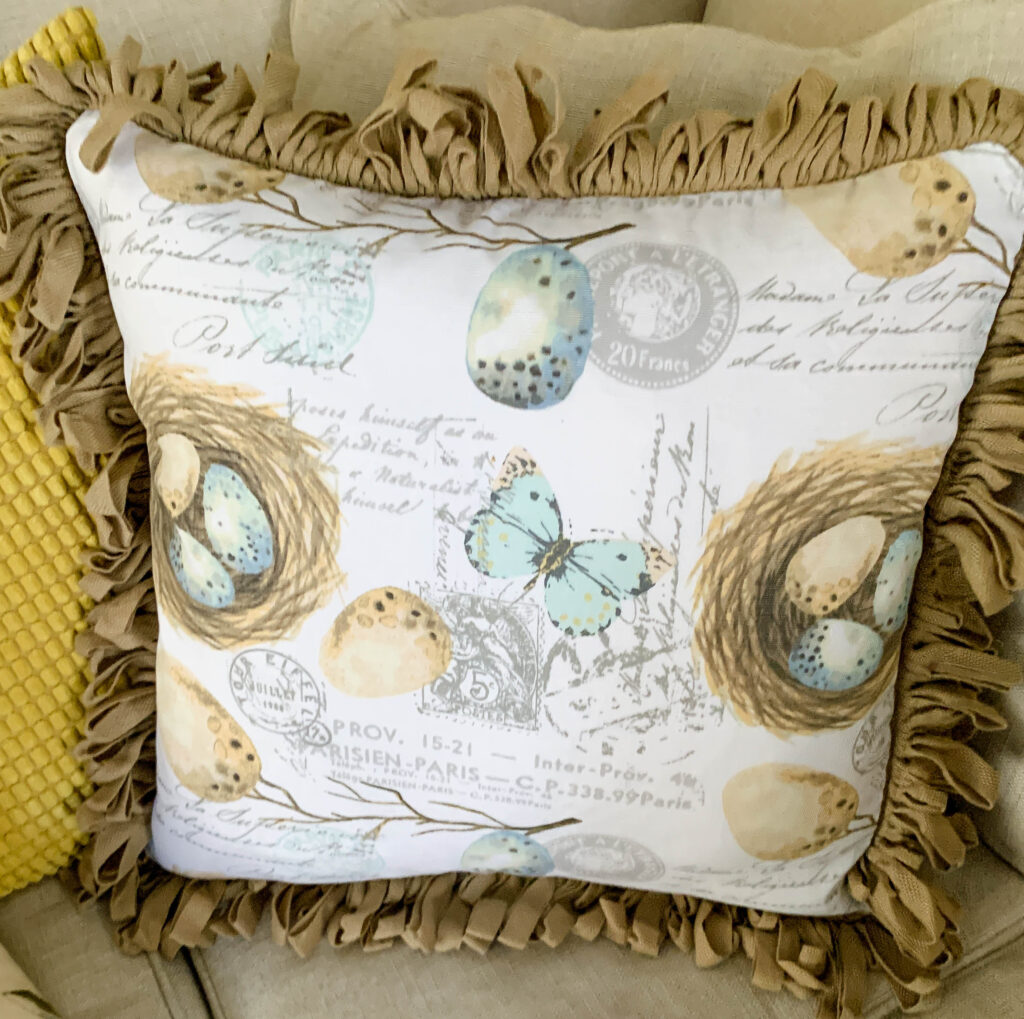
Why hadn’t I thought of this before? I laid out that napkin. Searched for that IKEA pillow form, and the rest is history.
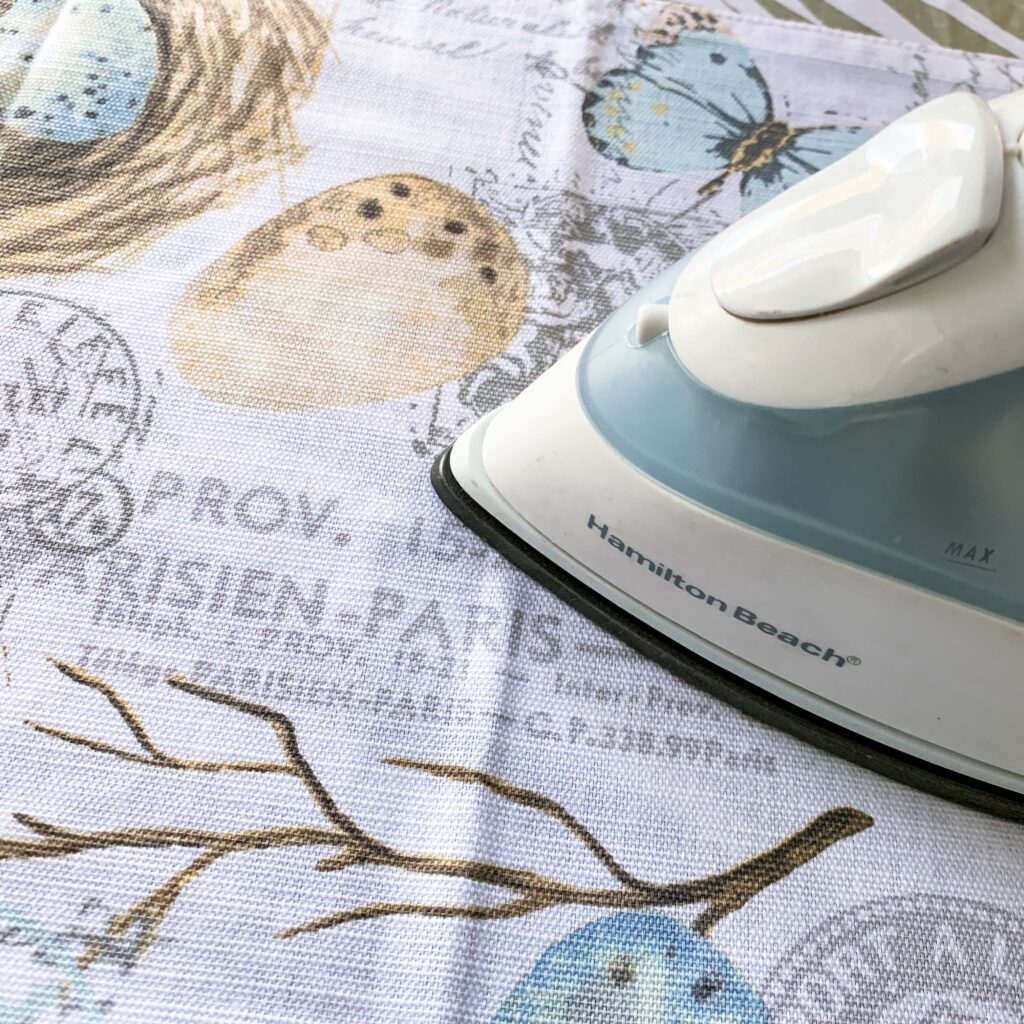
I ironed those napkins before ever beginning. Sewing teacher rule over here…
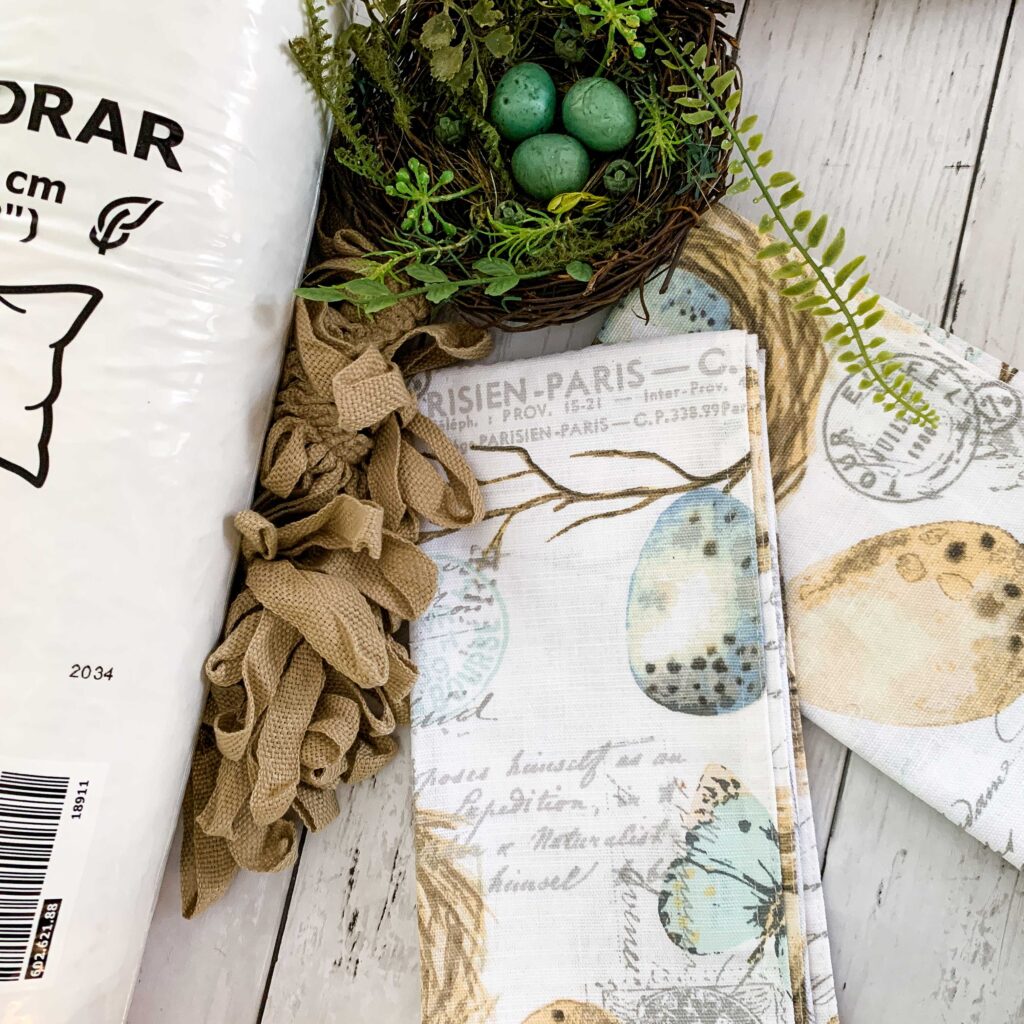
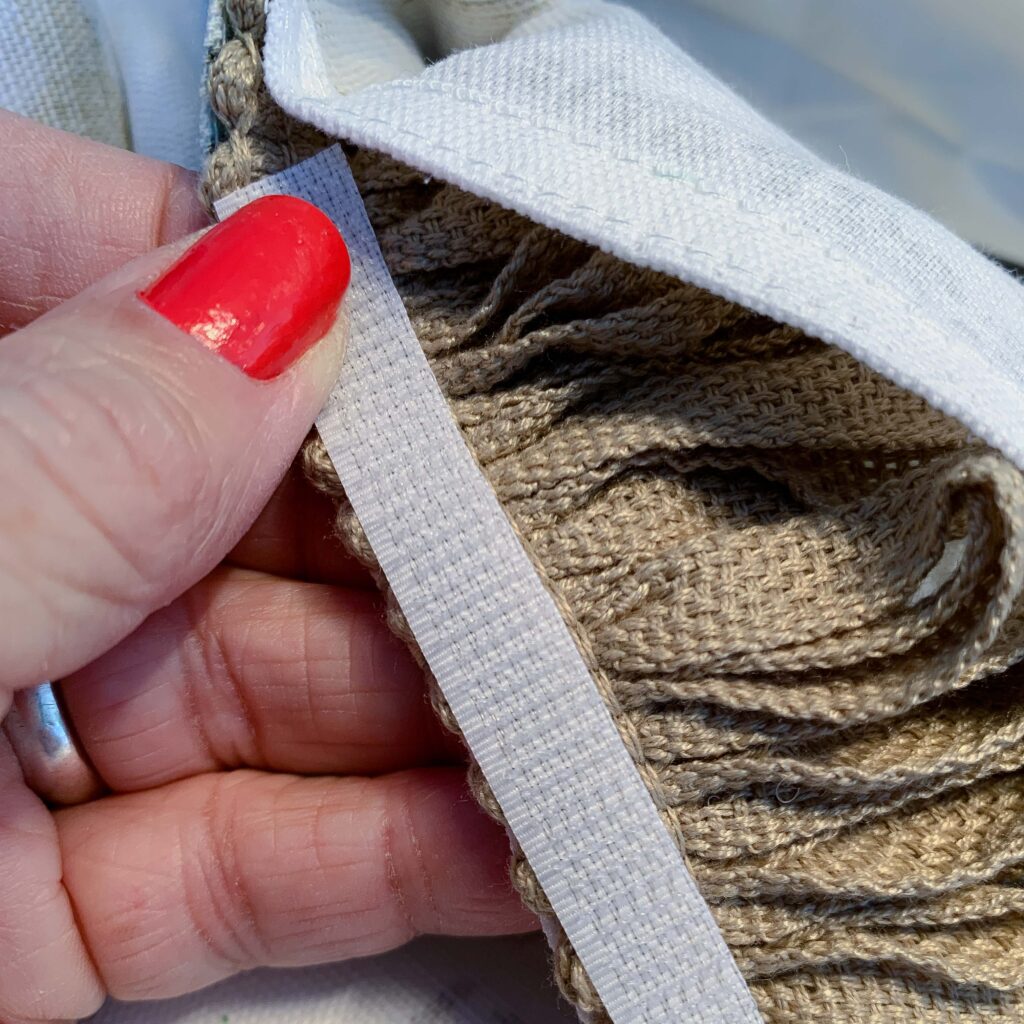
Those sweet napkins were transported to the sewing machine. Then, I pulled out some great trim from my sewing stash…
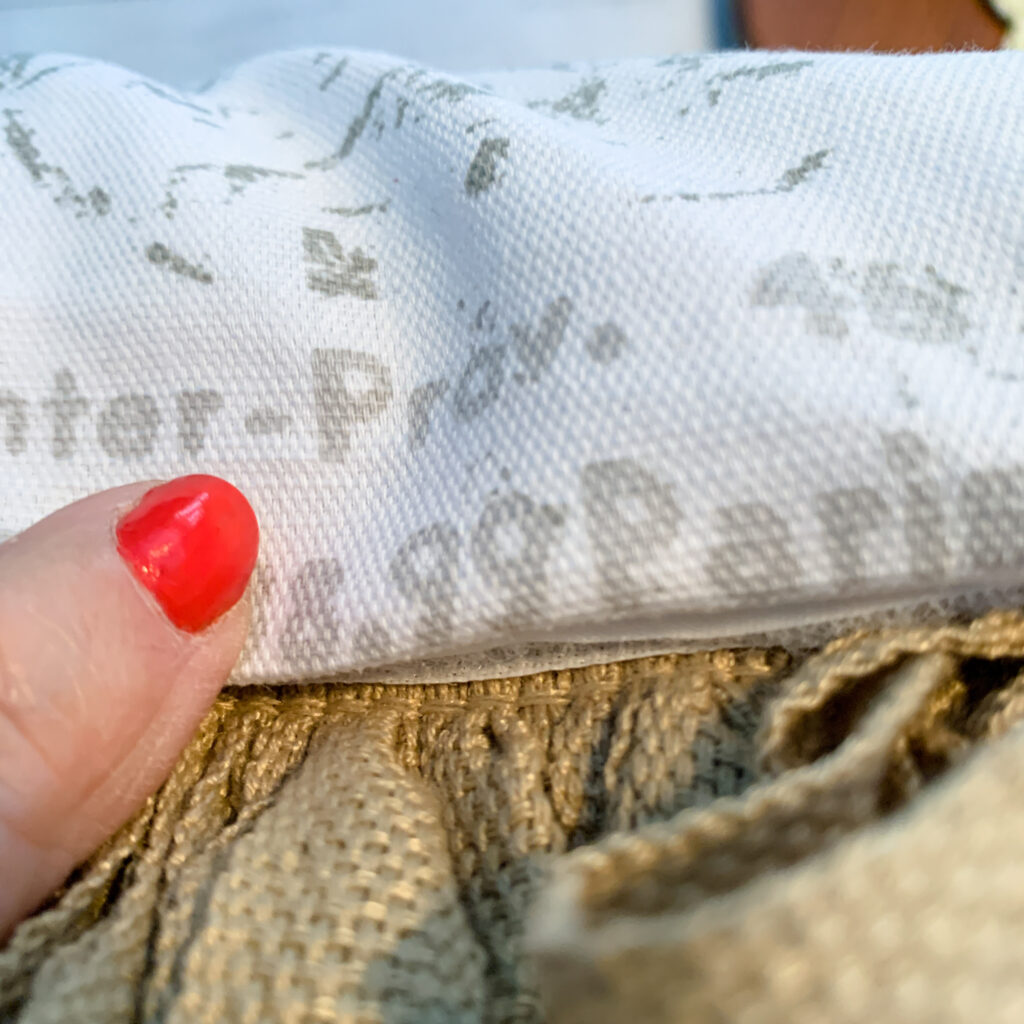
I pinned that trim to the one napkin with the right side down and the edge of the trim to the outside and began stitching. All of the way around.
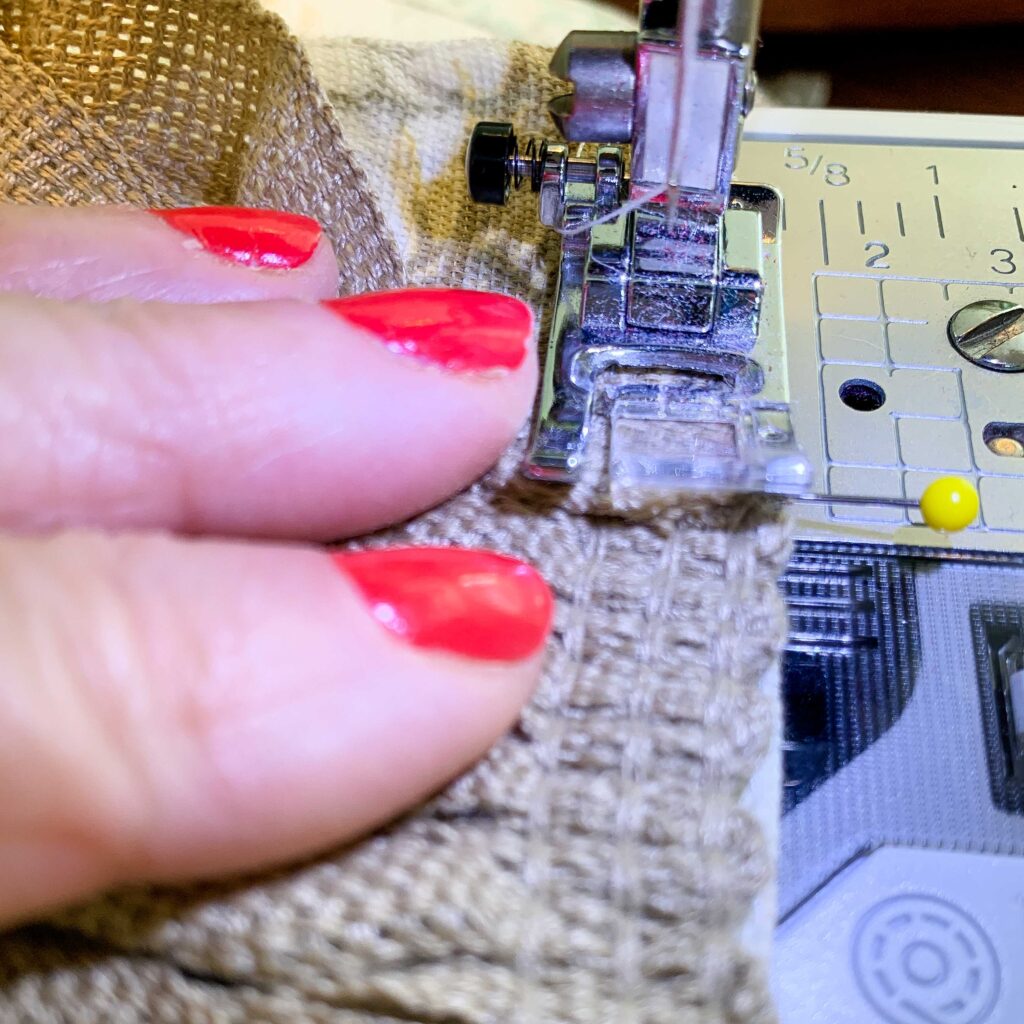
Then pinning the napkins together with the right sides together, I stitched the three remaining sides together, and ended about 3″ into the last side on each end. That made my corners finish and easier to add the velcro closure. TIP: I made sure to backstitch each end so that when I added the pillow, the seam would not pull out.
I simply turned that pillow cover right side out and put my hand inside to push out all of the corners.
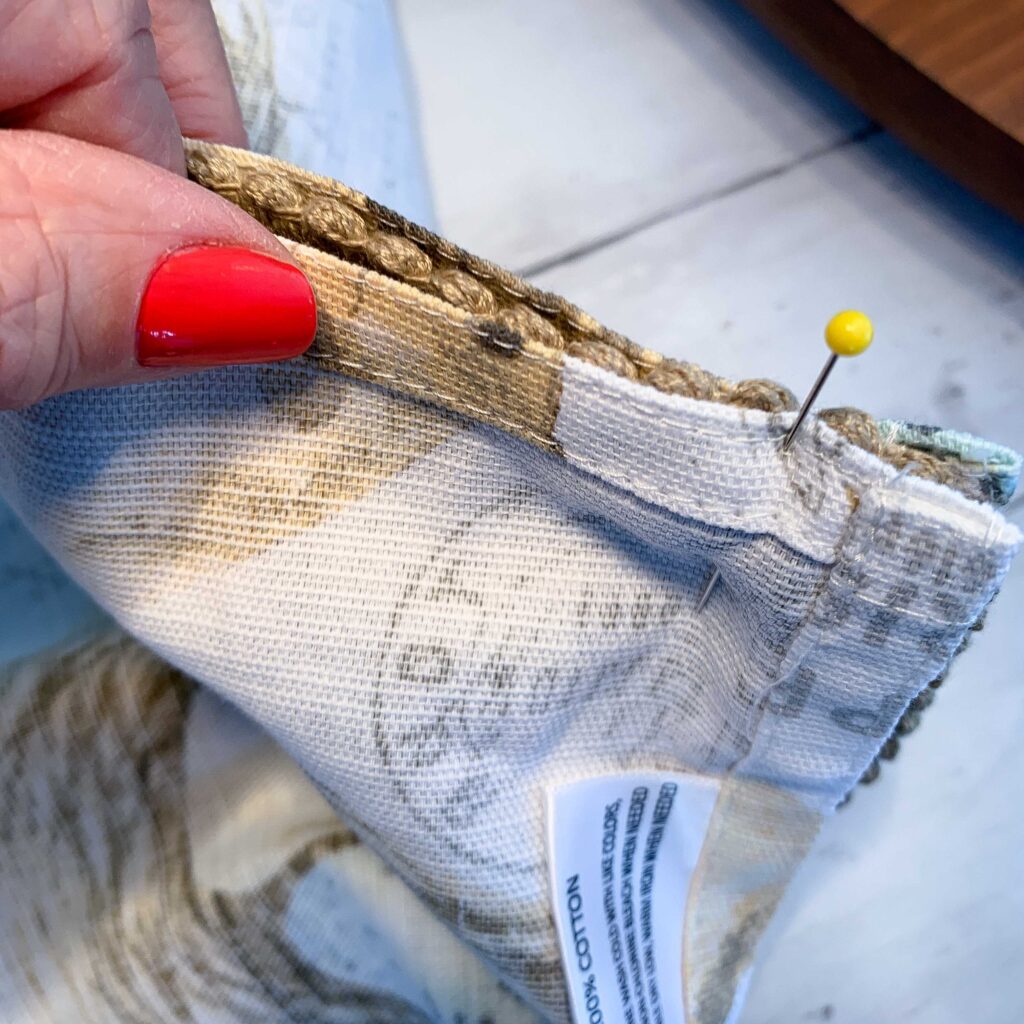
Next, I cut a piece of velcro the size of the opening and pinned it on the edge of each folded edge of the closure side.
My favorite IKEA pillow form was tucked and fluffed inside and the velcro closed.
How easy is that? Can I tell you the best part? These napkins were only $1.75 a piece! The trim was half price when I purchased it at Hobby Lobby and was a little over $8. This perfect cover was ONLY $10!! That pillow form from IKEA was only $6 if you need that great down pillow. I’ve listed another alternative from Amazon below if there isn’t an IKEA close to you.
Isn’t this the BEST Spring DIY project???!
I am beyond thrilled! There are still 6 napkins to use for the 6 place settings at my table and a gorgeous pillow for my family room spring decor.
Because I love new decor for spring…and this pillow is a favorite…it may stay on that sectional until fall.
Here’s what you will need to make the project:
Napkin Pillow Covers
Equipment
- Sewing machine
- iron
- pins
- scissors
Materials
- 2 cloth napkins to fit size pillow desired; I used 20 x 20"
- sewing thread to match napkins
- trim measure sides and add 3" to overlap
- sew on velcro 8"
Instructions
- Take 2 selected cloth napkins and iron out wrinkles.
- Pin trim right side to right of one napkin with edge of trim to edge of napkin.
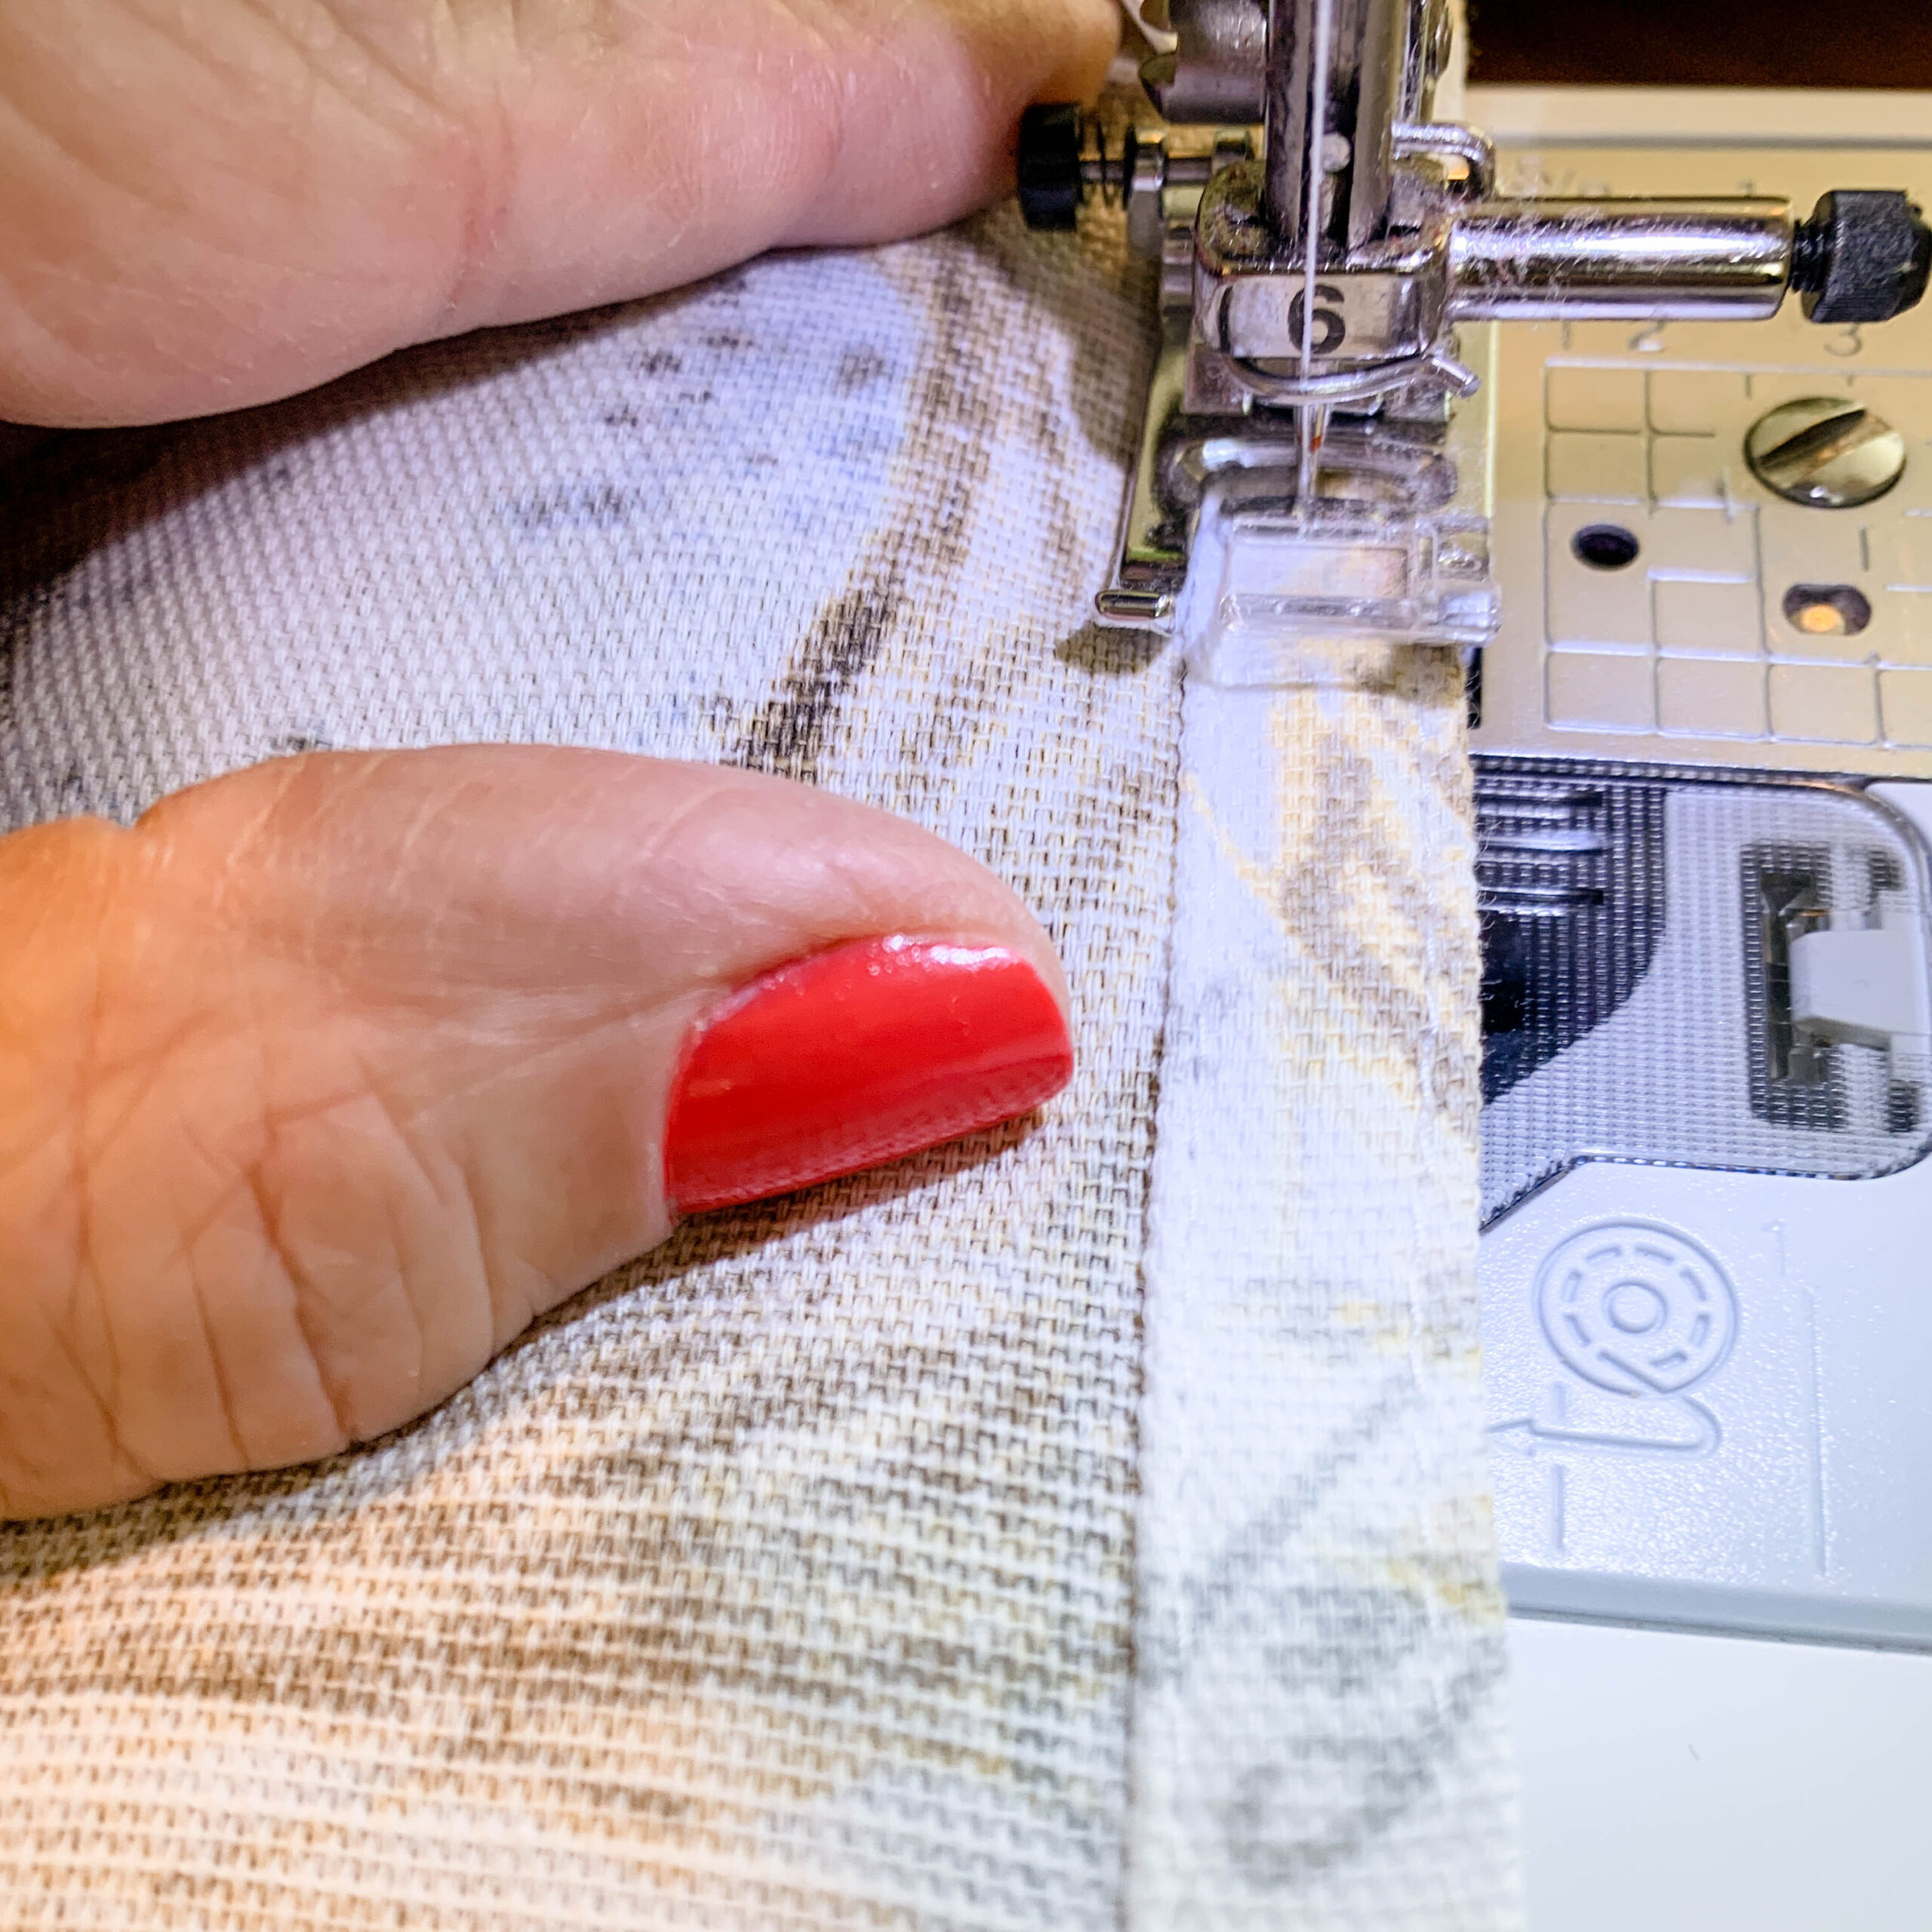
- Stitch the trim to the edge of the napkin about 1/4" allowance. I tried to sew as closely to the edge of the napkin as the trim would allow and not show so that I retained as much of the size of my 20" square napkins to cover my 20" square pillows.
- Lay the second napkin with the right sides together and stitch three sides. On the bottom, stitch in to the center about 3" on both sides and back stitch, leaving an opening to insert pillow form.
- Turn pillow cover right side out.
- Measure your opening and cut that amount of sew on velcro, the hook side on the inside edge on one edge and the loop side on the other side of the opening.
- Roll pillow and insert into the opening. Push the corners of the pillows into each corner of the cover. Close and move pillow until it has taken the shape of the cover.
Notes
I’m including some ideas for you for your shopping convenience as an Amazon Affiliate…no extra cost to you, but it will help the blog. You may find my disclosure policy here.
I love when a plan works out! When creativity comes to fruition.
Are you like that?
So much to love about this project. The cost. The uniqueness. The “one of a kind” finished project. The self satisfaction that creating and sewing and decorating brings me! I have to have creative outlets.
So many of you amaze me with knitting and quilting and DIY projects, especially with mad skills!
My sewing machine may not qualify for “power tools”, but, I’m so happy when it’s humming.
Happy Spring, friends!
I am so thrilled to be invited to share this project along with some other of my blogging friends. I can’t wait to see all the spring projects that my friends here are sharing! Hope you’ll hop on over and see their great creations.

Kippi at Home // Olivia O’Hern // The House on Silverado // From Farmhouse to Florida
🌸 🌸 🌸 🌸 🌸 🌸

My Family Thyme // Salmonde // Simple Nature Decor // Feet Under My Table
🌸 🌸 🌸 🌸 🌸 🌸

Chas’ Crazy Creations // Zucchini Sisters // Tribe of Burton


57 Comments
Pingback:
Pingback:
Cheryl
What a great idea!! I love that pillow! I had no idea about birds not nesting if you use eggs in the next! Pinned!
Leslie J Watkins
I know, right?! I always like to give my 20″ pillows new “clothes” and when I realized the size of these napkins, I ran with it! And yes! those bird nests help protect those mama birds and all who live here and visit!
Kippi Ohern
Gorgeous spring pillow! Great idea to use napkins to make them sew easy!
Have a great weekend.
Hugs,
Kippi
Leslie J Watkins
Thanks, Kippi! I love that they require no serging and are so much more economical than fabric! Thanks for putting all of us together for the hop! You are a Rockstar!
Sweetie!
I love this idea. Do you know my Mom was a Home Ec teacher?
Bunnies are a favorite too! I think we are kindred spirits.
~Sweetie!
Kim Waldorf
Such a great idea for making the pillow. It looks so pretty! Great job, Leslie!
Leslie J Watkins
Thank you, Kim! This one was a fun one. All my pillows need “clothes”!
Leslie J Watkins
NOOOOOO! In Alabama? from 2010-2014, I was speaking to Family & Consumer Sciences teachers at their state meetings…could I have possibly met her? The connections keep coming, Sweetie! And Bunnies! my favorite! Have a great weekend, friend.
Pingback:
Maria
What a gorgeous idea using the napkins, it tuned out beautiful, it matches everything you love. I like your idea of using the occupied sign on your front door for the birds nest, such a brilliant idea.
Leslie J Watkins
Thank you, Maria. I love it. And, YES! those bird nests with eggs added help keep both birds and humans safe! Happy weekend!
Paula@SweetPea
I am a sucker for seasonal pillow covers and I love making them. Your tutorial has given me so many ideas. First, I have not thought to look for trim to use. Now I know to head to Hobby Lobby for exactly the trim I had in mind. Second, using velcro is brilliant!! I always make envelope style pillows to avoid having to add a zipper. Velcro is the perfect solution for not wanting to sew in a zipper. Third, fabric is so expensive and using napkins that are the perfect size is a great idea! I’m sharing your project on my Sweet Pea FB page today. Great job!!
Vickie Ramey
Such an easy idea! I think I could do this!
Leslie J Watkins
Your comments made me so happy this morning, Paula. All of my pillows need LOTS of “clothes” and even though I am a retired Home Ec. teacher…I HATE PUTTING IN ZIPPERS! I know that they aren’t hard to add…but, velcro has helped me. I’m not opposed to those envelope pillows either! The cost of those cute napkins was so much more economical than fabric you find. I’ll have to find more cute ones to create more covers, too. THANK YOU for sharing on your FB page. Love you, friend. Happy weekend!
Chas Greener
What a great DIY and we all love these in our homes. Thanks for sharing your awesome spring DIY, and wonderful hopping with you.
Leslie J Watkins
Thank you, Chas! I loved hopping with this group! Swooning over your watering can!
Kimberly Jones Snyder
this are so adorable! makes me think I need to keep one of my mom’s sewing machines! thanks for sharing!
Leslie J Watkins
Yes! Everyone needs a sewing machine. It’s the thing that calms my heart. Loved your sugar mold project on the hop! I have never heard of sugar molds. Happy weekend, Kim!
Sarah E Almond
What a beautiful pillow. I am always changing out my pillows, and now I have some new ones to add to my list. 🙂
Leslie J Watkins
Thank you, Sarah. I was sooo happy to find a new way to create them. My favorite IKEA pillow forms have lots of clothes!
Pingback:
Pingback:
Renae
Beautiful! I love affordable adorable projects! I’m a huge sucker for bird nests too.
Leslie J Watkins
Thank you, Renae. I know! bird nests and bunnies get me every time! Happy weekend, friend!
Dorothy
Did you say Home Goods? We have one here. Headed there. This is the best idea, teacher.
Leslie J Watkins
I know!! Less expensive than fabric with finished edges already, right?!! Happy shopping!!
Pingback:
Lynn
What a simply beautiful project. I’m going to steal this one 🙂
Leslie J Watkins
Thank you, Lynn. My mind is spinning with more ideas from this one! You haven’t seen the last of that little pillow!! Happy weekend, friend!
Pingback:
Olivia O'Hern
Thanks for the tip on the birds! We get them all over the place, in the mailbox, in the planters, even in a fake nest that was a part of a wreath on the door. Love the idea of upcycling cloth napkins this way. Thanks for sharing.
Leslie J Watkins
I hope that this helps solve that bird problem. It sure works here! The new thing I found last year was a new nest in my fern that I didn’t realize I was disturbing while watering until it was too late…I loved joining you on the hop and can’t wait until the next one! My new cricut came in yesterday so I am off to put your ideas into practice. Happy Sunday!
Niky
The napkins are lovely, and what a great idea to turn them into a pillow! I love the muted colors and how well it goes with your coffee table vignette!
PS. I’d love it if you’d like to share this at my link party that opened today– Sundays on Silverado.
Niky @ The House on Silverado
Leslie J Watkins
Thank you, Niky! I loved this project from start to finish…and I have linked up with your party! Always excited to be asked to join!
Pingback:
Anne Zirkle
Love how this pillow turned out! IKEA really does have the best pillow forms. The trim you chose really took it to a new level! I’m also totally trying the bird nest trick on my front door wreath. Mama birds love building nests there and I felt so guilty last year when two eggs fell out when I opened the door not realizing it was there!
Leslie J Watkins
I know! Those IKEA pillows are the BEST! and those bird nests! I can’t tell you how happy I was to help mama birds find a better location than my front door!
Rebecca
Leslie, I didn’t know you were a Home Ec teacher! That’s what I wanted to do, but long story short I became a social worker instead. I just loved my Home Ec class and teacher in high school. I feel like I’m finally getting to express my creative side through blogging. Better late than never!
I just love your napkin pillow! The trim makes it really special. Those IKEA pillow forms are fabulous and such a bargain! I’m happy when my sewing machine is humming, too 🙂 It was fun hopping with you. Pinned!
Leslie J Watkins
I loved my years as teaching…and I have found the perfect outlet to again be sharing. My former students still tug on me and message me and comment that I need to teach them to…fill in the blank! It’s hilarious, though, because most of those requests come with stipulations like what I can make for them for lunch while they are sewing! When Covid is past, so much will happen with feet under my table; but, for now, I’m working on posts, and developing my You Tube channel and videos to continue to share what I know I need to. I so loved hopping with you, too!
Carol Karl
What a cute pillow. Thanks for your great step by step instructions.
Leslie J Watkins
Thank you, Carol! That light bulb moment when I realized those napkins would make a great pillow was the best! Enjoy making them!
Barbara Warner
Adore your bunny pillow from napkins and the trim is fabulous! I love birds, nests, and bunnies. So glad you’ve helped me see ways to use them all year long!
Leslie J Watkins
It was a light bulb moment for me for sure! I’m right there with you with the birds, nests and bunnies. Happy Spring!
Kirsten Burton
I love a good DIY pillow project!! So neat. Great job.
Leslie J Watkins
I love a fun project! thank you!!
Pingback:
elizabeth@pineconesandacorns
I am not sure how i missed commenting! This pillow is adorable and you make it look so easy!
Leslie J Watkins
Thank you, friend. It was sooo fun and easy! After trying to find a 20 x 20 pillow cover to fit my IKEA pillows, that light bulb went off when I read the size of these napkins. Solved a problem with so much ease!
Tammy
Leslie, can we talk about how much I want that pillow. Girl, that pillow. I heart it! I thought your garden plate wreath was my favorite but now, it’s this pillow. Yep, hands down it’s this gorgeous spring pillow. xoxo
Leslie J Watkins
Oh, you are too sweet! I am so glad you love that pillow I know you will love making one…seriously…napkins! I may need to look for bunny napkins to create new ones for Easter.
Rachelle
This is a beautiful pillow, and so clever using a cotton napkin! I would love it if you would add this to the Friday with Friends link party!
Thanks,
Rachelle
Leslie J Watkins
Oh, I am so glad you love it! I’ll be glad to link it on Friday. Thanks for the invitation to do that, Rachelle!
Donna Allen
Such a great and simple DIY!!! That trim is amazing, it just makes the pillow! Love it! Donna
Leslie J Watkins
Thanks, Donna! Don’t you love that trim? Hobby Lobby to the rescue. This pillow is a favorite one here.
Pingback: