
Pumpkin Fairy House
Transforming pumpkins into tiny fairy houses that add light and magic for the season.
Yield: 1 Fairy House
Equipment
- 1 knife
- 1 vegetable peeler
- 1 spoon
- 1 garden shears
- 1 glue gun and glue sticks
- greening pins
- wooden skewers
Materials
- numerous pieces sticks
- moss
- fairy accessories
- 1 battery operated light
- 1 pumpkin
Instructions
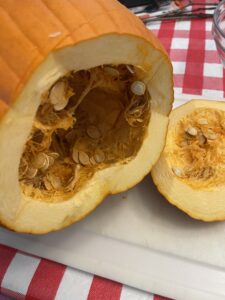
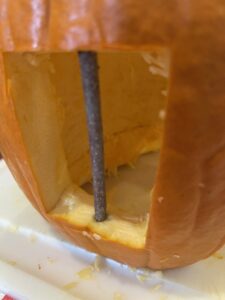
- Using a knife, cut a round circle from the bottom, remove and clean out the inside of the pumpkin with a spoon, removing seeds and stringy flesh.TIP: Clean seeds from flesh and save to bake for a great snack OR save and dry for planting next year.
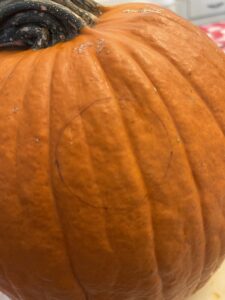
- Use a cutter or pattern for the windows and doors and trace onto the pumpkin with a marker.
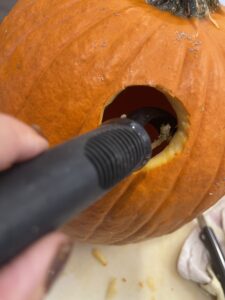
- Using a knife, cut out windows and doors to create your fairy house. A vegetable peeler comes in handy for removing extra pumpkin on the inside.
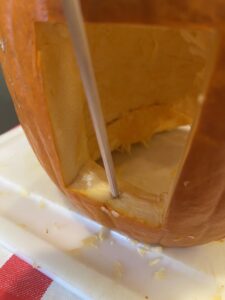
- Use a skewer to make a hole to add sticks to create windows.
- Add cut sticks around doorways or to make shutters.
- Feel free to add moss, berries, and fairy pieces to complete your cute pumpkin fairy house. Your creativity takes over here!Use your glue gun or greening pins to attach moss, berries, dried or pressed flowers or dried fruit.
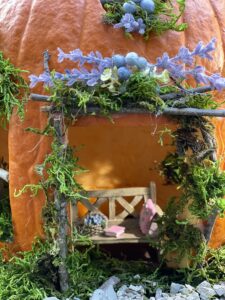
- Add a battery operated light inside for the perfect lit house at night. NOTE: if you have a remote battery light or one with a timer, it makes it all the easier to light at night.
- Add moss, dried flowers, and gravel to make pathways to finish your fairy garden setting.

Notes
Feel free to use natural items to decorate your doorways and windows and create a perfect pumpkin fairy house.
Add a battery light inside to make it cozy and inviting at night.
Add decorations inside or create your own fairy house village outside.