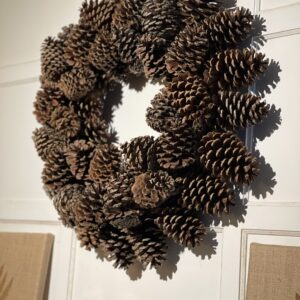
How to Make a DIY Pine Cone Wreath
A simple DIY for making a pine cone wreath that is perfect for outdoor or indoor use...from fall through January.
Equipment
- 1 metal or straw wreath form, size of your choice 18" for wreath, 12" for candler holder is what I used. Just make sure that the form is strong enough it doesn't move after the pine cones are added.
- 1 pair gloves
- 1 oven
- deep aluminum baking pans, disposable I was able to add 2 per shelf of my oven.
- 1 brown craft paper to cover the table from hot glue
- 1 glue gun and glue sticks
Ingredients
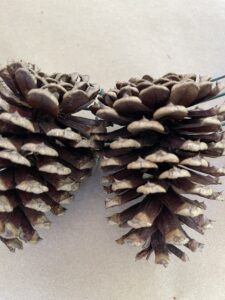
- 50-100 individual Pine cones, cleaned number determined by size of your wreath and pine cones
Instructions
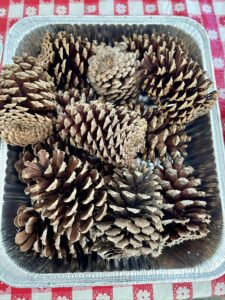
- Begin by removing pine straw from pine cones and placing into aluminum pans. Make sure that the racks of your oven will not touch pinecones when the pans are added to the oven.NOTE: Pine sap may leak onto pans. If you use other pans, make sure to line them with aluminum foil that can be discarded.
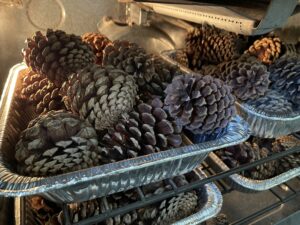
- Preheat oven to 200°.
- Add disposable aluminum pans of pine cones to the oven for an hour, making sure that they don't burn.NOTE: the purpose of baking is to remove any spiders or bugs that might be in them and then become a problem in your home.
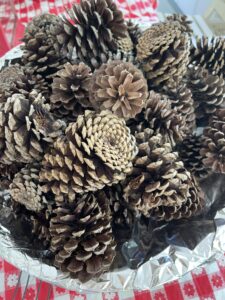
- Cover a large bowl with aluminum foil OR use a box to add baked pinecones to work from. Cool pine cones before using.
- Cover your workspace area with brown craft paper to protect the table's surface. The hot glue will drip onto the brown craft paper when working making the paper easy to remove and toss when finished.
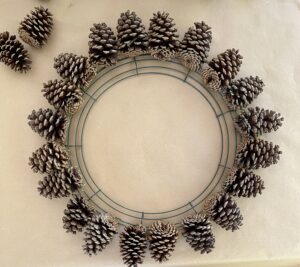
- Heat your hot glue gun and lay your wreath form in the center of the craft paper.NOTE: Make sure that your wreath form doesn't flex when adding the pine cones. If the form is too "flimsy", you may have to reglue pine cones later.
- Next, select a layer of pine cones to lay down around the outer edge of the wreath form before beginning to glue to give you a preview of the arrangement of pine cones before gluing.**Also helps with making sure you have enough of the right size that you need for that layer before adding to the wreath.
- Work with the wreath laying down to make certain that it lays well against a flat surface...ensuring that it will hang well.
- Begin adding pine cones to the outer rim of the wreath form by nestling in and adding hot glue, width of one pine cone to attach to the the outer two rings of the metal form.
- As you add pinecones to the glue on the form, push against the pine cone next to it and add a little glue between them so that they attach to each other, as well as, the form.
- Continue adding the next row of pinecones inside that ring, with points to the inside, alternating in spaces between the previous pinecones to fill in.
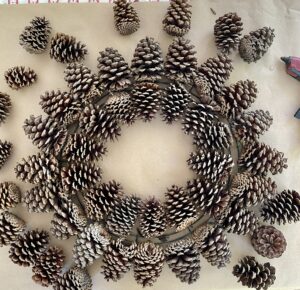
- Add a row of smaller pine cones on top, filling in gaps and alternating to give it more depth and creativity.
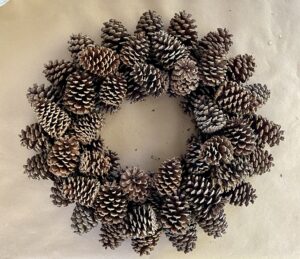
- That's it! Feel free to add other stems of florals or seasonal inspiration or ribbon to suit your fall or Christmas decor.
Notes
Inside or out, a pinecone wreath makes the perfect addition to front doors, porches or mantels from fall through the winter months. A perfect natural feel to compliment the season.
Add pumpkins and fall stems to make it the perfect wreath for fall.
Transition to Christmas by adding Christmas greenery and stems.
Use a smaller wreath form to create the perfect candle ring for tables.
TIP: use a sturdy enough wreath form that it doesn't flex after it's finished.
Enjoy!