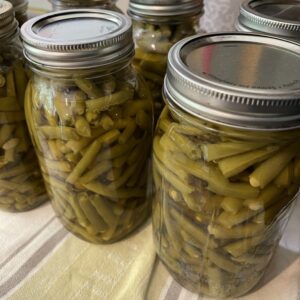
Home Canned Green Beans
Pressure canning green beans is the perfect way to capture the fresh taste of summer for great meals in the winter!
Equipment
- 1 Pressure Canner
- quart canning jars, lids and bands
- 1 Jar lifter
- 1 non metallic tool to remove air
- 1 tea kettle easier for filling jars
- 1 measuring spoons
Ingredients
- fresh green beans
- canning salt
Instructions
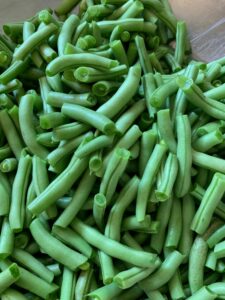
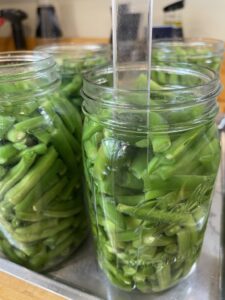
- Wash green beans in cold water. Remove ends and cut or snap into bite sized pieces.
- Follow your canner instructions on how much water to add to your canner for processing.
- Prepare quart canning jars by washing in hot water. Make sure that all jars are free from nicks on the rim that will prevent sealing.
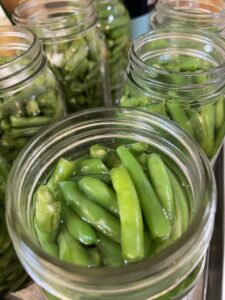
- Pack raw green beans tightly in jars and add 1 t canning salt to each quart; 1/2 t to each pint.
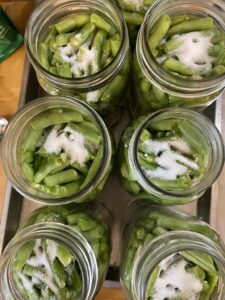
- Fill each jar with hot water leaving an inch head space.TIP: Using an electric tea kettle is so much easier to pour boiling water into the jars.
- Use the nonmetallic canning spatula to release air all around the jar and in the middle of the beans until you don't see bubbles rising. TIP: Air in any canned jars will often force liquid and sometimes overflow of product preventing a safe seal.
- Wipe rims of jars with a damp cloth and add clean unused seals and rings to each jar. Just a tip: Sterilizing rings and caps before adding to jars to can is no longer recommended by lid/ring manufacturers...they may actually prevent them from sealing. NOTE: Rings don't need to be too tightly added.
- Make sure that you begin pressure canning with a clean canner and have checked that your gasket is in good condition and you see light through the steam vent. Add the correct amount of water according to your canner and place the rack in the bottom of the pressure canner.
- Add jars to pressure canner on top of the rack.
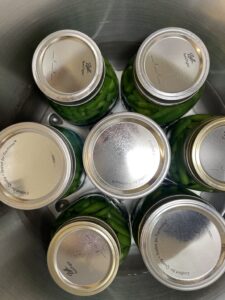
- Lock on the top and begin heating the canner without the weight on top.
- When steam is running through the vent on top for 10 minutes, add the weight. At this point I have a second steam release that will lift and lock. Each canner is different so follow your manual on operating your canner.
- Once the weight is on and the steam vent is closed, the pressure canner will begin to build pressure. For green beans you want the pressure at 10 pounds for 25 minutes for quarts, 20 minutes for pints. TIP: Begin processing time when the pressure is at 10 pounds.
- NOTE: Don't leave the canner while processing. At 10 pounds pressure, turn down the heat to hold it there and not continue rising.
- Once the processing time is complete, turn off the burner.
- The next step is the difficult one. LEAVE THE CANNER ALONE to cool down. Don't rush it! NOTE: Once the pressure for the canner has gone down to zero, still let it cool down before removing the weight. The longer you leave it, the better it is for holding the liquid in the jars.
- When you remove the weight, NO STEAM should come out of the vent beneath it. If it does, add the weight back to the canner. If not, something called syphoning will happen and the liquid will come out of the jars creating a less than safe seal and product.
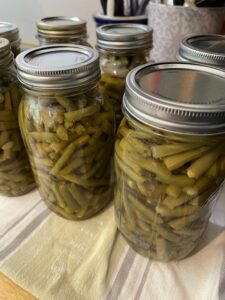
- If there is no steam after the weight is removed, remove the lid from the canner and use a jar lifter to safely remove the jars from the canner. Add them to a draft free area on a dry towel to continue to cool and seal. Make sure all lids have sealed.
- Let them sit for 12 to 24 hours before moving them to your pantry. Don't forget to label and date each sealed jar before storing.
- If jars don't seal, feel free to reprocess them. Make sure that they have enough liquid in them if processing again. You will need to add NEW lids and wipe rims off again before reprocessing, though. NOTE: Discard lids that have been used and/or processed. You don't want to risk them not sealing again and losing all of your produce.
Notes
Canning green beans is one of the BEST vegetables to have in your pantry during the winter months. Much simpler than you thought...and the rewards later will be loved by all who have their feet under your table.