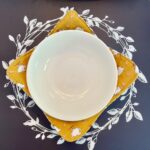
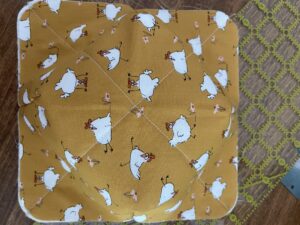
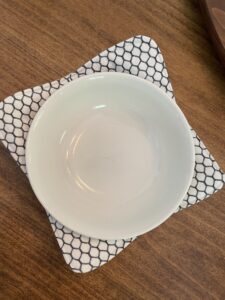
DIY Quilted Bowl Cozy
A quick and easy sewing project to create quilted bowl cozies to hold bowls of hot or cold food for easy handling.
Yield: 1 bowl cozy
Equipment
- 1 Sewing machine
- 1 pair scissors
- 1 set fabric pins or clips
- 1 ruler
- 1 rotary cutter/mat, optional
- 1 pencil
Materials
- 1 spool 100% cotton thread to coordinate with fabric
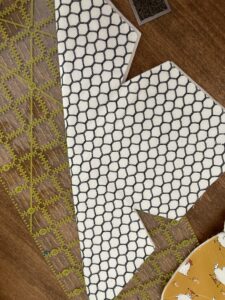
- 2 10" squares of 100% cotton fabric
- 2 10" squares of 100% cotton batting
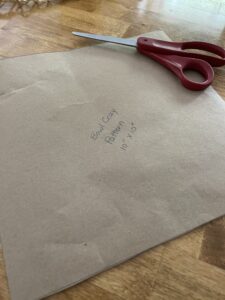
- 1 10" square of brown craft paper or card stock
Instructions
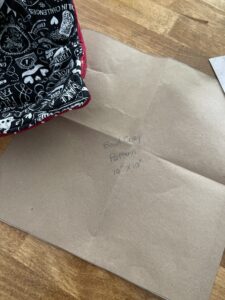
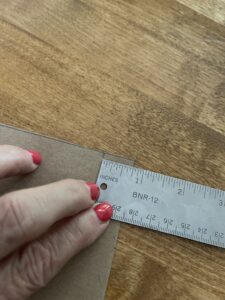
- Create a paper pattern by making a 10" square out of paper. I love using brown craft paper.
- Fold the paper pattern in half and in half again, creating 4 folded squares when you lay in flat.
- Fold the pattern in half and on the half way mark, use a pencil to mark 2" down on each side.Fold the opposite way, and mark those two sides, too.
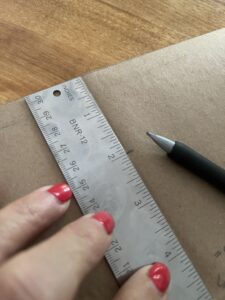
- Above each of the 4 - 2" marks, make a mark at 3/4" from the fold on each of the four marks.
- Next, with a ruler, draw a diagonal line from the 3/4" mark to the 2" mark creating a triangle on each of the four sides.
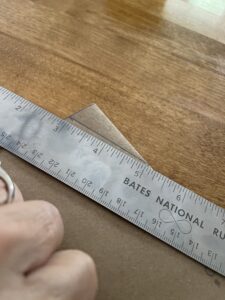
- Using sharp scissors, cut the diagonal line of each of the four sides.
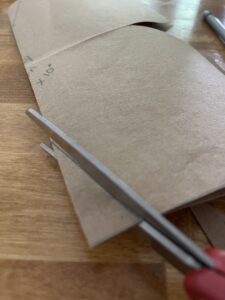
- When you open the pattern flat, you will have four triangles in the center of each side that will be 1 1/2" wide at the top and end 2" from the center of each side.

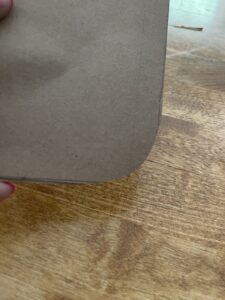
- If you want square corners on your bowl cozy, like my original one, stop here.BUT, if you want to have round corners, simple fold your pattern and cut all four corners with a rounded edge.
- Place the right side of each fabric onto a square of batting.
- Pin together each side of fabric and batting to the pattern and cut out.
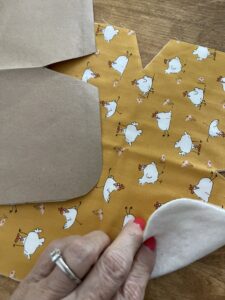
- Remove pattern and pins.
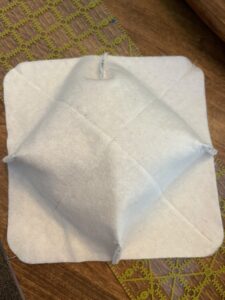
- Fold each set of fabric and batting in half with batting inside and press with the edge of ruler creating a diagonal crease down from one corner to the other forming an X with a crease.
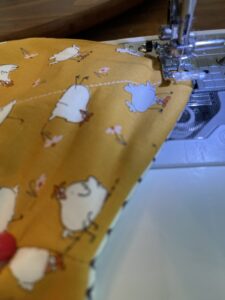
- Stitch the crease line from one corner to the other diagonally, forming an X. Repeat on the backing set of fabric and batting.
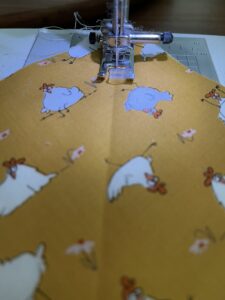
- You should have an X stitched on each set when finished. This helps prevent the batting and fabric from slipping during the rest of the sewing.
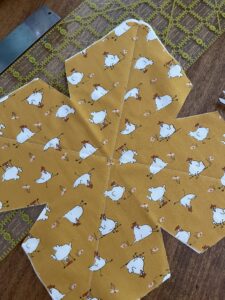
- Next, begin the darts. Folding the V with right sides together, begin stitching from the inside point to the outside. This helps make certain that you have caught both sides of the fabric together at the dart point. Otherwise, if fabric is not caught, it's almost impossible to correct. Make sure that you backstitch both ends of the dart. Check each dart to make certain the fabric was sewn inside.

- Repeat on the bottom fabric so that there are four darts...one between each sewn line on each side.This is what gives the cozy the "bowl" shape.
- Place the right sides of the bowls together and pin the edges of the fabric/batting together.
- Begin stitching 1" from any corner and back stitch after you begin to prevent the stitching from coming out.Use a 1/4" seam.
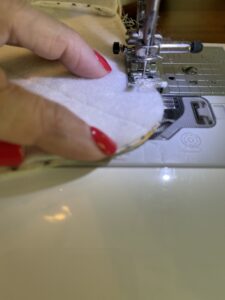
- For square corners, when you get to the stitching in each corner, leave your sewing needle in, raise the presser foot and turn the fabric, lower the presser foot, and continue stitching to the next corner. NOTE: If you have trimmed to make each corner round, just pin and hold the edge of your fabric as you sew around each corner.Repeat until you get to the side you where you began and leave a 3" opening for turning the bowl inside out and back stitch to prevent the stitching from coming out when you turn the bowl inside out.DON"T FORGET to backstitch where you stop so that it won't unravel when turning the bowl inside out.
- If you have square corners, trim the corners making sure that you don't clip the stitching.If you have rounded corners, you can make a few tiny clips from the edge of the rounded corner before you turn it inside out to help the corners lay flat after turning and stitching them.
- Turn the bowl inside out and use your fingers to push out the corners. A turning tool is helpful to make sure that the corners come out sharp and flat. The batting will prevent it from being really sharp, but that's okay.
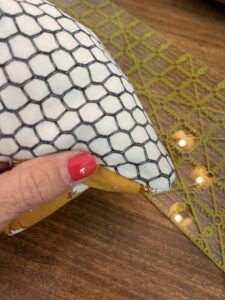
- Once edges and corners are pulled out and flat, an iron to press them flat before you topstitch and close the opening will make for a more finished look.
- Add pins to hold the edge flat as you topstitch about 1/4" around the edge of the bowl.I remove the pins before stitching because of the fullness to prevent possible needle breakage.Make sure that you tuck in the 3" opening where you turned the fabric inside out and stitch it closed as you topstitch.
- You are done!!
Notes
A quick and easy DIY for bowl cozies that makes the BEST gifts for hostess, teacher, friend, family, co-worker or ANYONE!