Great DIY Blanket
A beautiful way to personalize a blanket for special gifts!
Equipment
- iron
- Sewing machine
- scissors
- inkjet printer
Materials
- 1 Blanket of your choice
- Photo for the blanket
- Fusible interfacing
- transfer photo material
- snuggle fabric softener
- thread to match photo
Instructions
- Select a photo that you would love to have attached to a blanket.
- Size the photo to add to blanket.
- Add photo fabric as directed to the inkjet printer and print the image onto the fabric.
- Wait for at least 5 minutes or until ink dries on the fabric.
- Trim the photo leaving a border to the edge, if preferred.
- Peel off the paper backing from the photo.
- Add a little bit of snuggle fabric softener to cool water to a 9 x 13 glass dish and mix. **The pan should be large enough for the photo to lay flat.
- Holding the fabric, immerse the photo, face down, in the cool water solution and gently swish for about 15 seconds, away from any ink that is floating in the water.
- Lift the fabric out of the water, making sure that it doesn't fold down on itself.
- Place the fabric face down on a towel. Fold part of the towel over the back of the fabric and blot it to remove excess moisture. Open the towel right away.TIP: Don't worry if you see a ghost of an image, it is merely excess ink.
- Lay the fabric face up on a flat clean surface to dry.
- After it is dry, place the photo fabric between craft paper and iron with a dry iron--NO STEAM- to set the image into place.
- Cut a piece of fusible adhesive a little bit smaller than the image and remove one side and iron to the back of the photo between the craft paper, again with a dry iron. It should adhere to the back side of the photo.
- Remove the back side of the fusible adhesive and place the photo in one corner of the blanket. Lay craft paper over the top and iron to fuse the image onto the blanket, making sure it is straight with both edges.
- Using a zig zag or blanket stitch, stitch all around the blanket edges. ***Blanket stitch by hand if you prefer.
Notes
This is a GREAT DIY gift idea for so many occasions.
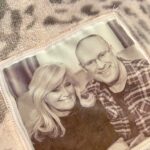
A wedding photo, adoption photo, grandparents photo...the list goes on...to personalize these for any occasion.
For me, Christmas gifts are happening here with this idea!
TIP: If you don't have a sewing machine, feel free to hand stitch a blanket stitch around the edge of the photo.