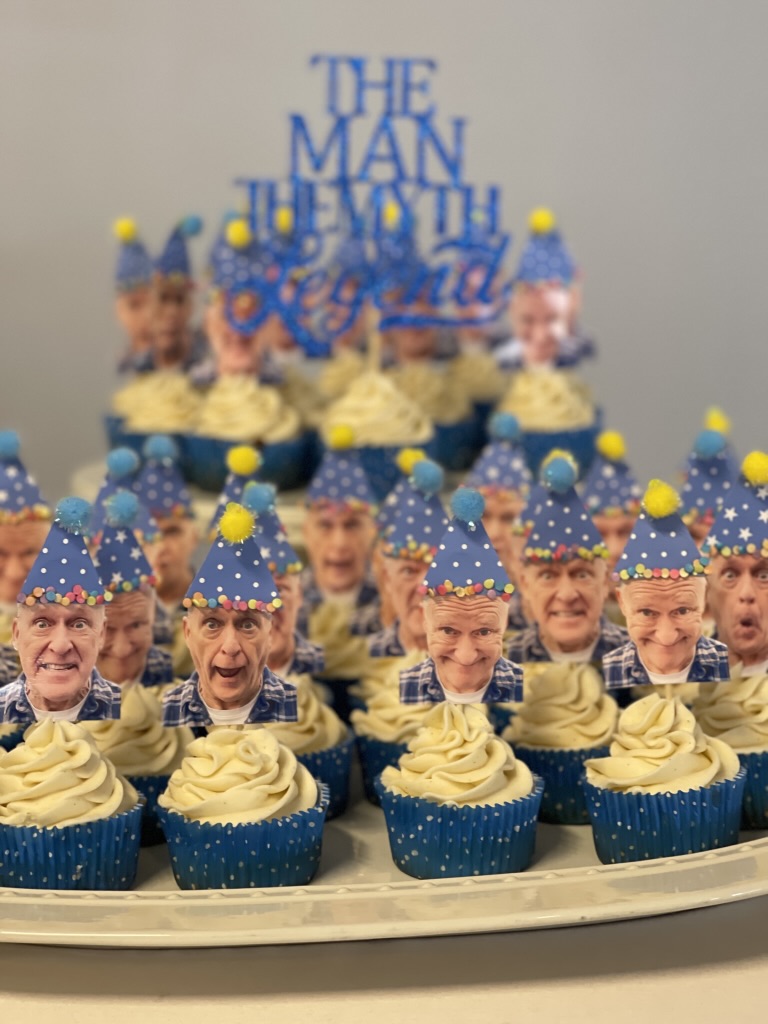
Hope you LOVE these DIY Photo Birthday Cupcake Toppers!
My husband recently celebrated a new decade for his birthday. You truly wouldn’t know it by the party planning. It was so much fun in creating a venue, menu and party that he would love…that it felt like I was planning for a 7 year old. Truly! That’s when the CUTEST Photo birthday cupcake toppers were created.
You see this snorkeling, roller skating, rock ‘n’ rolling, photographer guy is the most fun. A couple of decades ago we had a surprise party at the roller skating rink where he truly was at his best. Even then, guests were hesitant to don the skates and “join in” on the rink floor.
When the party planning began for this one, he mentioned a rink party again…NOPE! No one wants to watch kids roller skate with him viewing from the sidelines.
Perusing through Pinterest for ideas…black and gold were NOT his favorites. Blue became the color of choice.
AND the theme? Well, his favorite hobbies, a list of rock and roll music and a slide show of his photographs became melded into a fun “roast” for him.
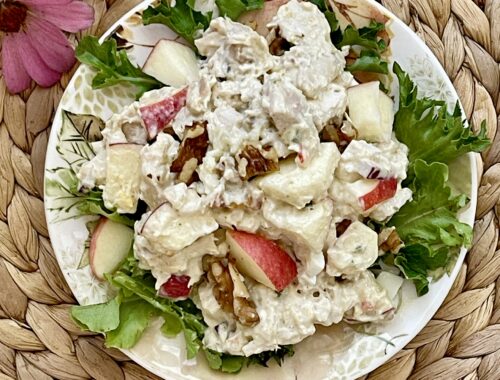
The menu became appetizers, drinks and cakes that he loved.
- Captain Rodney’s Dip
- Cheese Roll
- Charcuterie Wreath
- Candied Jalapenos with cream cheese
- Crab Cake Appetizers
- Oreo Popcorn
- Pound Cake
- Red Hot Apple Juice
- Coffee Punch
But, then the Birthday Cupcake Toppers were created.
Among the decorations came the how do we want to serve birthday cake to this crowd?
Now…if you know him or have followed this blog long…you will know that Aunt Helen’s pound cake is ALWAYS made for the twins birthday. That will never change. You can find the recipe here.
But, my niece decided she wanted to make cupcakes for him. Her cupcakes are ALWAYS his favorite! What to put on them?
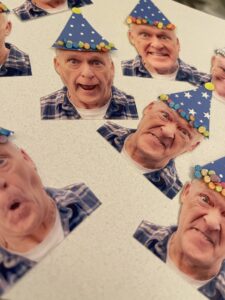
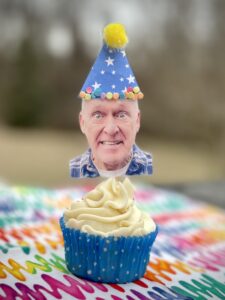
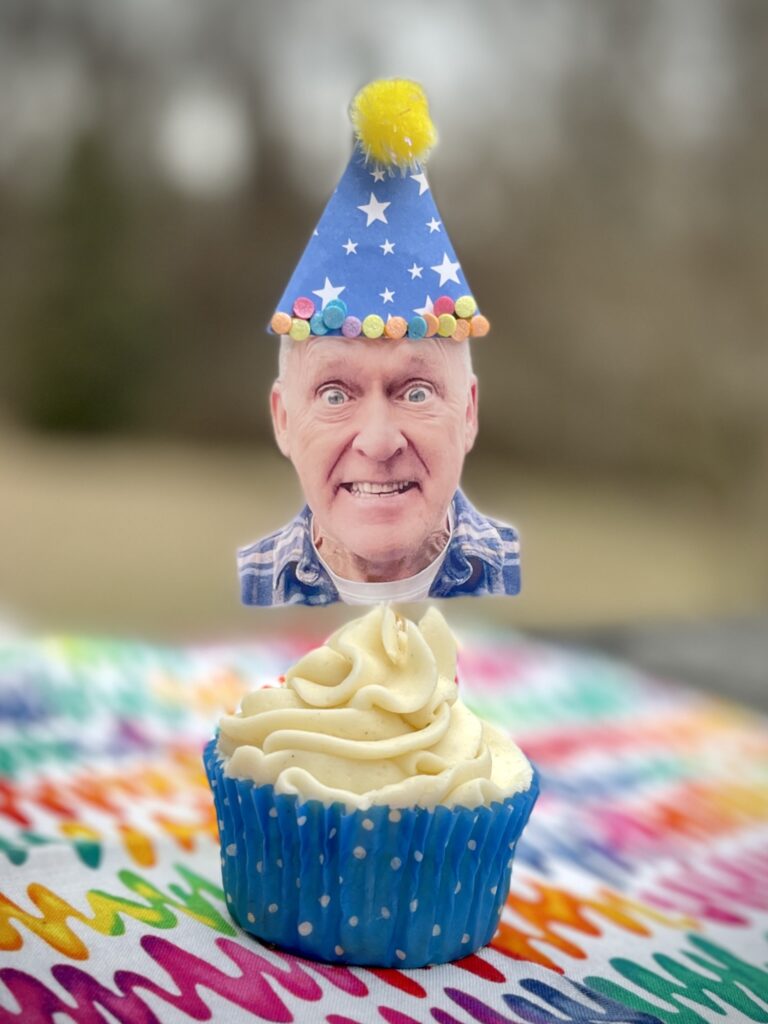
You see, it’s a joke about the many faces of G. How perfect to play on that for the birthday cupcake toppers.

The CUTEST DIY Photo BIrthday Cupcake Toppers!
Equipment
- 1 printer
- 1 camera- or phone camera
- 1 computer
- Photoshop is a great tool!
- 1 pair of scissors
- 1 pair of wire cutters
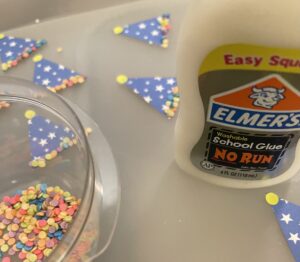
Materials
- 4 x 6 Photo Shop paper
- Liquid Glue
- Cupcake sprinkles or other hat decorations
- Pom Poms for hat
- Scrapbook paper
- Skewers
- packing tape
Instructions
- For best lighting, take subject outside for photos.
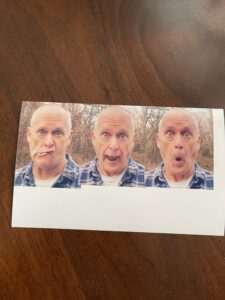
- Looking through your camera or phone lens, center the person for a head and shoulders photo.
- When you are the correct distance apart, try and take as many photos as you can with different expressions with neither of you moving so that the results of the images are alike as much as possible.
- Using your photo editing program–photo shop works great–add the photo to your program. Select the images you like and size them to 2" wide and 2 1/2" tall to fit the cupcakes.
- Position 3 photos on a 4 x 6" photo paper.

- Place 4 x 6 photo paper into your printer and print as many as you need for the number of cupcakes desired.
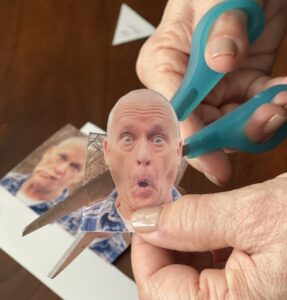
- Use sharp scissors to cut as closely to the image as possible.
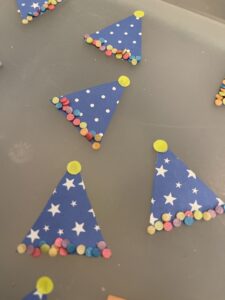
- Make a template for your birthday hat–1 1/2" for the width of the bottom of the hat…and 1 3/4" for the height and each side. Using the template, cut out as many hats as needed from scrapbook paper matching your theme and colors.
- Decorate the brim of the hat using a line of liquid glue and sprinkling cupcake sprinkles OR your other favorite decoration or trim to match your theme.
- Glue a pom pom to the top of the hat. TIP: You could hole punch paper if you don't have pom poms…but…pom poms really made them better!
- When the hats are dry, add one dot of glue to the top of the head that's been cut out and position the hats on the photographs.
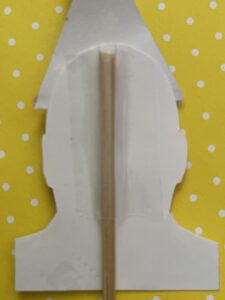
- Cut skewers to 4 1/2" using wire cutters to cut them.
- Tear off small pieces of packing tape and cut in half giving just enough tape to center the skewer and adhere to each side beside the skewer to the photo but not any larger so it isn't seen from the front.
- Place a skewer in the center of the tape.
- When cupcake toppers are dry, flip them over and center the tape and skewer where the skewer touches the top of the photo–not into the hat–and secure the tape on each side of the skewer.
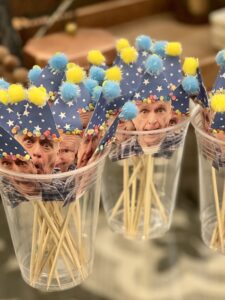
- They are NOW ready to add to the cupcakes!
- Insert those cute photo cupcake toppers into each cupcake!
Notes
Tips for Creating these Photo Cupcake Toppers–
- Take photos outside to brighten up the color and lighting for the best results.
- Have the subject stand in one spot where you can center their shoulder shot.
- Ask the person to make silly faces and keep taking those photos!
- Pick out your favorite ones to use for the cupcakes.
- If you have photoshop, color balance and size the photos where the shot is about 2″ x 21/2″” in size.
- Arrange 3 photos on a 4 x 6 photo paper image in the computer…if you have larger photo paper, arrange the number that fit onto that paper.
- Add photo paper to the printer–we had 4″ x 6″ paper.
- Print and them trim close to image.
- Create hats for your theme.
- Cut your skewers no taller than 4 1/2″–I had to trim mine again!
- Use packing tape to tape the skewers to the back of the photos.
- Insert those cute toppers into your favorite cupcakes.
- Prepare yourself for much laughter at the party!
Don’t forget to pin this on Pinterest to have ready for your next party planning!
Other uses for these cute Photo Cupcake Toppers–
- Retirement party
- Graduation party
- Birthdays for ALL ages
- ANY event that needs fun and a cute cupcake topper.
Can I be honest?
I laughed through the whole process of creating these!
When my niece added them to her fabulous cupcakes, I laughed again!
Seeing the looks on people’s faces when they saw them and tried to pick their favorite was priceless!
BEST party planning and DIY project ever!
The laughter while making them made it worth every moment!
THANK YOU, Emi for the amazing cupcakes that were enjoyed by all after guests selected their favorite!
One last tip…
Don’t stop with the cupcakes with this project!
While you have the photos, print more photos on card stock in larger sizes and make pennants and banners with them!
A few added to centerpieces would make it even more fun.
Hope you love this DIY! It was so fun making them that I had to share them with you all.
Loved that others helped celebrate!
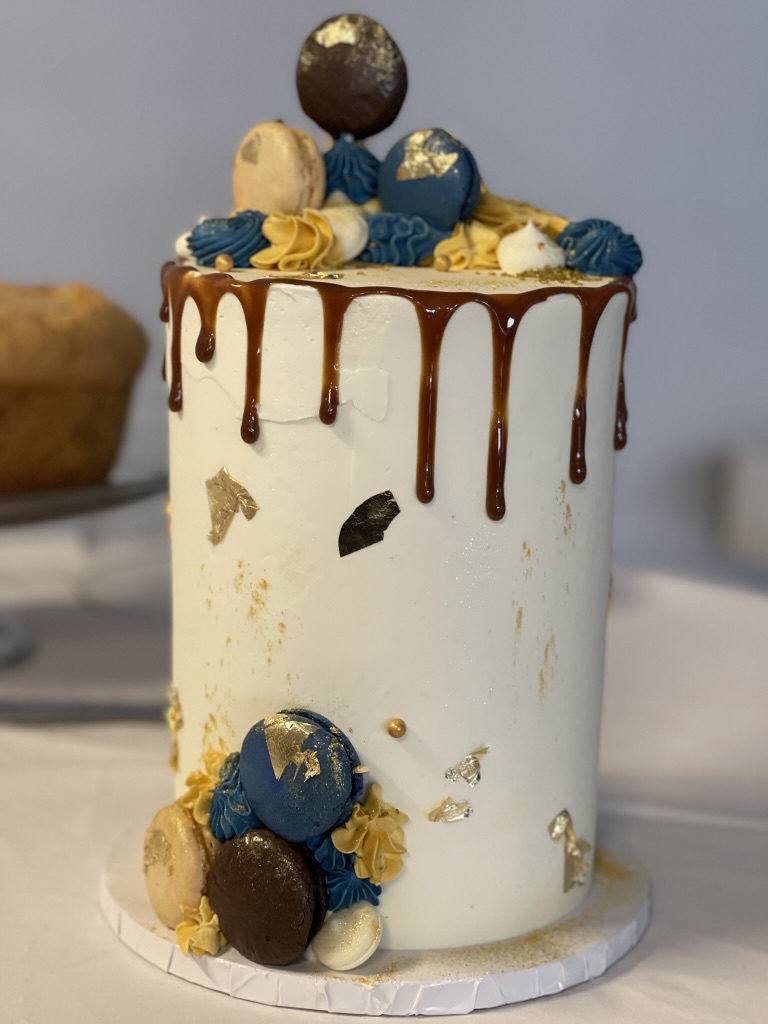
Thanks, Ro, for those crabcakes appetizers. To Martha, how special were those cheese balls? And…our sweet friend, Kristia @ The Peery House? This cake was stunning and a delicious addition!
Here are a few affiliate links to find the supplies used for this project…helps you locate what I used…and if you shop the links it’s the same price for you but may provide a tiny commission to help this blog bring you more fun! Click on the photos to shop!


8 Comments
Tracey+Buchanan
Those are hilarious!! Love them! Love you and Gary and your joy in life!
Leslie J Watkins
Thank you, Tracey! I laughed all the way making those toppers. We love you guys, too!
Vickie Ramey
Absolutely love this! Not because of the DIY project but because it’s truly a show-stopper! A hilarious way to highlight a person’s (Gary’s) personality! And you nailed it!
Leslie J Watkins
Thank you so, much! I laughed through making each of them! You are right! THOSE FACES!
Carla Vinson
Oh, Leslie, HOW Delightful! I chuckled out loud when I opened your email and saw Gary’s beloved faces. I plan to send this blog entry to a number of people that might enjoy doing this fun project. I miss you guys.
Leslie J Watkins
Thank you, Carla! I laughed ALL the way through making and serving these. He was such a joy to celebrate! Thank you for sharing it! Be watching…your Mom’s blueberry coffee cake is coming to the blog soon…
alda ellis
With all my family birthdays coming up, I am surely saving this idea. It is so darn cute . Birthdays are a big deal at our house and this will just be delightful to share. sending love and hugs!
Alda
Leslie J Watkins
Isn’t it fun?! I laughed all the way through creating and serving these! Can’t wait to see yours!