Great Tips for Creating Embossed Valentine’s Cookies
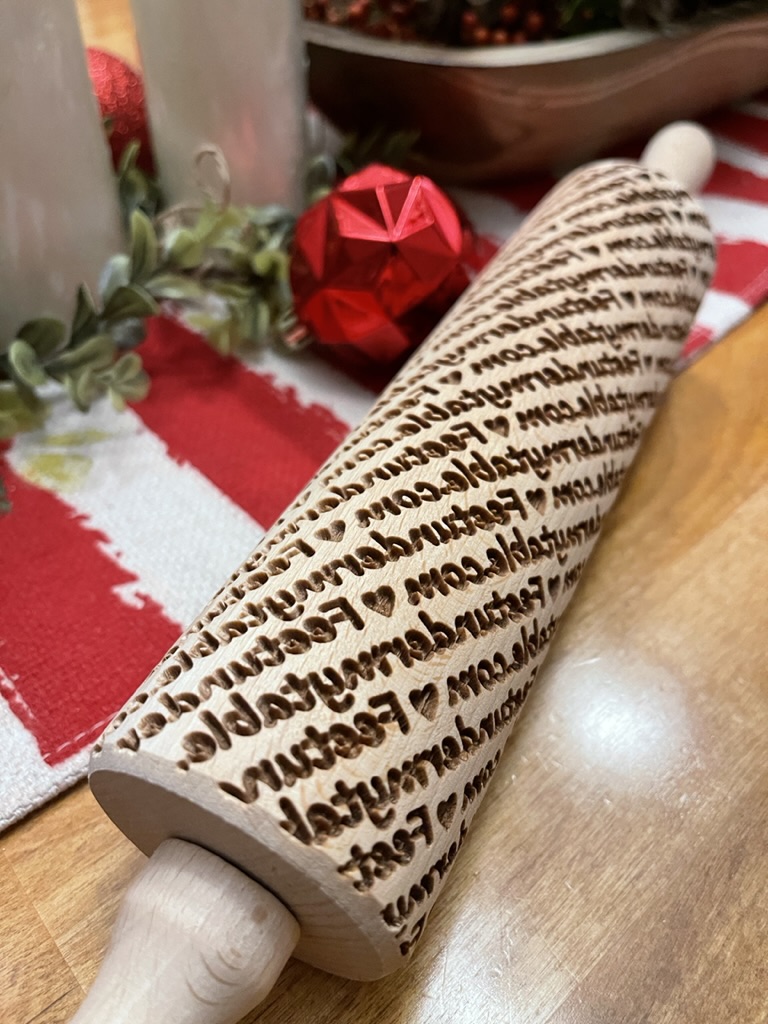
Do you remember the embossed rolling pin I shared with you in the heart gifts post? I have tips on creating the sweetest embossed Valentine’s cookies to share with you today.
I am so pleased with the results. So…here, we go!
Off to make cookies with that rolling pin!
For all of you with grandchildren or littles or bigs in your life who need a bit of love…you may need a personalized rolling pin of your own…I’ve linked affiliate links below for one similar to mine.
Now…the rolling pin that my husband ordered from Etsy for me came from Poland, I believe.
The recipe was in English, but the European measurements were a tiny bit daunting, right?
Things like gr were the abbreviations.
Now…I wanted to make sure that the recipe I used was one designed to use with this cute rolling pin…not veering off of the baking road just yet.
I have no clue who to thank for this great embossed Valentine cookie recipe.
Here are the steps given with that embossed cookie recipe:
- Preheat your oven to 200 Celsius…hmmmm…that’s 392 degrees F…let’s call it 400 degrees!
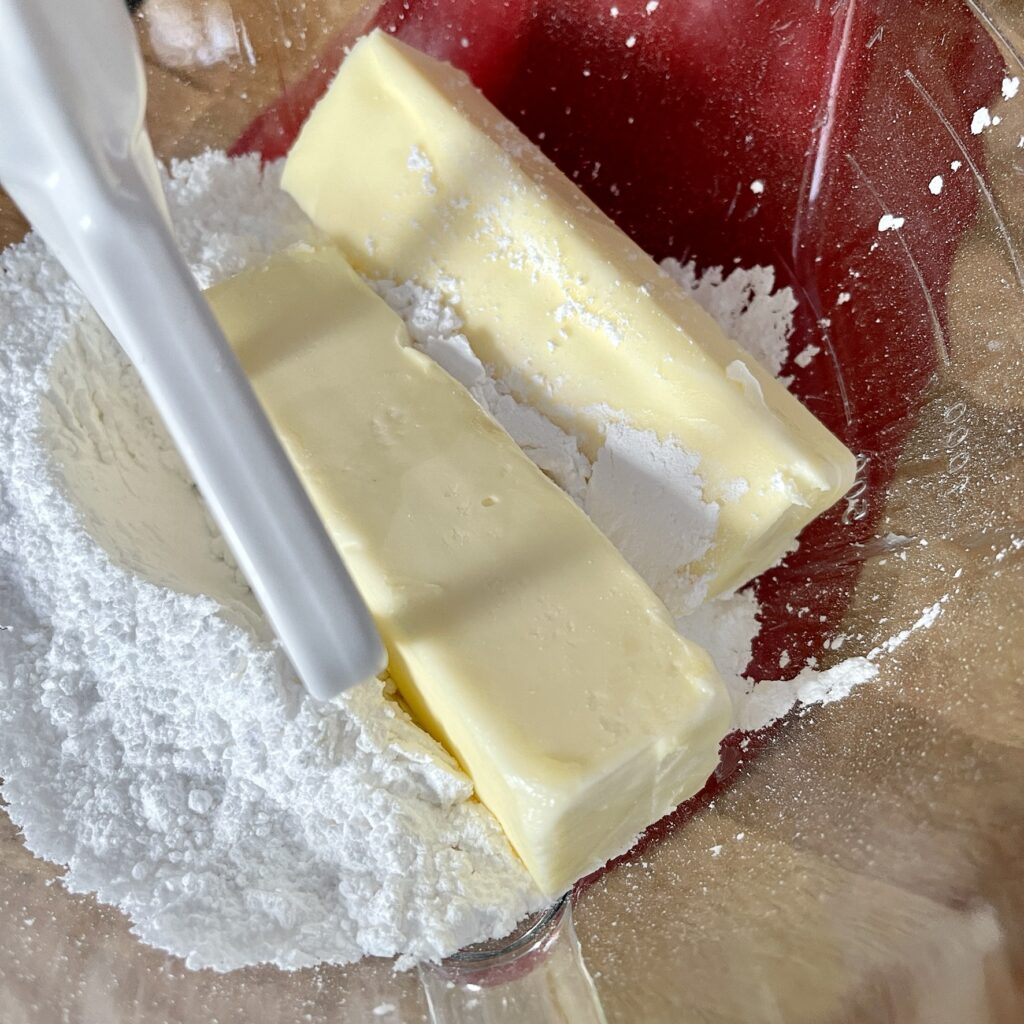
- Cream together butter and sugar with your mixer.
- Add egg and extract and continue to mix well.
- In a separate bowl sift together the all purpose flour and salt and add it to the creamed mixture a little at a time until well mixed.
- Roll out the cookies onto a parchment paper, dusting with flour as necessary.
- Cut into desired shapes and place on a parchment lined baking sheet.
- Bake cookies for 7-8 minutes or until tops appear dry rather than shiny.
In researching embossed cookies, I knew this recipe was missing a few steps.
Begin by adding the powdered or confectioner’s sugar and softened unsalted butter to a mixer and cream together and then add the egg and extract.
It was interesting that the type of extract wasn’t given; so, I chose a mix of vanilla and almond.
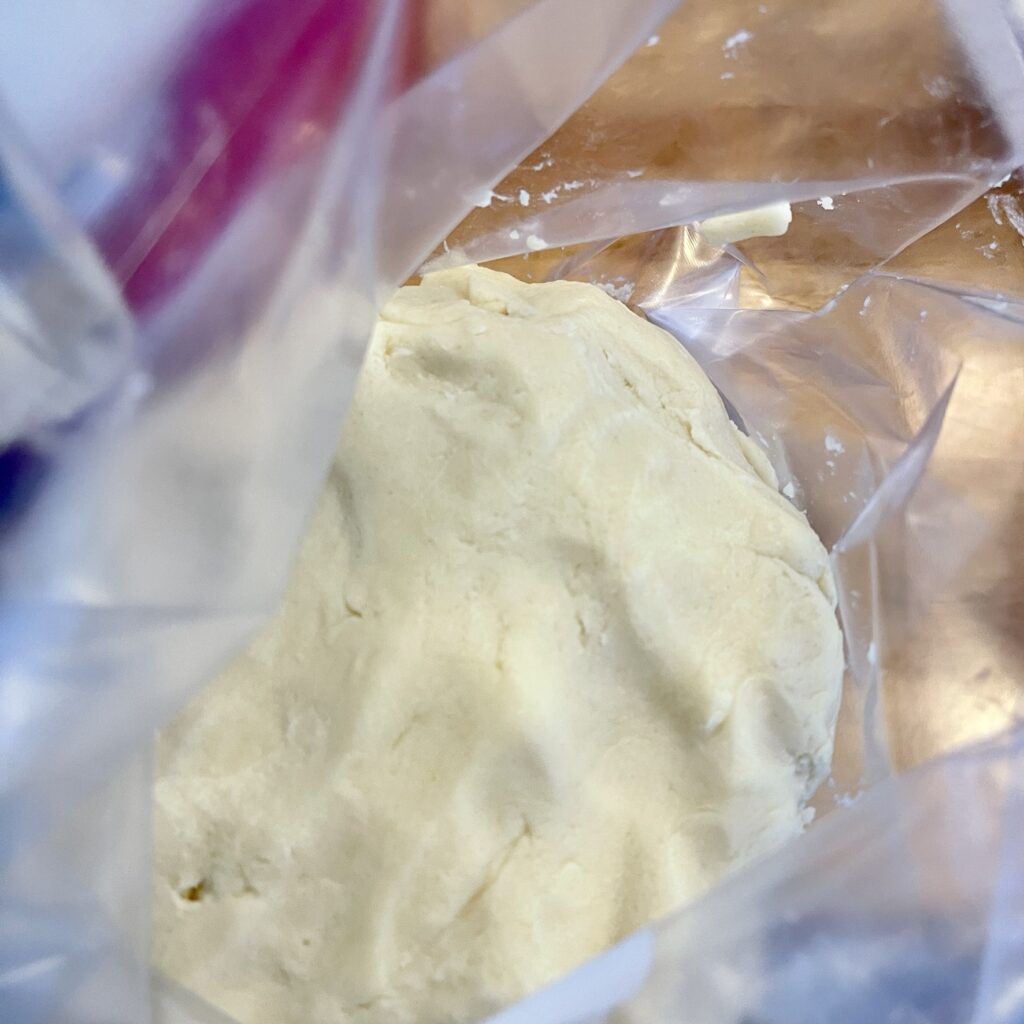
Chilling the dough before rolling is important. So, adding the dough into a ziplock bag for a few minutes is critical, especially with the embossing process. That step was left out of the recipe.
10 Tips for Embossed Cookies:
- Select a recipe that does not have acid or leavening agents to prevent losing the embossed image when baking.
- Be careful to roll the dough to an even thickness with a regular rolling pin BEFORE using the embossed rolling pin.
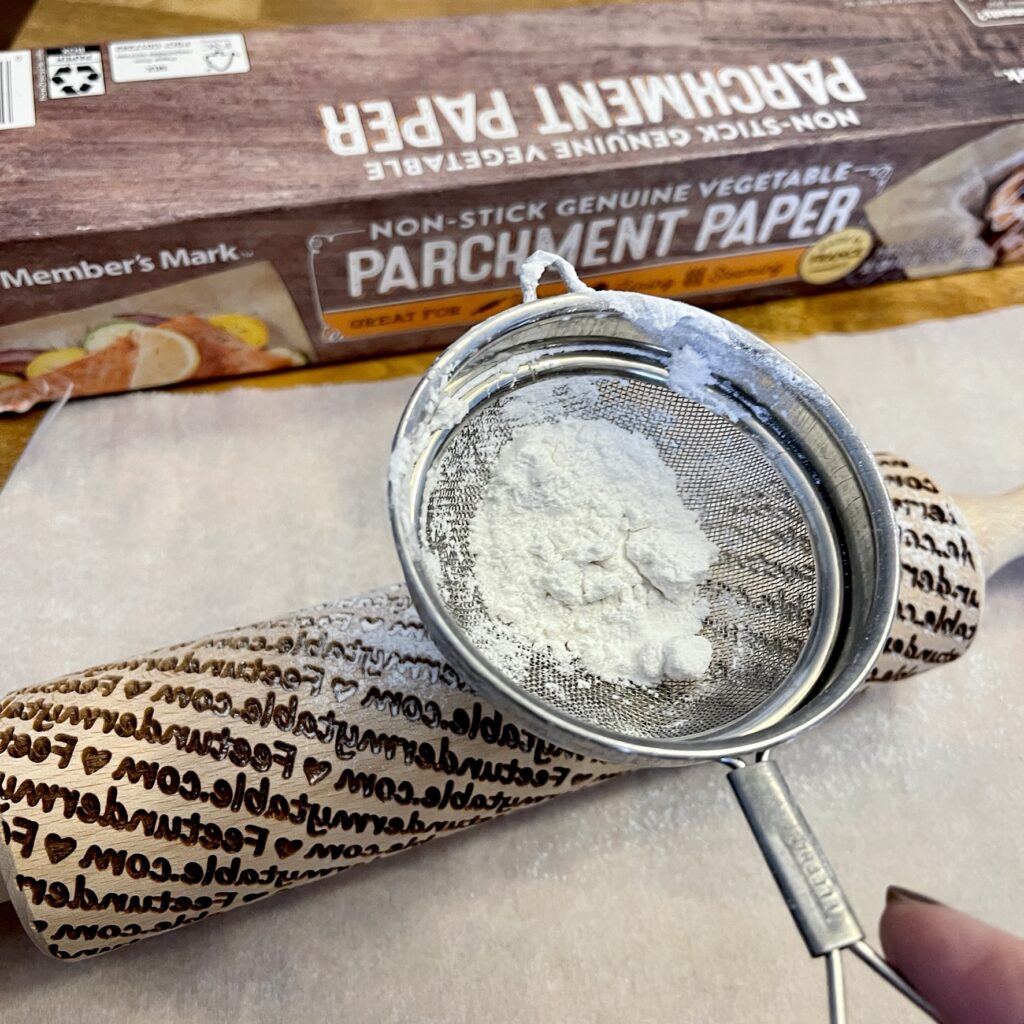
- Dust the embossed rolling pin with flour before rolling and as needed to prevent sticking. Shake out excess flour from the pin before using.
- Apply even pressure and only roll once and one direction when rolling with the embossed rolling pin.
- If dough warms during rolling, place back into the freezer or refrigerator for a few minutes. Warm dough will STICK to the embossed rolling pin!
- Be careful when cutting out cookies to make sure that the image is in the correct location within the cutter.
- To help the embossed image stay intact, refrigerate cookie dough after rolling and cutting prior to baking.
- Make sure that the oven is preheated and cookies are placed into the oven cold to ensure great results.
- To clean the embossed rolling pin after making the cookies, clean immediately with a dry brush. I had to use a toothpick to remove soft dough in one place on my pin. Not a fan of doing this!
- Be careful not to immerse the wooden embossed rolling pin in water or dishwasher. Keeping it dry is best practice for care.
Cool the cookies before decorating.
You can see that I learned what to do and NOT to do with the above tips with my first attempt!
Does that happen to you, too?
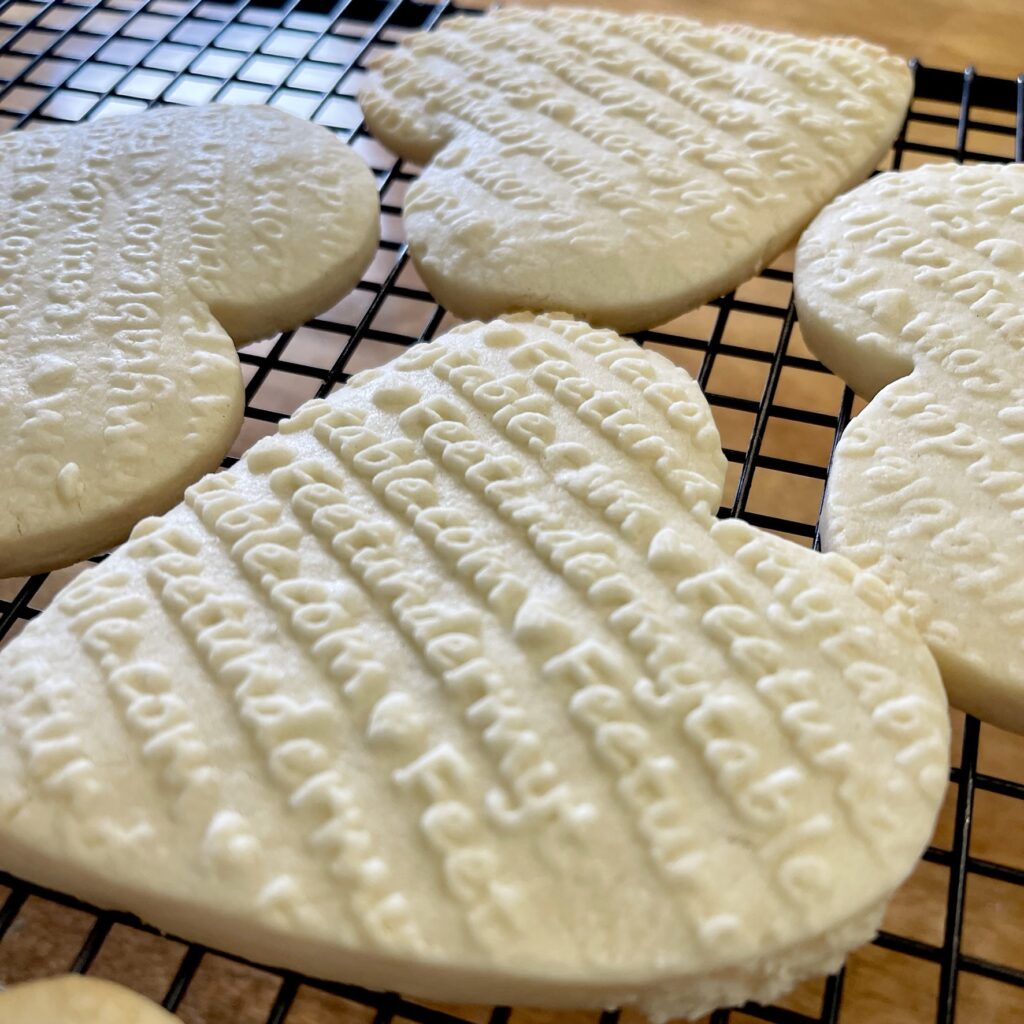
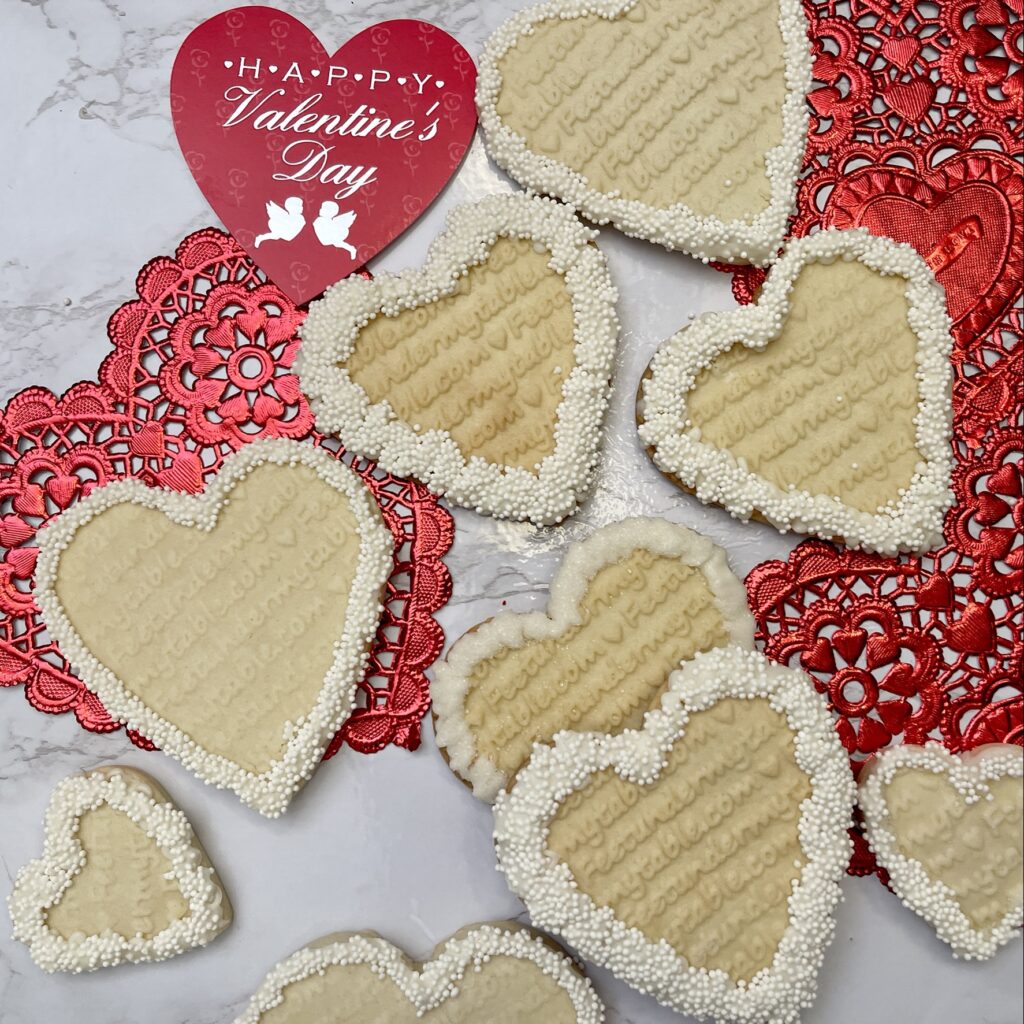
Even pressure and even thickness matter more with these cookies with both embossing and baking results. I am sharing my success and the “not so pretty” ones showing why this matters. Yep!

Embossed Valentine Cookies
Equipment
- 1 embossed rolling pin if you have one!
- 1 regular rolling pin
- 1 mixer
- 1 oven
- microwave
- 1 heart cookie cutter
- 1 cookie sheet
- parchment paper
- quart ziploc freezer bags
Ingredients
- 1/2 lb unsalted butter, softened 230 g, if weighing
- 7/8 C powdered sugar 175 g, if weighing
- 3 1/4- 3 1/2 C all purpose flour 400-425 g, if weighing
- 1 large egg
- 1/2 t vanilla
- 1 t almond extract
- White chocolate or milk chocolate for dipping. Almond bark may be substituted for this.
- Sprinkles
Instructions
- Cream together butter and sugar with a mixer.
- Add egg and extract and mix well.
- Sift together flour and salt.
- Add flour to the wet mixture a little at a time until well incorporated.
- Place dough into a ziplock bag and chill before rolling out.
- Dust the embossed rolling pin with a little flour in a sifter to prevent sticking and shake to remove excess.
- Roll the dough onto parchment paper on a flat cookie sheet with a regular rolling pin first to desired thickness-(keep in mind that pressure with the embossed rolling pin will decrease thickness.)
- Then roll the dough once in one direction with the embossed rolling pin, applying even pressure, ensuring evenly imprinting the image.
- Cut cookies using a heart cookie cutter or desired shapes.
- Remove extra dough from parchment so that only cut cookies are left on the cookie sheet.
- Place the cookie sheet into the refrigerator for a few minutes to make sure that the cookies are cold before baking. This helps hold the "embossed" image a little better.
- Preheat oven to 400 degrees while cookies are chilling.
- Once chilled, bake cookies in preheated oven for 10-15 minutes until tops appear dry rather than shiny. Remove before edges begin to brown.
- Remove cookies from the oven and place cookie sheet on a cooling rack while preparing the chocolate or almond bark for dipping.
- Add a few squares of almond bark to a quart sized freezer bag and microwave in 20 second increments until melted, turning over bag between warming.
- Using kitchen shears, snip a tiny corner off for piping chocolate onto cookie.
- Pipe chocolate edge on cookies and top with sprinkles.
- Let cool and set completely before moving them from parchment paper.
Notes
Decorating Embossed Valentine Cookies
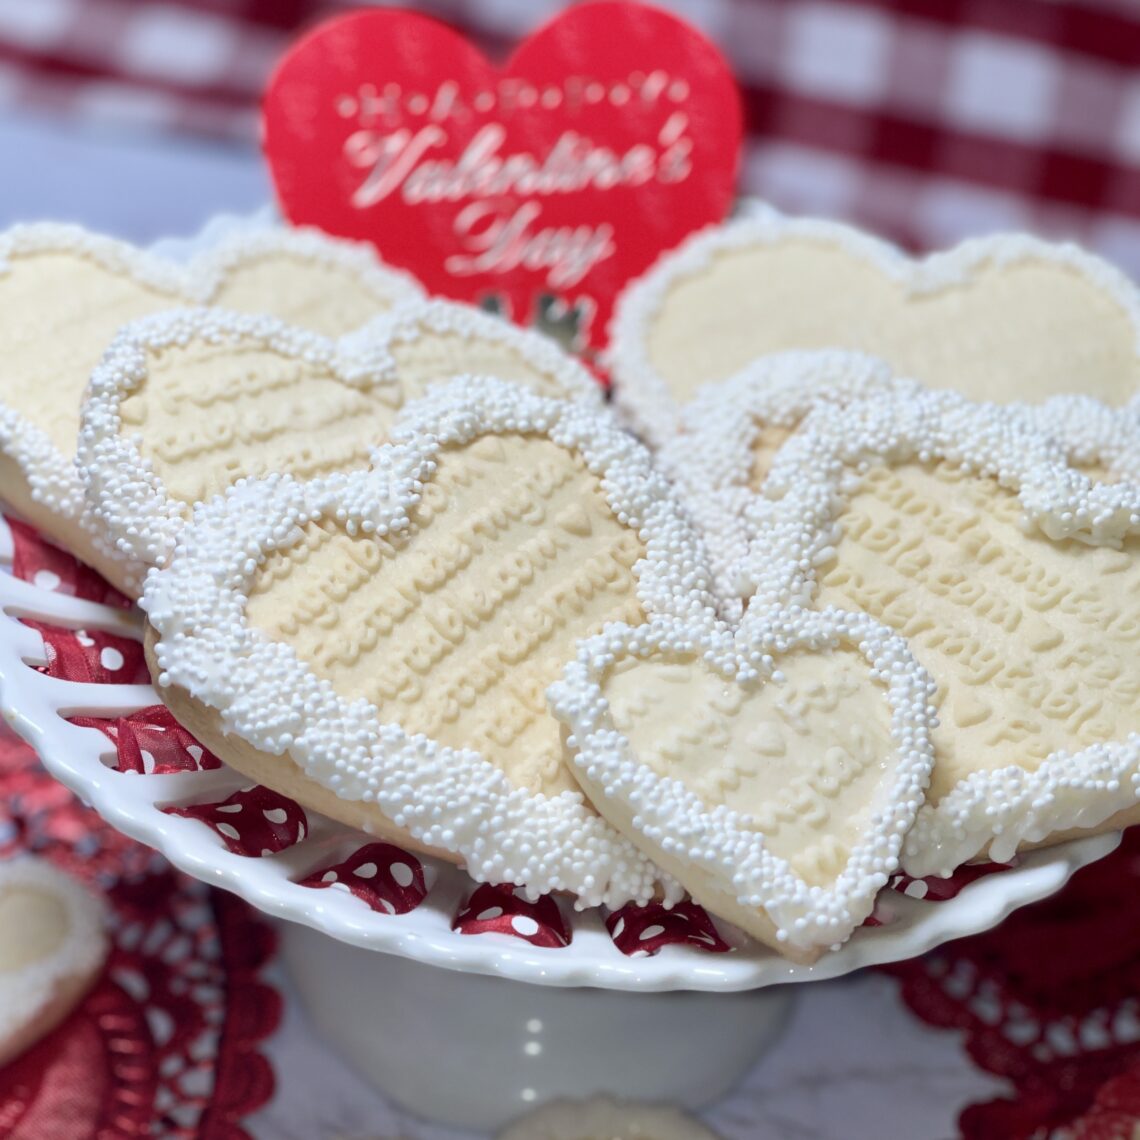
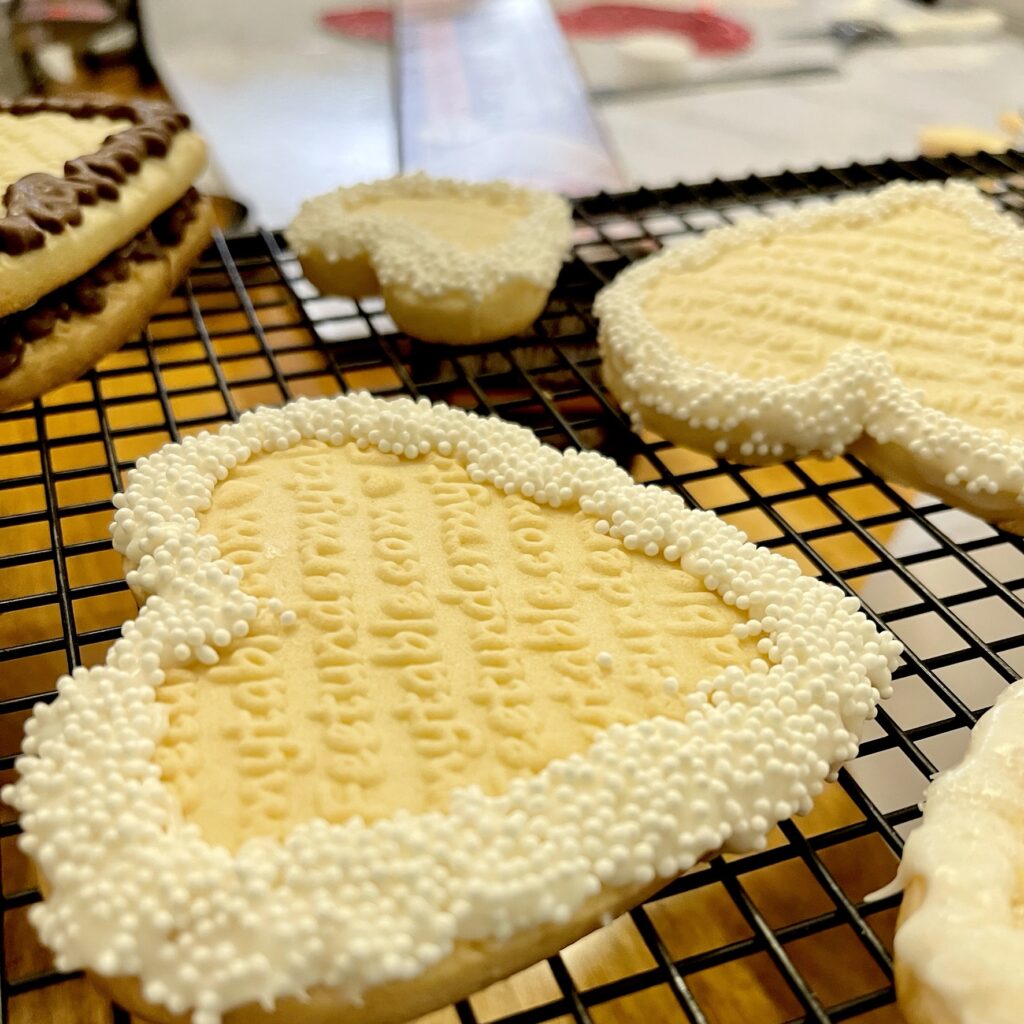
Because of the embossed writing on these Valentine cookies, I thought a simple edging with melted chocolate or almond bark was the perfect choice.
This recipe is not a really sweet one, so adding a bit of melted chocolate with sprinkles added just the right touch of sweetness to make it a special cookie.
Can I tell you that I made a quick and easy decision in decorating these?!
I always temper chocolate or almond bark on the stove to dip strawberries, pretzel rods, etc.
But, it just seemed the perfect choice to add a few squares of almond bark into a ziploc freezer bag and microwave in 20 second increments until fully melted, turning over between each session.
Next, use kitchen shears to snip a tiny bit off one corner to form a tip for piping.
The next part is the hard part. It’s difficult to control melted chocolate flowing out of a tiny hole, so it’s not as easy to control than with tips and couplers.
***Avoiding tips and couplers allows you to remelt any chocolate as it hardens during the decorating process.
To help the “unforgiving” look of the out of control edging, smooth it with the edge of a knife and then IMMEDIATELY cover it with sprinkles.
Now, in true transparency, it took several tries with sanding sugar sprinkles, red sugar sprinkles with “not a fan” look that made me throw up my hands.
Can I tell you that the milk chocolate almond bark was really not a great look with this method!
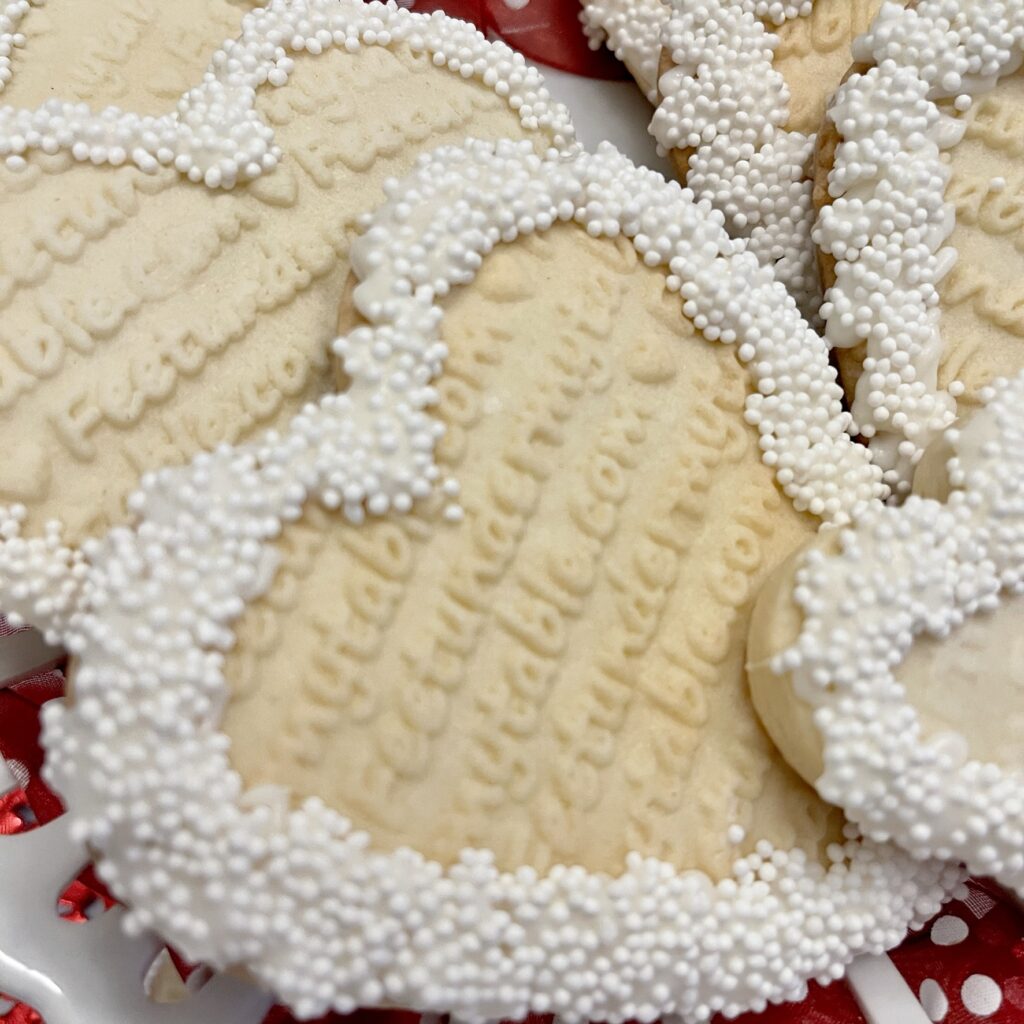
Then I struck gold! These white “bead” like ones gave them such an elegant look.
Aren’t they amazing?
I am truly happy with learning the “how to” and tips for embossing these Valentine cookies.
The teacher in me always loves a learning process and this one was rewarding even through working through the issues.
Wouldn’t these be a perfect favor for an engagement party?
Wedding favors with the bride and groom’s names embossed in them?
How about Easter cookies? Christmas cookies? or just making cookies for family gatherings?
My party planning wheels are turning.
The embossing personalization world is unending…what message would be on your embossed rolling pin and how would you decorate your embossed cookies?
I hope you’ll give these a try and surprise those you love…and if you get an embossed rolling pin…will you please share the special treats you create with me??!
It would make my heart soooo very happy! Thanks for reading and following and commenting, friends. You all are simply the best!
And…if you need more Valentine treat inspiration? I’ve got you!
Happy Valentine’s Day, friends!


43 Comments
Regina @Saved From Salvage
Leslie – great tips! I’m not sure I would recognize what was missing. I had forgotten about this rolling pin. I need to order as soon as I decide the personalization. Maybe in time for Easter!
Leslie J Watkins
I am so happy you ordered an embossed rolling pin! Can’t wait to see what you create with it…I am sure it will be amazing!
Tracey Buchanan
Those are beautiful!!
Leslie J Watkins
Thank you! I have loved learning to use it!
Libbie
I am in LOVE with this idea! Pinned for later!
Leslie J Watkins
Isn’t it the BEST? I think I need more of them in my life. THANK YOU for loving and pinning!
Cindy
Than you, thank you for sharing this information. I had a Dachsund embossed rolling pin and no matter what I did it didn’t work.
I was so upset I threw it out. Now I will order another one down the road to give this another try. Thank you again.
These are beautiful by the way. Enjoy them with th feet under your table!
Leslie J Watkins
Thank you, Cindy. My table has been dismantled and stored for the reconstruction, but these are being gifted to family to take home! I am so very happy that I could help with your issues. I think I need more of these pins in my life. So many great occasions to use them.
Janet
Excellent information Leslie! Your cookies turned out beautiful. I’ll have to order an embossed rolling pin and try it! Pinned for later.
Leslie J Watkins
Thank you, Janet. I think I need a few more of these rolling pins…so many occasions for their use!
Vickie Ramey
Bet it smells wonderful in your house! Did you share with the “crew”?
Leslie J Watkins
It did on Sunday when I made them! Yes..I am sending a sweet package to the Hensel crew. I don’t think they would make it shipped to Boise and Marietta!
Elizabeth
Leslie, I think I missed the post about your personalized rolling pin! This is so sweet. I love it and the recipe and directions as well.
Leslie J Watkins
Isn’t it the best? My first experience with an embossed rolling pin and I think I need more of them in my life! So glad you love it!
Stephanie | Gathered In The Kitchen
Holy wowza!! These are amazing! I bought a rolling pin similar to this in Germany but have yet to try it out! Now I am totally inspired and will do it htis week!!
Leslie J Watkins
Oh, I can’t wait to see yours, Stephanie! Please do share!
Marie
What a cool rolling pin! These cookies look so pretty.
Leslie J Watkins
Thank you, Marie! I now have a new obsession and may need more of these rolling pins! Unlimited possibilities!
Rosemary Palmer
I’ve looked at these rolling pins before but just never got one – now maybe I will. Beautiful cookies.
Leslie J Watkins
Thank you, Rosemary. I think these may be a new obsession!
Annemarie Schumacher
Wow! These are beautiful!
Leslie J Watkins
Thank you sooooo much!
Paula@SweetPea
Your cookies are gorgeous and are perfect to celebrate Valentine’s Day.
Leslie J Watkins
Thank you, Paula. I think they were truly enjoyed. I may have a new obsession with embossed rolling pins. So many great uses and designs!
Renae
These cookies are so lovely. I could only dream of making such pretty cookies.
Leslie J Watkins
Thank you, Renae. Embossed rolling pins may be a new obsession!
Cindy
That rolling pin is amazing Leslie! I can see it being passed down in your family for years and years! Thanks for sharing this recipe and the tip for melting chocolate in the microwave!
Leslie J Watkins
What a great idea, Cindy, to pass that rolling pin down. There are soooo many uses for embossed cookies that I may need more embossed rolling pins in my life.
Tammy
Leslie, these cookies look amazing. How beautiful with the embossing on them and how you decorated them. These are magazine worthy cookies!
Leslie J Watkins
Oh, thank you, sweet friend. I may need more embossed cookies in my life. A true art form that needs more rolling pins, right?!
DIANE
OH MY GOODNESS! These look fabulous! And your. husband ordering the custom rolling pin is just the sweetest.
I love how you decorated the edge. I am sooo stealing that idea this weekend! Thanks for sharing.
Stacey
I never would have thought about avoiding recipes that have a leavning agent in them, but that makes perfect sense as it would probably cause too much puffiness and the the embossed improint would be lost. Thanks for sharing, they’re gorgeous!
Kim
I’ve always wanted to try one of these rolling pins. Your tips are awesome. Off to pin. Thanks!
Brooke Fedigan
These turned out amazing! Have a wondeful Valentine’s Day
Karen Velinsky
I have seen these rolling pins, but thought they would be difficult…I am now going to give them a try!
Kim Hume
Leslie, these cookies are just beautiful. The embossing is such an elegant touch! Perfect for Valentine’s Day, weddings, bridal showers, and more. Thank you for sharing such a pretty idea!
Leslie J Watkins
Thank you…I know, right? When I started working with the embossing pin, my mind went to all of those things! Can’t you see them at a wedding with the bride and groom’s names? Oh, my goodness!
Lynne Zemaitis
The cookies are FABULOUS! I think I need to order an embossed rolling pin!
Leslie J Watkins
thank you! I know, right? I need sooooo many of those embossed rolling pins in my life. Truly!
Janet Lorusso
Leslie, these are fantastic! I had no idea such a custom rolling pin was available…now I need to get one!
Leslie J Watkins
I know, right? I need more of them in my life for so many uses and celebrations! Can’t wait to see what you choose and create with one! Please share with me!
Lynne Zemaitis
These are beautiful, Leslie! I am excited to feature your post at this week’s Tuesday Turn About link party. Thank you so much for sharing! Happy Valentine’s Day!
Leslie J Watkins
Thank you, Lynne! and thank you for the feature. I am so honored!